AI Crawler Management: How to Optimize Your robots.txt for AI Search

AI Crawler Management: How to Optimize Your robots.txt for AI Search

AI crawler management refers to the practice of configuring a website’s robots.txt file to control which AI search engine crawlers can access website content. AI crawlers are automated bots operated by companies like OpenAI, Anthropic, Google, and Perplexity that crawl websites to index content for use in AI-generated search responses. Proper AI crawler configuration is a foundational requirement for Generative Engine Optimization (GEO) because AI search engines cannot cite content they cannot access. According to BrightEdge, AI-referred traffic grew 527% year-over-year in 2025, yet many websites still block AI crawlers by default through restrictive robots.txt rules or by not explicitly allowing these newer user agents. Understanding which AI crawlers exist, how they operate, and how to configure robots.txt for each one is essential for AI search visibility in 2026.

What AI Crawlers Exist and Who Operates Them?

Fourteen major AI crawlers are currently active on the web, operated by the companies building AI search engines and large language models. These crawlers fall into two tiers based on their impact on AI search visibility.

Tier 1 AI Crawlers (Critical for AI Search Visibility)

Tier 1 crawlers are operated by the platforms that directly generate AI search responses seen by users. Blocking any Tier 1 crawler means content will not appear in that platform’s AI-generated answers.

Crawler Operator Purpose
GPTBot OpenAI Crawls content for ChatGPT training and search index
OAI-SearchBot OpenAI Dedicated crawler for ChatGPT Search real-time results
ChatGPT-User OpenAI Fetches pages when a ChatGPT user requests a specific URL
ClaudeBot Anthropic Crawls content for Claude’s training data and web access
PerplexityBot Perplexity AI Crawls content for Perplexity’s search index and responses

Tier 2 AI Crawlers (Important for Broader AI Visibility)

Tier 2 crawlers are operated by major technology companies that use crawled data for AI model training, AI features within their products, or secondary AI search capabilities.

Crawler Operator Purpose
Google-Extended Google Crawls content for Google AI Overviews and Gemini
GoogleOther Google General-purpose crawler for AI and research projects
Applebot-Extended Apple Crawls content for Apple Intelligence and Siri AI features
Amazonbot Amazon Crawls content for Alexa AI responses and Amazon search
Bytespider ByteDance Crawls content for TikTok search and ByteDance AI products
CCBot Common Crawl Nonprofit crawler whose dataset trains many open-source LLMs
Meta-ExternalAgent Meta Crawls content for Meta AI assistant and AI features
cohere-ai Cohere Crawls content for Cohere’s enterprise AI models
FacebookBot Meta Crawls content for Facebook and Instagram link previews and AI

What is the Difference Between Tier 1 and Tier 2 AI Crawlers?

The difference between Tier 1 and Tier 2 AI crawlers relates to their direct impact on AI search citation. Tier 1 crawlers (GPTBot, OAI-SearchBot, ChatGPT-User, ClaudeBot, and PerplexityBot) are operated by the platforms where users ask questions and receive AI-generated answers with source citations. Blocking a Tier 1 crawler directly prevents content from being cited by that platform. Tier 2 crawlers contribute to AI visibility in indirect but important ways. Google-Extended feeds Google AI Overviews, which appear at the top of Google search results and influence billions of queries. According to data from SparkToro, Google processes over 8.5 billion searches per day, and AI Overviews now appear for an estimated 30% of informational queries (Search Engine Land, 2025). Applebot-Extended feeds Apple Intelligence features used by over 1.5 billion Apple device users worldwide. Allowing both Tier 1 and Tier 2 crawlers maximizes AI search visibility across all platforms.

How Should robots.txt Be Configured for AI Crawlers?

The robots.txt file should explicitly allow each AI crawler by user agent name. While a general User-agent: * / Allow: / directive permits all crawlers including AI bots, explicitly listing each AI crawler provides clarity and ensures no ambiguity. The following robots.txt configuration allows all 14 AI crawlers.

# Welcome AI crawlers for search visibility
# Learn more: echloe.io/blog/ai-crawler-management-optimize-robots-txt-for-ai-search

User-agent: *
Allow: /

# Tier 1 AI Crawlers (Critical)
User-agent: GPTBot
Allow: /

User-agent: OAI-SearchBot
Allow: /

User-agent: ChatGPT-User
Allow: /

User-agent: ClaudeBot
Allow: /

User-agent: PerplexityBot
Allow: /

# Tier 2 AI Crawlers (Important)
User-agent: Google-Extended
Allow: /

User-agent: GoogleOther
Allow: /

User-agent: Applebot-Extended
Allow: /

User-agent: Amazonbot
Allow: /

User-agent: Bytespider
Allow: /

User-agent: CCBot
Allow: /

User-agent: Meta-ExternalAgent
Allow: /

User-agent: cohere-ai
Allow: /

User-agent: FacebookBot
Allow: /

Sitemap: https://yourdomain.com/sitemap.xml

Place this file at the root of the website so it is accessible at https://yourdomain.com/robots.txt. The Sitemap directive at the bottom helps both traditional and AI crawlers discover all indexable content.

Should Any AI Crawlers Be Blocked?

The decision to block specific AI crawlers depends on the organization’s goals and content policies. Websites that want maximum AI search visibility should allow all 14 crawlers. Websites with concerns about AI model training (as opposed to AI search) may choose to allow search-specific crawlers (OAI-SearchBot, ChatGPT-User, PerplexityBot) while blocking training-focused crawlers (GPTBot, CCBot). However, blocking GPTBot may also affect ChatGPT Search visibility, because OpenAI uses GPTBot for both training and search indexing. Organizations should evaluate the tradeoff between content protection and AI search visibility. According to Originality.ai’s analysis in 2025, over 35% of the top 1,000 websites block at least one AI crawler, with GPTBot and CCBot being the most commonly blocked.

What Other Technical Steps Complement robots.txt for AI Search?

Robots.txt configuration is one component of a broader technical GEO strategy. Three additional technical steps complement robots.txt for maximum AI search visibility. First, creating an llms.txt file that provides AI systems with a structured summary of the website’s content and purpose. Second, implementing JSON-LD structured data (Organization, Article, and FAQPage schemas) that helps AI crawlers understand entity relationships and content authority. Third, generating and submitting an XML sitemap to both Google Search Console and Bing Webmaster Tools, since Bing powers parts of ChatGPT Search. Echloe’s free GEO audit at echloe.io analyzes robots.txt configuration, checks for AI crawler access, evaluates llms.txt and structured data implementation, and provides a comprehensive AI search readiness score across six categories.

How Can Businesses Verify Their AI Crawler Configuration?

Businesses can verify AI crawler configuration by checking three things. First, confirm the robots.txt file is accessible by visiting https://yourdomain.com/robots.txt in a browser. Second, verify that no AI crawler user agents are listed under Disallow directives. Third, check server access logs for AI crawler activity, which confirms the bots are successfully accessing the site. AI crawler user agents appear in server logs just like Googlebot and other traditional crawlers. Regular monitoring of robots.txt is important because CMS updates, security plugins, and CDN configurations can sometimes override or modify robots.txt rules without the site owner’s knowledge.

What If Every Phone in the Room Was a Game Controller — in the Age of AI?

Claude Code building an Air Jam game live

Every phone in your pocket has a gyroscope, a touchscreen, speakers, a vibration motor, and a browser. That’s a game controller. A pretty good one, actually, and every person in the room already has one.

That thought is the entire premise behind Air Jam: an open-source framework for building multiplayer games where a computer or TV runs the game, and players join instantly from their phones by scanning a QR code. No app downloads. No Bluetooth pairing. No account creation. You scan, you play.

I built it because I wanted to see what happens when you remove every barrier between “I have a game idea” and “we’re all playing it together in the same room.” Especially now, when AI can write most of the code for you.

Claude Code building an Air Jam game live

Why Build This?

The concept isn’t new. AirConsole proved years ago that phones-as-controllers work beautifully for party games. But AirConsole is a closed commercial platform, you build games for their ecosystem, on their terms.

I wanted the open-source version. Something anyone could use, extend, and deploy anywhere. But more than that, I wanted it designed for a specific moment in time: the one we’re living in right now, where developers are increasingly working alongside LLMs to write code.

Here’s the thing about making a multiplayer game that uses phones as controllers. There are really two problems:

  1. The infrastructure. WebSocket connections, room management, input synchronization, state replication across devices, handling disconnections and reconnections, latching inputs so button presses aren’t lost between network ticks and game frames. This is genuinely hard to get right, and it’s the same problem no matter what game you’re building.

  2. The actual game. The creative part. The rules, the visuals, the controller layout, the thing that makes people laugh or yell or lean forward in their chairs.

Problem #1 is exactly the kind of thing you don’t want an LLM figuring out from scratch every time. It’s systems-level code with subtle edge cases. Problem #2 is exactly the kind of thing LLMs are great at helping with: creative, iterative, visual, fun.

So Air Jam solves #1 completely. The networking, the rooms, the input pipeline, the state sync, all of it is handled. You bring the game. And if you’re working with an AI assistant, it can focus entirely on the part that matters: making something people want to play.

(If you want the longer story of how Air Jam got here, with the AirConsole couch days, the painful Unity SDK detour, and the 1,500-file rewrite that made it AI-native, the origin story lives at airjam.io/blog/story-of-building-airjam.)

How It Works

How Air Jam works: a host screen with a QR code, players' phones as controllers, inputs flow to the host, shared state broadcasts back

The setup is simple. A game is a React app with two views: one for the host screen (the computer/TV running the game) and one for the controller (the phone). You define what data the controller sends to the host with a Zod schema, configure your runtime, and you’re done with the networking.

Here’s the input schema from Pong, the starter template that ships with the framework:

import { z } from "zod";

export const gameInputSchema = z.object({
  direction: z.number().min(-1).max(1),
});

That’s it. A paddle direction. The schema is the contract between the phone and the game.

The app config wraps the SDK setup into a single airjam object that exposes the host and controller boundary components:

import { createAirJamApp, env } from "@air-jam/sdk";
import { gameInputSchema } from "./game/contracts/input";

export const airjam = createAirJamApp({
  runtime: env.vite(import.meta.env),
  controllerPath: "/controller",
  input: {
    schema: gameInputSchema,
  },
});

Then in your routes:

import { airjam } from "./airjam.config";

<Routes>
  <Route
    path="/"
    element={
      <airjam.Host>
        <HostView />
      </airjam.Host>
    }
  />
  <Route
    path={airjam.paths.controller}
    element={
      <airjam.Controller>
        <ControllerView />
      </airjam.Controller>
    }
  />
</Routes>

On the host side, you call useAirJamHost() and you get the connected players, runtime state, and everything else the host owns. You read validated controller input through useGetInput(). On the controller side, useInputWriter() plus useControllerTick() is the entire input publishing API. That’s the whole networking surface for basic games.

When you need shared state, scores, team assignments, game phases, there’s createAirJamStore. It works like Zustand (because it is Zustand under the hood), but the store automatically syncs between all devices. The host is always the source of truth. When a controller calls an action, it’s transparently sent as an RPC to the host, executed there, and the result broadcasts back to everyone.

import { createAirJamStore } from "@air-jam/sdk";

export const usePongStore = createAirJamStore<PongState>((set) => ({
  scores: { team1: 0, team2: 0 },
  teamAssignments: {},

  actions: {
    joinTeam: ({ actorId, connectedPlayerIds }, { team }) => {
      set((state) => reduceJoinTeam(state, { actorId, connectedPlayerIds, team }));
    },
    scorePoint: (_ctx, { team }) =>
      set((state) => ({
        scores: { ...state.scores, [team]: state.scores[team] + 1 },
      })),
  },
}));

Both the host and the controller import this same hook. The host mutates state directly. The controller’s calls get proxied over the network. Action handlers receive a host-side context object (actor identity, connected players) so authorization decisions stay in one place. You don’t write any networking code, it just works.

This is the thing that makes vibe-coding these games practical. An LLM doesn’t need to understand WebSocket protocols or message serialization. It just writes a Zustand-shaped store and a Zod schema. The framework handles the rest.

Build a Game in 4 Steps

This is what the workflow actually looks like end-to-end:

1. Scaffold. One command:

npx create-airjam my-game

Pick a template (Pong is the simplest, Air Capture the most ambitious), pnpm install, and you have a working game.

2. Describe. Open the project in Claude Code, Cursor, or whichever assistant you use. Air Jam ships agent-friendly docs in docs/for-agents/ so the LLM doesn’t have to reverse-engineer the SDK. Tell it what game you want.

3. Iterate. Run pnpm run dev. It boots the host and the signal server locally. Scan the QR code from your phone. Now the AI iterates on code while you test on a real device, with real input, in real time. That’s the loop that makes the difference, and it’s the one most game prototyping setups don’t give you.

4. Share. Deploy as a static site to Vercel, Netlify, or anywhere. Sign up at airjam.io, register the game in your dashboard for an API key, point your build at it, and anyone with the room code can play from their phone.

The framework owns the unfun part. The AI owns the boilerplate. You own the design.

The Decisions That Make It Work

A few design choices that turned out to matter a lot:

Input Behavior Modes

This one is subtle but important. Game loops typically run at 60 frames per second. Network events from phones arrive whenever they arrive, asynchronously, on their own schedule. A quick button tap might arrive, get written to the input buffer, and then get cleared by the next network tick before the game loop ever reads it. From the player’s perspective: “I pressed the button and nothing happened.”

Air Jam’s input system solves this with declarative behavior modes per field:

  • pulse is the default for booleans. When a tap arrives, it stays “true” until the host’s game loop reads it via getInput(). That read consumes the pulse and resets it. No tap is ever lost, no matter how the timing lines up between the network and the game loop.
  • latest is for held continuous values like a defend button or a held trigger. The latest value the controller published wins.
  • hold keeps a non-zero value alive for a tick or two after the controller publishes a zero, which catches quick flick gestures on joysticks that would otherwise be missed.

You configure it on the schema:

input: {
  schema: gameInputSchema,
  behavior: {
    latest: ["defend"],
  },
},

It’s a small thing, but it’s the difference between a game that feels responsive and one that feels broken.

Transparent State Sync

createAirJamStore is worth emphasizing because of what it actually does under the hood. On the host, the store behaves like a normal Zustand store. On controllers, every action call is intercepted and turned into an RPC message sent to the host via the WebSocket server. The host executes the action (it’s the single source of truth, with the actor’s identity injected from the server), and the resulting state change is broadcast to all controllers.

You get a host-authoritative multiplayer architecture, the kind that prevents cheating and keeps state consistent, without writing any networking code. The API is identical to regular Zustand. If you know how to write a React state hook, you know how to build multiplayer game state with Air Jam.

Composable Shell Primitives

Air Jam ships a set of small UI primitives, not a monolithic shell. There are pieces for what every game needs: showing a QR code and room code, listing connected players, managing connection status, locking screen orientation, fullscreen toggles, lifecycle action clusters (start/pause/reset), and a SurfaceViewport that handles orientation and safe-area layout.

Pieces like RoomQrCode, JoinUrlField, ConnectionStatusPill, LifecycleActionGroup, and SurfaceViewport compose into whatever shell your game wants. You can stand a playable surface up in minutes without thinking about layout, or rebuild the whole thing your own way and keep the framework’s runtime guarantees.

What People Built With It

To test whether any of this actually works in practice, we ran a game jam at zerodays, the software dev agency where I work. Nine developers, three teams, seven hours. Everyone used AI assistants (Claude, Codex, Kimi, Cursor) in whatever dev environment they preferred. The only rule: build a game with Air Jam.

What came out was three completely different games. A fighting game, a music quiz, and a cooperative office sim. All built with the same SDK, all using phones as controllers, all playable by the end of the day.

“Code Review”, A Boxing Game

Built by Miha, Žiga, and Tim.

Code Review gameplay

The name is a developer in-joke. It’s a top-down pixel-art boxing game where the two teams are the Coders and the Reviewers. You tilt your phone to move your fighter around the ring (gyroscope input), and your phone’s screen shows punch and defend buttons.

The combat has a satisfying risk/reward layer: blocking halves incoming damage, but if you get hit while blocking, your next punch does double damage with a golden glow effect. During playtesting, people discovered that if two players cornered a third, they could bounce them back and forth with punches, a completely unintended mechanic that immediately became everyone’s favorite strategy.

What’s interesting from a framework perspective: this game uses the phone’s gyroscope for movement and touch buttons for actions, all flowing through the same input schema. The latest behavior on the defend button keeps it feeling like a real held trigger, while the default pulse behavior on punches ensures rapid taps never get dropped.

“Last Band Standing”, A Music Quiz

Built by Me, Vane, and Domen.

Last Band Standing gameplay

A Kahoot-style music trivia game. A YouTube video plays on the host screen, but the video is blurred, you can hear the song but can’t see the music video. Players race to identify either the song or the artist from four options on their phones. Faster correct answers score more points.

The song bank is over 80 tracks deep, ranging from Bohemian Rhapsody to Rick Roll to Slovenian turbo-folk, which got some of the biggest laughs when they came up. There’s a streak system where the top-scoring player gets a fire animation on their avatar.

This game shows the framework working for something completely different from real-time action. The controller is just four answer buttons. The game is round-based, not continuous. The same SDK that handles gyroscope-driven boxing handles a quiz show.

“The Office”, A Cooperative Office Sim

Built by Matej, Špela, and Niki.

The Office gameplay

This one was a favorite. It’s basically Overcooked, but set in a tech office, specifically, our tech office. You move characters around an office layout completing tasks to earn money, managing your energy and happiness stats to stay alive.

The characters are real members of the zerodays team, with their actual photos as avatars and custom skill profiles. The PM is rated 5/5 at meetings and 1/5 at coding. The developers are the opposite. Tasks include “Vibe Coding” (400 EUR), “Fix the internet” (250 EUR), and “Clean the coffee machine” (0 EUR, because of course that pays nothing). The entire game is in Slovenian, right down to the death notifications.

And yes, you can literally die of boredom if you don’t play enough FIFA on the in-game PlayStation. The happiness meter drains randomly and the only cure is a break.

The game was built by two developers, with our non-developer colleague writing all the character profiles and skill ratings. The framework handled the networking and input, they just focused on making something funny and personal.

The Point

Three genres. A fighting game with gyroscope movement, a quiz show with simple buttons, and a cooperative sim with a D-pad. All built in one day with the same framework by teams that had never used it before. The controllers look completely different, the game logic is completely different, but the underlying infrastructure is the same.

That’s what I was building toward. Not a framework that makes one kind of game. A framework that handles the parts that are always the same (the networking, the rooms, the input pipeline, the state sync) and gets out of the way for the parts that should be different every time.

All three jam games now ship as official starter templates in the framework, alongside Pong, Air Capture, and a minimal starter, for six templates in total. Anyone running npx create-airjam today scaffolds from one of them.

What I Took Away From All of This

The thing that surprised me most wasn’t the technical stuff. The framework worked about as well as I’d hoped, the input behavior modes were invisible (which is the point), the state sync held up, and the composable primitives gave people a running start.

What surprised me was how personal the games became. When the framework handles all the infrastructure, the creative energy goes entirely into game design. That’s how you end up with your coworkers’ faces as game characters and “death by boredom” as a mechanic. People weren’t thinking about WebSockets. They were thinking about what would be funny, what would make a good moment when everyone plays together.

That’s the part worth emphasizing, because it matters beyond this specific project. There’s a lot of conversation right now about AI-assisted development, what it enables, what it threatens, where it’s going. Most of that conversation is abstract. This was concrete: people in a room, building things that only exist to be played together, in person, with friends. The AI helped write the code. The humans decided what the code should do. And then they played it together and laughed.

That’s a pretty good use of the technology.

A special thanks to my team at zerodays for spending a Thursday building games on an early version of the framework — and to Niki, Matej, and Špela, whose idea it was to put the team’s faces into The Office 😛

Air Jam is a better project because of you.

Try It

Air Jam is fully open-source and free to use.

Start a new game in one command:

npx create-airjam my-game

This scaffolds a working game with a local development server, the SDK, and documentation, including instructions optimized for AI coding assistants. Run pnpm run dev, scan the QR code with your phone, and you’re playing in under a minute.

Play the game jam games right now. All three jam games (Code Review, Last Band Standing, and The Office) are available alongside Pong, Air Capture, and the minimal starter in the Air Jam Arcade. One room, one QR code, all the games.

Deploy your own. Sign up at airjam.io, register your game in the dashboard, and you get an API key automatically. You can host the game wherever you like (Vercel, Netlify, anywhere that serves a static site) and point it at the platform.

A few more things worth knowing:

  • Hosted release pipeline. airjam release validate | bundle | submit | publish takes a game from source to live on the platform, with artifact validation, screenshot capture, and image moderation in between.
  • Analytics out of the box. Every published game gets an event-sourced runtime ledger and dashboard panels. No SDK to install.
  • Agent-reachable end-to-end. The same pipeline is exposed as MCP tools, so an AI assistant can scaffold a game, build it, validate it, and publish it without a human in the upload path.

Links:

If you build something with it, I’d genuinely love to see it. And a star on GitHub helps more than you’d think.

How to Actually Use Claude. 18 steps that unlock 100% of its potential

Claude has been out for two years. Most people who use it every day are still using 10% of what it can do.

Not because it’s complicated. Because nobody showed them what the other 90% looks like.

This guide fixes that. By the end you will have Claude set up in a way that remembers you, understands you, and works the way you actually think. And you will know how to use it for things most people have never tried.

Start Here

1 – Create a Project, not a chat

Every time you open a new Claude chat, it starts with zero memory. It doesn’t know your name, your work, your goals, or how you like to communicate. You spend the first few messages re-explaining yourself, or you don’t, and Claude gives you something generic that doesn’t fit how you actually work.

Projects fix this. A Project is a persistent workspace where Claude keeps context across every conversation inside it. You set it up once and every session that follows starts with Claude already knowing who you are.

Go to Claude, click Projects in the sidebar, and create a new one.

Name it something like “Work” or “Personal” depending on how you plan to use it. Everything that follows goes inside this Project.

2 – Tell Claude who you are

Before Claude can help you well, it needs to understand you. Most people skip this step entirely and wonder why Claude gives them answers that feel slightly off.

Paste this into your Project and fill in every field honestly. The more specific you are, the better every single response becomes.

My name is [your name].

I work as [your role or profession]. My main responsibilities are [2-3 things you actually do day to day].

Right now my biggest goals are [1-3 specific goals you're working toward].

I use Claude mostly for [list your main use cases — writing, research, analysis, learning, coding, etc].

My background and knowledge level: [what you know well, what you're learning, what you're new to].

How I like to receive information: [e.g. direct and concise / detailed with examples / step by step / no bullet points / short paragraphs].

Things I don't want: [e.g. don't add disclaimers, don't use corporate language, don't repeat what I just said back to me, don't start with "Great question"].

Topics and areas I care about: [your interests, industry, niche].

Save this inside your Project’s knowledge base. Claude will read it at the start of every conversation in this Project.

3 – Turn that into Custom Instructions

Pasting your background is a good start. But Custom Instructions go further. They tell Claude not just who you are, but exactly how to behave with you by default.

Paste this prompt into Claude after you’ve filled in the template above:

Based on everything I've told you about myself, write me a set of custom instructions for this Claude Project.

The instructions should:
- Describe who I am and what I do
- Set my default communication style and format
- Tell Claude what to never do when working with me
- Define the tone I want in every response
- Include any default behaviors I would want in every session

Write them in second person, as if Claude is reading rules about how to help me. Be specific. No generic advice. Under 400 words.

Take the output and paste it into your Project Instructions. This becomes Claude’s permanent operating mode for every conversation in this Project.

Claude Is Not What You Think

4 – Claude is not a search engine

Most people use Claude the way they use Google. They type a question and wait for an answer. That is the lowest-value way to use it.

Claude is not a retrieval tool. It is a thinking partner. It doesn’t just pull information, it reasons, synthesizes, argues, and builds on context. The moment you treat it like a search engine, you cut its usefulness by 80 percent.

Stop asking Claude what something is. Start asking Claude to help you think through something.

Instead of: “What is prompt caching?”

Try: “I’m building a workflow that calls Claude 20 times per session. Walk me through how prompt caching works and whether it would actually reduce my costs given that context.”

The second prompt gives Claude a problem to solve with you. The first gives it a definition to recite.

5 – Ask Claude to ask you questions first

This is one of the most powerful techniques almost nobody uses. Before Claude starts any complex task, tell it to gather information from you first.

When Claude asks you questions before starting, the output is dramatically better because it’s built on the right foundation.

Without this, Claude makes assumptions and you spend time correcting things that could have been right the first time.

Use this before any important task:

Before you start, ask me the 5 most important questions that would help you do this well.
After I answer, then begin

Or for a specific task:

I need you to help me write a cold email to a potential client.

Before you write anything, ask me what you need to know to make this genuinely good, not generic.

What Even Regular Users Don’t Know

6 – Style cloning

When Claude writes in your voice without examples, it writes in its own voice. The output is grammatically correct and completely wrong in tone. It sounds like AI because it is.

Give Claude three to five samples of your own writing. Ask it to analyze your patterns, not just describe your style. After that analysis, it writes like you, not like a polished corporate assistant.

Here are 3 examples of my writing:

[paste sample 1]
[paste sample 2]
[paste sample 3]

Analyze my writing style in detail. Look at: sentence length, rhythm, vocabulary choices, how I open and close paragraphs, what I avoid, how formal or informal I am, and any patterns that make my writing distinct.

After this, when I ask you to write anything for me, match this style exactly. Do not default to your own patterns.

7 – Claude as your sparring partner

Most people ask Claude to help them with ideas. That means Claude builds on what you say, adds to it, expands it. You get agreement and elaboration.

That is useful sometimes. But it is not how you stress-test an idea.
Before committing to any plan, decision, or piece of writing, ask Claude to attack it. Not critique it. Attack it. The distinction matters.

Here is my plan: [describe your plan]

Your job is to destroy it. Find every assumption I'm making that could be wrong. Find every way this could fail. Argue the opposite position as hard as you can. Do not be polite. Do not add qualifications. Just attack.

After that, steelman my position. Build the strongest possible case for why I'm right.

Then tell me what you actually think.

8 – Extended Thinking

Most Claude users have never turned this on. Extended Thinking is a mode where Claude reasons through a problem step by step before giving you an answer, instead of going straight to the output.

For simple tasks, you don’t need it. For complex decisions, analysis, or any question where you want Claude to actually think rather than pattern-match, turn it on.

In Claude, click the brain icon before sending your message. Or add this to your prompt:

Think through this carefully before responding. 

Work through the problem step by step, show your reasoning, identify where you're uncertain, then give me your conclusion.

The difference in output quality on hard questions is significant.

9 – Claude writes prompts for Claude

This is the most underused thing you can do. If you’re not sure how to prompt Claude for a specific task, ask Claude to write the prompt for you.

Claude knows what kinds of instructions produce better results. Let it use that knowledge on your behalf.

I need Claude to help me [describe your actual task]. 

Write me the best possible prompt for this task. 

Include role, context, format instructions, and any constraints that would improve the output. 

Then use that prompt immediately.

How to Spend Fewer Tokens and Get More

10 – Specify the output length

Claude’s default is to write as much as it thinks is appropriate.

That is usually more than you need, which means more tokens used, more time spent reading, and more noise in the output.

Tell Claude exactly how long you want the answer before it starts.

Answer in 3 sentences maximum.

Give me 5 bullet points. No explanations. Just the points.

Write this in under 150 words.

This one instruction cuts token usage on most tasks by 40 to 60 percent without losing any of the value you actually need.

11 – Remove the preamble

Every Claude response defaults to starting with something you didn’t ask for. “Great question. Let me break this down for you.” Or a full restatement of what you just said. Or a disclaimer. Or a closing summary that repeats everything it just told you.

You didn’t ask for any of that. It costs tokens and it wastes your time.

Add this to your Custom Instructions:

Never start responses with preamble, affirmations, or restatements of my question. 

Go directly to the answer. 

Do not add a summary at the end unless I specifically ask for one. 

No disclaimers unless the topic genuinely requires one.

12 – Don’t re-explain yourself every conversation

If you’re pasting the same background information into every new chat, you are wasting tokens every single time and training yourself into a habit that costs you more as Claude usage scales.

This is exactly what Projects and Custom Instructions are for. Put your context in once. Let Claude read it automatically at the start of every session. Never paste your background again.

If you are not using Projects yet, start there before anything else in this article.

13 – Start a new chat for a new topic

Claude carries the context of everything said earlier in a conversation. When you switch topics inside a long chat, Claude still has all the previous context loaded. That means more tokens used on every response, slower processing, and context bleed from earlier in the conversation affecting your new topic.

When you switch to something unrelated, start a fresh chat inside your Project. You keep the Project memory. You lose the irrelevant baggage.

Ready to Use Right Now

These are complete prompts you can copy and use immediately.

14 – Understand anything through analogies (Feynman method)

Most explanations Claude gives by default are technically correct and practically useless. They use the same vocabulary as the thing you’re trying to understand, which means you walk away with a definition but not actual comprehension.

The Feynman method forces understanding through simplicity. If Claude can’t explain it in plain terms using analogies, it means the explanation isn’t clear enough yet. This prompt works for anything from investing to quantum physics to how a specific API works.

Explain [topic] to me using only analogies and everyday examples. No jargon. Assume I have no background in this field.

After each analogy, check whether I've actually understood it by asking me one question. Based on my answer, go deeper or adjust the explanation.

Keep going until I can explain it back to you in my own words without using any technical terms.

15 – Travel plan built around how you actually travel

Most travel planning starts with destinations and ends with a generic itinerary you could find on any travel blog. Claude can do something different: build a plan around your specific travel style, pace, budget, and what actually matters to you, not what’s on every must-see list.

The key is giving it real information about you, not just dates and locations.

I'm planning a trip to [destination]. I'll be there for [number of days]. My budget is approximately [amount] per day including accommodation.

Here's how I actually travel: [describe your style — do you like slow mornings or packed days, touristy places or local spots, museums or food, active or relaxed, solo or with someone, etc].

Things I want to avoid: [crowds, tourist traps, expensive restaurants, long transport times, etc].

Build me a day-by-day itinerary that fits this. For each day, include where to stay, what to do, where to eat, and any logistics I need to know. Flag anything that requires booking in advance.

16 – Monthly expense analysis with real conclusions

Most people look at their bank statement and feel vaguely bad about their spending without understanding what’s actually happening.

Claude can turn raw numbers into a clear picture of where your money is going and what you should actually do about it.

This works best when you paste real data, not estimates.

I'm going to paste my expenses from the last month. Analyze them and tell me:

1. What categories am I spending the most on
2. Where my spending looks unusual compared to what I described as my goals
3. What I could cut without meaningfully affecting my life
4. What I'm probably underspending on that matters
5. One specific change that would have the biggest financial impact

Here are my expenses: [paste your bank statement or expense list]

My financial goals right now: [describe what you're trying to do — save more, pay off debt, invest, etc]

17 – Claude as your personal thinking partner

Most people don’t have someone in their life who will listen without judgment, ask the right questions, and help them work through something they’re stuck on without pushing their own agenda. Claude can fill that role, but only if you give it the right instructions.
This isn’t therapy. It’s structured self-reflection with an outside perspective that helps you think more clearly.

I want to talk through something I'm dealing with. Your job is not to give me advice right away.

First, ask me questions to understand the situation fully. What's actually happening, how I feel about it, what I've already tried, and what outcome I'm hoping for.

After you understand the full picture, reflect back what you're hearing — not just the facts but what seems to be underneath them.

Then, and only then, offer your perspective. Be honest, not reassuring. Tell me what you actually think, including anything I might not want to hear.

Here's what's on my mind: [describe what you want to think through]

18 – Stress-test any business idea before you commit

Most business ideas die because people fall in love with them before testing them. They spend months building something nobody wants because they never honestly asked whether the idea was actually good.
Claude can act as a ruthless first filter. Not to kill ideas, but to find the real problems before they cost you time and money.

I have a business idea I want to stress-test before I invest serious time in it.

Here's the idea: [describe it in detail — what it is, who it's for, how it makes money, why you think it works]

Your job is to find everything wrong with it. Specifically:

1. What assumptions am I making that could be wrong
2. Who already does this and why I might lose to them
3. Why the target customer might not actually pay for this
4. What would have to be true for this to work, and how likely is that
5. The single biggest problem with this idea

Be specific. Generic risks like "the market might not be ready" are not useful. Give me the real version of each problem.

After that, tell me what the idea would need to look like to actually work.

The Actual Point

Claude is not smarter than you. It does not have better ideas than you. What it has is infinite patience, broad knowledge, and the ability to think through problems from angles you haven’t considered.

The people who get the most from Claude are not the ones with the best questions. They are the ones who have set it up to understand them, who give it real context, and who know how to use it as a partner rather than a dispenser.

Most people will read this and keep opening Claude the same way they always have.

Set it up once. Change how you work permanently

For more breakdowns Follow me on LinkedIn, GitHub

Weekly Challenge: Vowels and numbers

Weekly Challenge 374

Each week Mohammad S. Anwar sends out The Weekly Challenge, a chance for all of us to come up with solutions to two weekly tasks. My solutions are written in Python first, and then converted to Perl. Unless otherwise stated, Copilot (and other AI tools) have NOT been used to generate the solution. It’s a great way for us all to practice some coding.

Challenge, My solutions

Task 1: Count Vowel

Task

You are given a string.

Write a script to return all possible vowel substrings in the given string. A vowel substring is a substring that only consists of vowels and has all five vowels present in it.

My solution

It seems many Team PWC users sent Mohammad “so many emails” when the examples did not match the expected output. As I follow TDD when completing the challenges, I also picked this up.

For this task, I have two loops to generate all possible substrings. The variable start goes from 0 to 5 less than the length of the string. This is because a valid answer needs to have at least five letters. The variable end goes from start + 5 to the length of the string.

I then check if the substr contains each vowel and does not contain any non-vowels. If it does, I add it to the solution list.

def count_vowel(input_string: str) -> list[str]:
    l = len(input_string)
    vowels = ["a", "e", "i", "o", "u"]
    solution = []

    for start in range(l - 4):
        for end in range(start+5, l+1):
            substr = input_string[start:end]
            if (
                all(v in substr for v in vowels) and
                not any(c not in vowels for c in substr)
            ):
                solution.append(substr)

    return solution

The Perl logic uses a variable length instead of end to reflect how the substr function works.

use List::Util 'any';

sub main ($input_string) {
    my $l        = length($input_string);
    my @vowels   = (qw/a e i o u/);
    my @solution = ();

    foreach my $start ( 0 .. $l - 4 ) {
        foreach my $length ( 5 .. $l - $start ) {
            my $substr = substr( $input_string, $start, $length );

            if ( $substr !~ /^[aeiou]+$/ ) {
                next;
            }

            if ( any { index( $substr, $_ ) == -1 } @vowels ) {
                next;
            }

            push @solution, $substr;
        }
    }

    say "(" . join( ", ", map { qq{"$_"} } @solution ) . ")";
}

Examples

The order in the output differs from the examples.

$ ./ch-1.py aeiou
("aeiou")

$ ./ch-1.py aaeeeiioouu
("aaeeeiioou", "aaeeeiioouu", "aeeeiioou", "aeeeiioouu")

$ ./ch-1.py aeiouuaxaeiou
("aeiou", "aeiouu", "aeiouua", "eiouua", "aeiou")

$ ./ch-1.py uaeiou
("uaeio", "uaeiou", "aeiou")

$ ./ch-1.py aeioaeioa
()

Task 2: Largest Same-digits Number

Task

You are given a string containing 0-9 digits only.

Write a script to return the largest number with all digits the same in the given string.

My solution

I always look at the examples to fill in answers that aren’t mentioned in the task description. One thing I wasn’t sure if the numbers had to be consecutive or not. In this instance, the examples don’t help answer that question. I made the decision that they didn’t need to be.

My first thought was to sort by the frequency of the numbers and the number if it had the same frequency. But this would work with numbers like 100 (where 0 appears most often).

The solution I came up with was to count the frequency of each number using the Counter function. I then loop through the dict (hash in Perl) to find the highest number.

from collections import Counter
import re

def largest_number(input_string) -> int:
    if not re.search(r'^d+$', input_string):
        raise ValueError("String should only contain numbers")

    largest_number = 0
    freq = Counter(input_string)

    for digit, count in freq.items():
        number = int(digit * count)
        if number > largest_number:
            largest_number = number

    return largest_number

The Perl solution follows the same logic.

Examples

$ ./ch-2.py 6777133339
3333

$ ./ch-2.py 1200034
4

$ ./ch-2.py 44221155
55

$ ./ch-2.py 88888
88888

$ ./ch-2.py 11122233
222

AI Product Development Is Easier. Hiring Great Engineers Is Not

AI has made the first version of almost everything easier to ship.

A founder can test a landing page faster. A product manager can mock a workflow before engineering scopes it. A small team can ship a feature in weeks that would have taken a quarter a few years ago.

That is useful. But it also creates a new problem.

The visible output is losing signal.

A clean prototype no longer tells you what it used to tell you. A polished portfolio no longer proves what it used to prove. A working demo can hide weak judgment for longer than most hiring processes are built to detect.

This matters most when you are hiring senior engineers.

Because senior engineering value is not only about how much code someone can produce. It is about what gets simpler because they joined. What gets questioned before it becomes expensive. What gets killed before the team wastes a quarter building it.

The mistake is measuring only output

Most hiring loops still ask the same questions.

What did you build?

What did you ship?

What systems did you scale?

Those questions matter, but they are incomplete. In an AI-assisted world, output is easier to manufacture, polish, and present. The harder signal is judgment under ambiguity.

Can this person reason through a messy production incident?

Can they push back on a roadmap item without turning the room defensive?

Can they explain why a boring technical decision is better than a clever one?

Can they tell you what they chose not to build?

That last question is underrated.

A senior engineer who prevents one wrong quarter of work may create more value than a faster engineer who ships everything requested.

The best engineers change what the room notices

The highest-impact engineers I have seen are not always the loudest or fastest in the first meeting.

They ask slightly better questions. They notice unclear assumptions. They slow the room down for five minutes and save the team five weeks later.

That does not always look impressive in a standard interview.

A take-home test rewards production. A portfolio rewards presentation. A keyword screen rewards matching. But judgment often shows up in negative space, in the damage that never happened because someone saw the trap early.

This is why AI makes hiring harder, not easier.

It raises the floor of visible output. It does not raise the ceiling of decision quality.

What to screen for instead

If you are hiring senior engineers, keep proof of work in the process. Just do not stop there.

Ask candidates about a technical decision they reversed.

Ask what they stopped a team from building.

Ask which shortcut looked fast but created future pain.

Ask them to walk through a messy incident where the answer was not obvious.

Ask how they would evaluate a customer request that sounds urgent but may not matter.

The goal is not to make the interview harder. The goal is to make the signal more realistic.

Real engineering work is rarely a clean puzzle. It is tradeoffs, pressure, incomplete information, unclear product context, and systems that already have history.

Your hiring process should test that world.

The actual moat

AI can make average teams look more capable at the surface.

It can help people write cleaner code, generate better-looking demos, and move faster through early versions.

But it cannot make a team choose the right problem. It cannot make a bad roadmap good. It cannot turn weak engineering judgment into strong judgment just because the output looks better.

That is why talent density matters more now, not less.

The durable moat is not the first version of the product. The durable moat is the people and operating system inside the company: how decisions get made, how tradeoffs are handled, how quickly bad ideas are killed, and how clearly the team can identify real signal before everyone else does.

I wrote the deeper version of this for Indian startup hiring, with the talent moat framework, India hiring data, and practical senior-engineer evaluation questions here:

https://www.saralhire.ai/blog/product-is-easier-to-copy-talent-is-not

I analyzed stripe.com and github.com — their DNS reveals their email provider, hiring tools, and security posture

I can tell you Stripe uses Greenhouse for hiring before they have posted a job listing. I can tell you GitHub runs Zendesk for support and Marketo for marketing automation. All from a single DNS query.

Every domain broadcasts its infrastructure to the world through DNS records, SSL certificates, and HTTP headers. Most people never look. I built DomainIntel — a free API that reads all of it in one call. No API key, no signup.

Try it on your own company right now:

curl "https://domainintel.vercel.app/api/lookup?domain=yourcompany.com"

Here is what it found on two companies everyone knows.

Stripe.com: lean stack, strict security

Mail provider: Google Workspace

SPF record reveals their outbound email stack:

  • spf1.stripe.com — transactional email (their own infrastructure)
  • greenhouse-outbound-mail.stripe.com — Greenhouse (applicant tracking for hiring)
  • _spf.qualtrics.com — Qualtrics (surveys and feedback collection)

Three services. That is a deliberately lean setup for a company processing billions in payments.

DMARC policy: p=reject — the strictest setting possible. Any email claiming to be from stripe.com that fails authentication gets rejected outright, never delivered. This is what you want to see from a company handling your payment data.

GitHub.com: massive footprint, softer security

Mail provider: Microsoft 365

SPF record tells a very different story:

  • spf.protection.outlook.com — Microsoft 365 (primary email)
  • _netblocks.google.com — Google (likely legacy or marketing)
  • mail.zendesk.com — Zendesk (customer support)
  • _spf.salesforce.com — Salesforce (CRM)
  • servers.mcsv.net — Mailchimp (newsletters)
  • mktomail.com — Marketo (marketing automation)
  • sendgrid.net — SendGrid (transactional email)

Seven authorized email senders. Each one is a potential phishing vector — an attacker who compromises any of these services can send email that passes GitHub’s SPF checks. This is the tradeoff of a large enterprise stack: more capability, more surface area.

DMARC policy: p=quarantine — suspicious emails get flagged but not rejected. Less strict than Stripe. For a company that is the target of constant phishing campaigns (fake GitHub security alerts are one of the most common phishing templates), this is a notable choice.

WHOIS: MarkMonitor registrar (the enterprise-grade registrar used by most Fortune 500 companies). Domain age: 18+ years, created October 2007.

SSL: Sectigo certificate with 75 days until expiry.

The comparison matters

Stripe authorizes 3 email senders with a reject policy. GitHub authorizes 7 with a quarantine policy. This is not random — it reflects fundamentally different security philosophies. Stripe optimizes for minimum attack surface. GitHub optimizes for operational flexibility at the cost of a wider trust perimeter.

If you were evaluating either company as a vendor, this single API call tells you more about their security posture than their marketing page does.

A practical walkthrough: vendor evaluation

Say you are evaluating a B2B SaaS company as a potential vendor. You run their domain:

curl "https://domainintel.vercel.app/api/lookup?domain=example-vendor.com"

What to look for:

  • Google Workspace or Microsoft 365 in the mail providers — real company with proper email infrastructure
  • Marketo or HubSpot in SPF — they have a marketing team, likely 50+ employees
  • DMARC set to none or missing — red flag, not protecting against email spoofing
  • SSL certificate expiring in under 30 days — operational hygiene issue
  • Domain age under 1 year — proceed with extra caution

One call, 5 data points, a much clearer picture than a LinkedIn search.

Connect it

REST API (no auth, free):

curl "https://domainintel.vercel.app/api/lookup?domain=stripe.com"

MCP server for Claude, Cursor, or VS Code — add to your config:

{
  "mcpServers": {
    "domainintel": {
      "url": "https://domainintel.vercel.app/api/mcp"
    }
  }
}

5 tools available: whois_lookup, dns_lookup, ssl_check, tech_stack, full_report

Free. No API key. Try it on any domain.

Cómo Reconstruimos la Identidad Visual de Guayoyo Tech Usando Skills de Diseño para Agentes de IA

Rebrand con Skills de IA — Header

Rebrand con Skills de IA — Header

Hace una semana nuestro sitio web se veía exactamente como lo que era: un proyecto generado con ayuda de IA. Fuente Inter. Gradientes cian. Tarjetas simétricas con sombras genéricas. Tres columnas perfectamente balanceadas. Un puñado de Heroicons.

Funcionaba. Pero era completamente olvidable. El equivalente visual de la música de ascensor.

Hoy tenemos una identidad visual propia: paleta ámbar, tipografía editorial con tres familias, layouts asimétricos numerados, soporte dark/light con tokens semánticos, y una personalidad que no se parece a ningún template.

Lo hicimos en menos de 48 horas. Con 62 archivos modificados y 30 commits. Sin tocar la lógica de negocio. Y lo más interesante: el diseñador fue Claude Code, alimentado con skills de diseño que le enseñaron a tener buen gusto.

Este artículo cuenta exactamente cómo lo hicimos.

El problema: AI Slop con esteroides

Si has usado un agente de código para generar interfaces, conoces la estética: Inter, púrpura o cian, tarjetas redondeadas, sombras box-shadow predeterminadas, tres columnas simétricas. La comunidad de desarrollo le puso nombre: AI Slop.

Nuestro sitio anterior encajaba perfectamente en esa descripción. La paleta usaba #06b6d4 (cyan-500) sobre fondos #0f172a (slate-900). Las secciones eran predecibles: hero centrado, grid de cards, CTA genérico, footer estándar.

La ironía era evidente: una empresa que vende sistemas de inteligencia artificial y automatización no debería verse como si un agente sin restricciones la hubiera diseñado. Nuestro propio producto nos estaba delatando.

Necesitábamos un cambio. Pero no teníamos diseñador.

El catalizador: un artículo sobre skills de diseño

Publicamos Skills de Diseño para Agentes de IA — un análisis de cinco herramientas que le enseñan buen gusto a los agentes de código. La premisa central:

Los LLMs no tienen criterio estético. Cuando generan una interfaz, aplican patrones estadísticamente probables. La solución no es cambiar de modelo ni escribir prompts más largos. Es darle al agente constraints explícitas de diseño.

Mientras escribíamos ese artículo, tomamos una decisión: vamos a aplicarlo a nuestro propio sitio. Si las skills de diseño funcionan en teoría, teníamos que probarlo en carne propia.

El experimento consistía en:

  1. Definir un sistema de diseño completo en un archivo ejecutable
  2. Darle ese archivo a Claude Code
  3. Pedirle que reescribiera cada sección del sitio
  4. Iterar con comandos de refinamiento

El proceso: 62 archivos, 30 commits, 3 skills

Capa 1 — Fundación: reglas explícitas en CLAUDE.md

El primer paso fue establecer restricciones absolutas. Nada de “hacelo más moderno” o “mejorá el diseño”. Reglas concretas:

## Diseño
- Nunca uses Inter, Roboto, ni Open Sans
- Nunca uses gradientes fríos (purple, cyan, blue)
- Nunca uses más de 3 colores por componente
- Nunca uses box-shadow genérico (0 4px 6px -1px)
- No uses tarjetas simétricas con bordes redondeados de 8px
- No uses Heroicons como elemento decorativo principal
- Todo color debe referenciar un token semántico, nunca un valor crudo

Capa 2 — Sistema: DESIGN.md con la identidad completa

El segundo paso fue definir el sistema de diseño en un archivo estructurado de 9 secciones, siguiendo el estándar DESIGN.md:

1. Atmósfera visual: Cálida, editorial, técnica sin ser fría. Como una revista de arquitectura meets terminal de Kubernetes. El ámbar como color de acento evoca el café guayoyo — familiar, venezolano, nada corporativo.

2. Paleta de colores semánticos:

:root {
  --color-base: #09090B;           /* Fondo principal - negro cálido */
  --color-surface: #141210;        /* Superficies - marrón casi negro */
  --color-overlay: #1C1917;        /* Capas superpuestas */
  --color-border-subtle: #292524;  /* Bordes sutiles */
  --color-border: #44403C;         /* Bordes activos */
  --color-accent: #F59E0B;         /* Ámbar - la estrella */
  --color-accent-hover: #FBBF24;   /* Ámbar claro */
  --color-ink-primary: #FAFAF9;    /* Texto principal */
  --color-ink-secondary: #D6D3D1;  /* Texto secundario */
  --color-ink-muted: #78716C;      /* Texto terciario */
  --color-ink-ghost: #57534E;      /* Texto fantasma */
}

3. Tipografía — tres familias con roles definidos:

  • Manrope para UI, labels, navegación — geométrica, contemporánea
  • Source Serif 4 para headings editoriales — evoca imprenta, seriedad
  • JetBrains Mono para código, datos, números — técnica, precisa

4. Layout — editorial, no genérico:

  • Grid asimétrico: 3fr / 2fr en hero, 1fr / 2fr en servicios
  • Secciones numeradas (01, 02, 03, 04) en lugar de íconos genéricos
  • Sin tarjetas: contenido sobre fondo directo con bordes de sección sutiles
  • Espaciado generoso: 96px entre secciones, 120px para breaks mayores

5. Sombras con propósito:

--shadow-ambient: 0 1px 3px 0 rgb(0 0 0 / 0.4);      /* Profundidad sutil */
--shadow-structural: 0 10px 15px -3px rgb(0 0 0 / 0.6); /* Elevación media */
--shadow-depth: 0 25px 50px -12px rgb(0 0 0 / 0.8);     /* Máxima profundidad */

6. Do’s and Don’ts:

  • ✅ Flechas ámbar (→) como bullets en listas de features
  • ✅ Números gigantes en mono como elementos gráficos
  • ✅ Labels mono uppercase con tracking generoso
  • ✅ Acordeones numerados sin bordes de tarjeta
  • ❌ Nunca íconos de Heroicons como decoración principal
  • ❌ Nunca gradientes como fondo de sección
  • ❌ Nunca más de 3 jerarquías tipográficas por sección

Capa 3 — Refinamiento: iteración con comandos

Con el sistema definido, el proceso fue quirúrgico. Cada sección siguió el mismo ciclo:

  1. Solicitar: “Reescribí el Hero con las reglas de DESIGN.md”
  2. Revisar: Evaluar el output contra las constraints
  3. Refinar: /polish para detalles, comandos específicos para ajustes
  4. Auditar: Chequeo de accesibilidad, contraste, responsive, tema oscuro/claro

Este ciclo se repitió para cada sección: Hero, Servicios, Showcase, FAQ, Contacto, Blog, Footer, Navbar.

Lo que cambió: antes y después

Elemento Antes Ahora
Paleta Cyan #06b6d4 + Slate #0f172a Ámbar #F59E0B + Negro cálido #09090B
Tipografía Inter (la fuente del AI Slop) Manrope + Source Serif 4 + JetBrains Mono
Hero Centrado genérico Split screen: copy left + terminal en vivo
CTA Botón estático Botón magnético con spring physics
Servicios Cards simétricas con íconos Layout 1fr/2fr numerado 01-04 con flechas ámbar
Showcase Grid de cards con imágenes Filas numeradas con métricas prominentes
FAQ Acordeón con bordes de tarjeta Acordeón editorial numerado sin bordes
Blog Lista cronológica simple Grid asimétrico 2fr/1fr + sidebar + TOC lateral
Tema Solo modo oscuro Dark/Light con transiciones suaves
Logo Fijo Cambia automáticamente con el tema
Colores Valores crudos (#0f172a) Tokens semánticos (--color-base)

Detalles que marcan la diferencia

Terminal en vivo en el Hero:

kubectl apply -k ./overlays/production/
namespace/production   unchanged
deployment/gateway     created
deployment/ia-worker   created
ingress/gateway-lb     created
▌ sistema en producción

No es decoración. Es una declaración de capacidades técnicas reales renderizada en JetBrains Mono sobre fondo oscuro.

CTA magnético con spring physics: El botón principal sigue el cursor con física de resorte (stiffness: 150, damping: 12). Una micro-interacción que comunica atención al detalle antes de que el usuario lea una sola palabra.

Números gigantes como elementos gráficos: En Servicios, en lugar de íconos genéricos, usamos 01, 02, 03, 04 en JetBrains Mono a 5rem, con opacidad reducida. Funcionan como anclas visuales y elementos de ritmo editorial.

Prosa del blog con barra de progreso: El layout del artículo cambió de una columna centrada a tres columnas: TOC lateral izquierdo, contenido central, sidebar derecho. Una barra de progreso sutil en el top indica la posición de lectura.

Transiciones de tema: El cambio dark/light no es instantáneo. Usa transition: background-color 250ms ease-out, color 250ms ease-out para un fundido suave que se siente deliberado.

Las skills que usamos

Frontend-Design Skill (Anthropic)

La capa base. Sin este skill, Claude Code revierte a Inter y púrpura en cuestión de minutos. Lo instalamos como requisito absoluto:

claude plugins install frontend-design@claude-code-plugin

DESIGN.md (custom)

Nuestro sistema de diseño completo en un archivo. Las 9 secciones cubriendo atmósfera, paleta, tipografía, layout, sombras, componentes, restricciones, responsive y guía para el agente.

Design Plugin

Para bloquear violaciones del sistema de diseño. Si Claude intenta usar un color crudo o Inter, el plugin lo rechaza automáticamente.

Lecciones aprendidas

1. Las skills son constraints, no sugerencias

Cuando le decís a un agente “hacelo más moderno”, produce basura. Cuando le decís “nunca uses más de 3 colores por componente, nunca uses Inter, nunca uses gradientes fríos”, produce diseño.

La diferencia entre un sitio con AI Slop y uno con personalidad no está en el modelo. Está en la precisión de las restricciones.

2. El orden de capas importa

Probamos instalar todas las skills juntas. El resultado fue inconsistente: el agente recibía instrucciones contradictorias de múltiples fuentes.

La arquitectura que funcionó: Fundación → Sistema → Refinamiento. Tres capas, en ese orden. Nunca dos skills compitiendo en la misma capa.

3. Los tokens semánticos son la clave

El mayor salto de calidad vino de una decisión simple: prohibir valores de color crudos. #F59E0B no existe en nuestro código. Existe var(--color-accent).

Esto significa que cambiar la paleta completa — por ejemplo, de ámbar a verde esmeralda — requiere editar exactamente 12 líneas en un solo archivo. El agente nunca toca valores crudos, solo referencias semánticas.

4. El diseño editorial vende más que el diseño de SaaS

Las empresas de tecnología convergen visualmente en el mismo lugar: tarjetas, íconos, gradientes, CTAs gigantes. Es el uniforme del SaaS.

Nuestro cambio a un layout editorial — asimétrico, numerado, con jerarquía tipográfica — nos diferencia instantáneamente. En un mar de sitios que se ven iguales, el que se ve diferente gana la atención.

5. Menos de 48 horas es posible

62 archivos modificados. 8,110 líneas agregadas. 1,617 líneas eliminadas. 30 commits. Todo en menos de dos días.

La velocidad no vino de trabajar más rápido. Vino de tener un sistema de diseño ejecutable que Claude Code podía aplicar consistentemente sin supervisión constante.

El resultado

Nuestro sitio ya no se ve como si un agente de IA lo hubiera diseñado. Se ve como si un estudio de diseño con criterio editorial lo hubiera hecho.

Pero fue un agente de IA. Solo que esta vez, le dimos las instrucciones correctas.

¿Querés hacer lo mismo con tu sitio?

El proceso es replicable:

  1. Leé el artículo original sobre Skills de Diseño para Agentes de IA
  2. Instalá Frontend-Design Skill como capa base
  3. Creá tu DESIGN.md con paleta, tipografía, layout y restricciones explícitas
  4. Dejá que Claude Code reescriba cada sección aplicando tu sistema
  5. Iterá con /polish hasta que cada detalle esté en su lugar

No necesitás un diseñador. Necesitás un archivo de diseño que tu agente pueda leer.

En Guayoyo Tech construimos sistemas de IA que transforman cómo operan las empresas. ¿Querés automatizar procesos, integrar IA en tu stack o reconstruir tu presencia digital? Conversemos sin compromiso.

The Hive Are Evolving!

98% adversarial defense rate. 200 rounds. One $700 GPU.
I just finished benchmarking my defender swarm against six attacker models — three frontier cloud LLMs and three locally-hosted open models on my mate’s machine over a Cloudflare Tunnel.
The result that surprised me most: the frontier cloud models were the worst attackers in the pool. Their breach rate sat at 0% — too aligned to red-team coherently. The genuine threats were uncensored mid-weight open models running on commodity hardware. The same stack any motivated attacker can spin up for $20 of cloud compute.
My defender swarm — five specialists at 1.5B–8B parameters, all running on a single RTX 5070 12GB — hit 98% defense rate. The smallest model (3B) led detection at 100%. Architecture > size, every time.
This is one of the flagship capabilities of Sovereign Hive: a local-first AI ops platform I’m building. Australian, Queensland-based, 100% Indigenous-owned.
Full architecture breakdown in the article 👇
sovereignhive.com.au
Defence engineers, AI researchers, anyone working on autonomous on-device AI — what’s your read on this gap between frontier-model alignment and real-world attacker behaviour?

AISecurity #InfoSec #AdversarialML #SovereignAI #IndigenousBusiness #EdgeAI

“2026 Apple Tasarım Ödülleri” için finalistler duyuruldu

“2026 Apple Tasarım Ödülleri” için finalistler duyuruldu

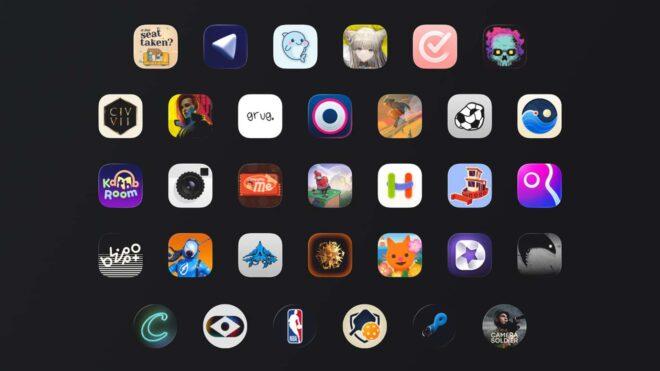
“2026 Apple Tasarım Ödülleri” için finalistler duyuruldu8 Haziran’da düzenlenecek WWDC26 etkinliği öncesinde 2026 Apple Tasarım Ödülleri’nin finalistleri resmi olarak duyuruldu. Keyif ve Eğlence – Uygulamalar kategorisinde Blippo+, Metaballs ve Grug yer alırken; Keyif ve Eğlence – Oyunlar kısmında PowerWash Simulator, Is This Seat Taken? ve Ball x Pit bulunuyor. Kapsayıcılık – Uygulamalar alanında Guitar Wiz, Hearing Buddy ve Structured öne çıkarken, Kapsayıcılık – Oyunlar tarafında Sago Mini Jinja’s Garden, Pine Hearts ve Civilization VII dikkat çekiyor. Yenilikçi – Uygulamalar listesinde Detail: AI Video Editor, NBA: Live Games & Scores ve D-Day: The Camera Soldier yer alırken; Yenilikçi – Oyunlar sekmesinde TR–49, Blue Prince ve Pickle Pro listelenmiş durumda. Etkileşim – Uygulamalar kategorisinde The Outsiders: Athlete Tracker, Moonlitt: Moon Phase Tracker ve Tide Guide: Charts & Tables yer bulurken; Etkileşim – Oyunlar ise TR–49, Sago Mini Jinja’s Garden ve Grand Mountain Adventure 2’den oluşuyor. Sosyal Etki – Uygulamalar dünyasında Primary: News in Depth, Katha Room ve Harvee […]

“2026 Apple Tasarım Ödülleri” için finalistler duyuruldu yazısı ilk olarak Teknoloji haberleri – LOG üzerinde yayınlandı.

How to Use Custom CSS to Brand Your Published Markdown Pages

You have written a solid piece. The content is sharp, the structure is clean, and you hit publish. Then someone opens your page and sees the default styling, a generic font, no brand colours, and the same layout as every other published Markdown page. The content is good. The page does not feel like yours.

This is the gap most Markdown publishing tools leave wide open. They give you a publish button but not a brand. You get a live URL and a layout that screams “default template” to anyone who has used the internet for more than a week.

AnySlate’s custom CSS feature closes that gap. You write your Markdown, publish it, and then drop in a stylesheet that makes the page look exactly the way you want: your fonts, your colours, your spacing, your identity. No external tools, no separate website builder, no paying for a custom domain just to get basic styling control. This guide walks you through exactly how to use it.

Why Default Styling is Costing You More Than You Think
Here is a scenario. You are a freelance consultant. You publish a case study on your AnySlate page to share with a potential client. The content is excellent, three months of work condensed into a tight, well-argued document. But the page looks identical to every other plain Markdown page on the internet. No logo. No brand colour. No typographic personality.

The client reads it. The work is impressive. But the presentation quietly signals that the delivery is not polished. That gap, between the quality of the thinking and the presentation of that thinking, costs credibility in a way that is hard to measure but easy to feel.

Custom CSS is how you close it. One stylesheet, applied to your published pages, turns a default template into a branded reading experience.

Your published page is a product. The content is the value, but the presentation is the first thing a reader experiences. A page that looks like yours, and only yours, signals that the thinking behind it is also distinctly yours.

The Properties That Do 90% of the Work
You do not need to know advanced CSS to make your pages look branded and professional. Six properties cover almost every meaningful visual decision on a published Markdown page:

CSS property

What it controls

Why it matters for branding

font-family

The typeface of all body text

Nothing signals brand personality faster than a distinctive typeface

color

Text colour across the whole page

Brand colours applied to headings and accents create immediate recognition

background-color

Page background

Off-white or tinted backgrounds feel more considered than pure white

max-width

The maximum width of the content column

Wider or narrower line lengths define the reading feel of the page

line-height

Spacing between lines of text

Generous line-height makes dense content feel readable and calm

border-left

Left border accent on blockquotes and callouts

A brand-coloured border on pull quotes is an instant visual signature

Start with these six. Once the page feels like yours with just these properties, then layer in heading styles, link colours, code block treatments, and anything else you need. The order matters — nail the fundamentals before adding detail.

A Real Starting Stylesheet You Can Use Today
Here is a clean, minimal stylesheet that transforms a default AnySlate published page into something that feels intentional and branded. Paste this into your AnySlate custom CSS field and adjust the values to match your own brand:

body {

font-family: ‘Georgia’, serif;

color: #1a1a1a;

background-color: #fafaf8;

max-width: 720px;

margin: 0 auto;

padding: 2rem 1.5rem;

line-height: 1.75;

}

h1, h2, h3 {

font-family: ‘Arial’, sans-serif;

color: #111111;

letter-spacing: -0.02em;

}

h1 { font-size: 2.2rem; margin-bottom: 0.5rem; }

h2 { font-size: 1.5rem; margin-top: 2.5rem; }

a {

color: #E8514A;

text-decoration: none;

border-bottom: 1px solid #E8514A;

}

blockquote {

border-left: 4px solid #E8514A;

margin: 2rem 0;

padding: 0.5rem 0 0.5rem 1.5rem;

color: #444444;

font-style: italic;

}

code {

background: #f0f0ee;

padding: 0.2em 0.4em;

border-radius: 3px;

font-size: 0.9em;

}

A few things to notice here. The max-width of 720px keeps lines short enough to read comfortably — anything wider starts to feel like a newspaper, and readers’ eyes tire faster. The line-height of 1.75 gives prose the breathing room it needs. And the coral-red #E8514A on links and blockquote borders is the AnySlate accent — swap this for your own brand colour and the whole page shifts to feel like you.

CSS is not decoration. It is the difference between a page that communicates and a page that just displays. The same content, presented in a well-considered stylesheet, reads as more credible, more considered, and more worth the reader’s time.

Making It Actually Yours: Three Quick Swaps
Once the base stylesheet is in place, three targeted changes will make the page unmistakably yours rather than a tweaked default:

Swap the font. Change the font-family on the body and headings to a typeface that matches your brand. The page will feel completely different — in a good way — from that single change alone.

Replace the accent colour. Find every instance of #E8514A in the stylesheet and replace it with your brand colour. This changes your links, your blockquote borders, and any other accents in one sweep. Even a small brand colour change makes the page feel owned rather than borrowed.

Adjust the max-width to match your content type. Long-form essays read best at 680–720px. Technical documentation with code blocks can go wider at 800–860px. Short, punchy content works better at 600px. The width of the column defines the reading rhythm of the whole page.

The One Thing to Take Away
Publishing in Markdown should not mean accepting someone else’s design decisions. The content is yours, the presentation should be too. AnySlate’s custom CSS feature is where that happens: a single stylesheet that turns a default template into a branded reading experience, distinctly yours.

You do not need to be a designer. You do not need to know advanced CSS. The six properties in the table above and the starter stylesheet in this guide are enough to make any published Markdown page look considered, professional, and on-brand in under thirty minutes.

Start publishing at anyslate.io. Custom CSS is included in the Hobby plan at $30 a year and above, along with PDF export and version history. No account is needed to try the desktop app for free.