Full Opensource AI-Agent to learn and integrate

https://github.com/srutz/cagent

Cagent is a coding-agent … a TypeScript implementation of an autonomous agent framework that can interact with language models, execute tools, and perform tasks based on user input.

It is free, opensource and MIT Licensed, so you can do with it as you like.

It designed to be simple and modular. Also it is meant to be a starting point for including it into your own projects. Think of shadcn approach and copy it into your projects, just like I do.

Running it like this will show you how tools actually work from an LLM-Perpective:

cagent --verbose list files in current dir

MYTH-OS: The Compiler Pattern for Systemic RPG Generation Complete Technical Whitepaper & Implementation Guide

PipeCode blog header for a beginner-friendly ETL pipeline data engineering guide — bold title

📑 TABLE OF CONTENTS
Executive Summary
Core Architecture (5-Layer Compiler Pattern)
System Specifications
Implementation Guide
Code Examples & Schemas
Deployment Instructions
Integration for Game Engines
Advanced Features

  1. EXECUTIVE SUMMARY
    MYTH-OS v2.0 PRO is a production-grade RPG generation system that bridges the gap between creative narrative AI and deterministic game mechanics. Using the Compiler Pattern, it processes natural language input and compiles it into:

✅ Structured Narrative Data (Scene, Tone, Intent)
✅ Mechanical Specifications (Stat Blocks, Formulas, Balance)
✅ World State (Persistent Global Variables)
✅ Visual Assets (AI-Ready Image Prompts)
✅ Exportable JSON (Direct Database/Engine Integration)
Key Innovation: Instead of treating AI output as final prose, we treat it as source code that must be compiled into deterministic game systems.

  1. THE 5-LAYER COMPILER PATTERN
    Layer 1: NARRATIVE ENGINE
    Purpose: Extract semantic meaning from user input.

Inputs: User text, scene description, conflict statement Outputs:

Scene Summary (3-sentence description)
Tone Tags (Dark, Heroic, Mystical, etc.)
Conflict Identification (Player vs Enemy, Exploration, Dialogue, etc.)
Story Direction (Next logical plot beat)
Example Processing:

Code
INPUT: “The knight raised his shield as the giant beast charged.”

OUTPUT:
Scene: Battlefield encounter with charging colossus
Tone: Dark Heroic, High Tension
Conflict: Heavy Knight (Defensive) vs Colossal Beast (Offensive)
Direction: Combat Simulation Required
Layer 2: CHARACTER GENERATION SYSTEM
Purpose: Map narrative characters to RPG-compliant stat objects.

Processing:

Extract character archetype (Knight, Mage, Rogue, etc.)
Assign class and subclass from predefined hierarchy
Generate or retrieve attributes (STR, INT, DEX, VIT, etc.)
Assign aura type (Element, Ki, Ether, Divine, Soul)
Calculate derived stats (HP, Mana, Armor, etc.)
Output Schema:

JSON
{
“character”: {
“id”: “char_001”,
“name”: “Valdrin”,
“class”: “Heavy Knight”,
“subclass”: “Ironclad”,
“level”: 12,
“aura_type”: “Earth Ether”,
“attributes”: {
“strength”: 18,
“vitality”: 20,
“dexterity”: 8,
“intelligence”: 6,
“wisdom”: 14,
“charisma”: 10
},
“derived_stats”: {
“max_hp”: 240,
“max_aura”: 150,
“armor_rating”: 22,
“speed”: 4
}
}
}
Layer 3: MECHANICS LAB (DETERMINISTIC LOGIC)
Purpose: Convert narrative actions into mathematical game formulas.

Critical Rule: NO VAGUE DESCRIPTIONS. All effects must be quantifiable.

Processing Pipeline:

Parse action verb (Attack, Defend, Cast, etc.)
Identify ability source (Class, Subclass, Equipment, Passive)
Calculate damage/effect using established formulas
Apply modifiers (Critical, Status, Scaling)
Generate cooldown and resource cost
Example Ability Compilation:

Code
INPUT: “The knight strikes with heavy force”

COMPILED ABILITY:
Name: Crushing Blow
Type: Physical Attack
Damage Formula: (STR * 1.5) + (Weapon_Base * 0.8) + 2d8
Cost: 20 Aura
Cooldown: 2 turns
Status Effect: None
Scaling: +0.1 per level

EXAMPLE OUTPUT (Level 12 Knight):
Base Damage: (18 * 1.5) + (35 * 0.8) + 2d8
= 27 + 28 + 2d8
= 55 + 2d8 (Average: 64 damage)
Damage Formula Standard:

Code
Physical_Damage = (Attacker_STR * Ability_Scaling) + Weapon_Base + d_roll ± Status_Modifiers

Magic_Damage = (Attacker_INT * Ability_Scaling) + Catalyst_Base + d_roll ± Resistance

Healing = (Attacker_WIS * Spell_Scaling) + Base_Heal_Amount
Layer 4: WORLD FORGE (PERSISTENT STATE)
Purpose: Generate and maintain a persistent world graph.

State Tracking:

Current Region / Biome
Active Factions & Reputation
Environmental Hazards
NPC Locations
World Difficulty Scaling (1-10)
Timeline Events
World State Schema:

JSON
{
“world_state”: {
“version”: “2.0”,
“timestamp”: 1704067200,
“current_region”: “Ashfall Valley”,
“active_biome”: “Volcanic Highlands”,
“difficulty_scaling”: 7,
“factions”: {
“Silver_Conclave”: {
“stance_toward_player”: “Hostile”,
“power_level”: 8,
“control_percentage”: 45
},
“Obsidian_Horde”: {
“stance_toward_player”: “Neutral”,
“power_level”: 6,
“control_percentage”: 30
}
},
“active_threats”: [
{
“threat_id”: “dragon_001”,
“type”: “Colossal Beast”,
“location”: “Molten Peak”,
“threat_level”: 9
}
]
}
}
Layer 5: VISION RENDER (VISUAL PROMPTS)
Purpose: Generate high-fidelity AI image prompts compatible with DALL-E 3, Midjourney, Stable Diffusion.

Prompt Template:

Code
[Character/Scene Description]
[Setting & Lighting]
[Style & Medium]
[Emotional Tone]
[Cinematic Elements]
[Technical Quality Modifiers]
Example Output:

Code
Heavy armored knight in slate-blue plate armor standing in a burning battlefield,
glowing molten sword raised, intense cinematic lighting with volumetric smoke,
epic composition, dark heroic fantasy art style, 8k resolution,
detailed armor with runic inscriptions, dynamic action pose,
orange and blue color grading, dramatic shadows

  1. SYSTEM SPECIFICATIONS
    3.1 Aura System (Resource Management)
    Code
    Base Aura Types:
    ├─ Elemental (Fire, Ice, Lightning, Earth, Wind)
    ├─ Ki (Physical Life Force)
    ├─ Ether (Magical Resonance)
    ├─ Divine (Holy/Unholy Power)
    └─ Soul (Void/Existential Energy)

Aura Scaling:
Base_Aura = 100 + (Level * 10)
Aura_Regen = (WIS / 2) + (Level / 4) per turn

Ability_Cost = Base_Cost * (1 + Status_Modifier)
3.2 Class & Subclass Hierarchy
Code
HEAVY KNIGHT
├─ Ironclad (Defense-focused)
│ ├─ Fortress Form
│ ├─ Shield Slam
│ ├─ Absorb Wall
│ ├─ Counter Mass
│ ├─ Plating Pulse
│ └─ Siege Posture
└─ Dreadnought (Offense-focused)
├─ Momentum Charge
├─ Earthfall Blow
├─ Bone Breaker
├─ Impact Field
├─ Ruin Drive
└─ Colossus Mode

RANGER
├─ Marksman (Precision)
└─ Beastmaster (Pet Support)

MAGE
├─ Pyromancer (Fire)
└─ Frostweaver (Ice)

ROGUE
├─ Assassin (Burst Damage)
└─ Trickster (Control)

MONK
├─ Mystic Fist (Chi-Based)
└─ Void Walker (Dimensional)

WARDEN
├─ Sentinel (Guardian)
└─ Oath-Keeper (Bonded)
3.3 Scaling Formulas
Code
HP_Scaling: Base_HP + (Level * VIT * 1.5)
Damage_Scaling: Base_Damage + (Level * 0.5)
Resistance_Scaling: Base_Resistance + (Level * 0.25)
Ability_Cooldown: Base_Cooldown / (1 + Haste_Modifier)

  1. IMPLEMENTATION GUIDE
    4.1 Initialization Protocol
    Command: /init [Theme] [Difficulty] [Magic_System]

Code
Example: /init “Dark High-Fantasy” 7 “Soul-Ember Aura System”

System Response:
✓ Loaded: Grimdark Fantasy Ruleset
✓ Loaded: Level 7 Enemy Scaling
✓ Loaded: Soul-Ember Resource System
✓ Global State: Initialized
✓ Ready for Input
4.2 Command Structure
Code
/init [Theme] – Initialize world
/inspect [Entity] – Deep-dive stat block
/combat [A] vs [B] – Simulate encounter
/map [Region] – Generate regional overview
/export [Format] – Export data (json/csv/xml)
/log – Summarize session state
/branch [Number] – Execute story path
/balance-check – Verify mechanical balance
/faction-report – Show faction standings
/world-update – Refresh world state
4.3 Full Output Template

Code

🖋️ NARRATIVE BREAKDOWN

Scene: [3-sentence description]
Tone: [Tone tags]
Conflict: [Primary conflict]
Direction: [Next story beat]

👤 CHARACTER LAYER

Name: [Character name]
Class/Subclass: [Class] / [Subclass]
Level: [Current level]
Aura Type: [Aura element]
Key Stat: [Primary attribute and value]
Stats Grid: [All attributes in table format]

⚔️ SYSTEM MECHANICS

Primary Ability: [Ability name]
Type: [Passive/Active/Triggered]
Damage Formula: [Mathematical formula]
Resource Cost: [Aura/Mana cost]
Cooldown: [Turn cooldown]
Status Effects: [Applied effects]
Scaling: [Per-level progression]

Secondary Abilities: [List with formulas]

🗺️ WORLD DATA

Region: [Current region]
Biome: [Biome type]
Faction Influence: [Dominant factions]
Threat Level: [1-10 difficulty]
Environmental Hazards: [Active dangers]
NPC Locations: [Key NPCs and positions]

🎨 VISUAL PROMPT

[High-fidelity DALL-E 3 compatible image prompt]

📟 DATA EXPORT (JSON)

[Complete JSON schema of all above data]
🌳 BRANCHING PATHS
[1] DEEPEN MECHANICS - Expand ability pool [2] WORLD EVOLUTION - Show regional consequences [3] NARRATIVE PROGRESSION - Next story beat [4] COMBAT SIMULATION - Roll for action [5] CHARACTER EXPANSION - Add backstory [6] DIALOGUE TREE - NPC interaction
Code

---

## 5. CODE EXAMPLES & SCHEMAS

### 5.1 Core Agent Initialization (JavaScript)

javascript
class MythOSCompiler {
constructor(config = {}) {
this.config = {
maxContextWindow: config.maxContextWindow || 8000,
difficulty: config.difficulty || 5,
theme: config.theme || ‘High Fantasy’,
auraSystem: config.auraSystem || ‘Elemental’,
…config
};

this.globalState = {
  worldVersion: '2.0',
  currentRegion: null,
  activeFactions: {},
  characters: {},
  timeline: [],
  difficulty: this.config.difficulty
};

this.layers = {
  narrative: new NarrativeEngine(),
  character: new CharacterGenerator(),
  mechanics: new MechanicsLab(),
  world: new WorldForge(this.globalState),
  visual: new VisualPromptEngine()
};

}

async compile(userInput) {
const compiled = {};

// Layer 1: Extract Narrative
compiled.narrative = await this.layers.narrative.parse(userInput);

// Layer 2: Generate Character Data
compiled.character = await this.layers.character.generate(
  compiled.narrative.archetype,
  compiled.narrative.keywords
);

// Layer 3: Calculate Mechanics
compiled.mechanics = await this.layers.mechanics.calculate(
  compiled.character,
  compiled.narrative.actionType
);

// Layer 4: Update World State
compiled.world = await this.layers.world.update(
  compiled.narrative,
  compiled.mechanics
);

// Layer 5: Generate Visuals
compiled.visual = await this.layers.visual.render(
  compiled.narrative,
  compiled.character,
  compiled.world
);

// Export JSON
compiled.json = this.exportJSON(compiled);

return this.formatOutput(compiled);

}

exportJSON(compiled) {
return {
version: ‘2.0’,
timestamp: Date.now(),
metadata: {
theme: this.config.theme,
difficulty: this.config.difficulty,
auraSystem: this.config.auraSystem
},
layers: {
narrative: compiled.narrative,
character: compiled.character,
mechanics: compiled.mechanics,
world: compiled.world
},
globalState: this.globalState
};
}

formatOutput(compiled) {

return `

🖋️ NARRATIVE BREAKDOWN

${this.formatNarrative(compiled.narrative)}

👤 CHARACTER LAYER

${this.formatCharacter(compiled.character)}

⚔️ SYSTEM MECHANICS

${this.formatMechanics(compiled.mechanics)}

🗺️ WORLD DATA

${this.formatWorld(compiled.world)}

🎨 VISUAL PROMPT

${compiled.visual.prompt}

📟 DATA EXPORT

`json
${JSON.stringify(compiled.json, null, 2)}
`

🌳 BRANCHING PATHS

${this.generateBranches()}

`;

}

// … Additional formatting methods
}
5.2 Character Generation Schema
JavaScript
class CharacterGenerator {
async generate(archetype, keywords) {
const baseStats = this.getArchetypeStats(archetype);

return {
  id: this.generateID(),
  archetype,
  class: this.mapArchetypeToClass(archetype),
  subclass: this.selectSubclass(keywords),
  level: this.determineLevelFromContext(),
  auraType: this.selectAuraType(archetype),

  baseAttributes: {
    strength: baseStats.STR,
    vitality: baseStats.VIT,
    dexterity: baseStats.DEX,
    intelligence: baseStats.INT,
    wisdom: baseStats.WIS,
    charisma: baseStats.CHA
  },

  derivedStats: {
    maxHP: this.calculateHP(baseStats),
    maxAura: this.calculateAura(baseStats),
    armorRating: this.calculateArmor(baseStats),
    speed: baseStats.DEX / 4,
    damageMultiplier: baseStats.STR / 10
  },

  abilities: this.generateAbilities(archetype),
  equipment: this.generateEquipment(archetype),
  passives: this.generatePassives(archetype),

  lore: {
    backstory: this.generateBackstory(archetype),
    faction: this.determineFaction(keywords),
    alignment: this.determineAlignment(keywords)
  }
};

}

calculateHP(stats) {
return 100 + (stats.VIT * 8) + (stats.Level * stats.VIT);
}

calculateAura(stats) {
return 50 + (stats.Level * 5) + (stats.INT * 2);
}
}
5.3 Mechanics Lab (Damage Calculation)
JavaScript
class MechanicsLab {
calculateDamage(attacker, ability, defender = null) {
const baseDamage = this.parseFormula(ability.damageFormula, attacker);
const diceRoll = this.rollDice(ability.dicePool);
const modifiers = this.calculateModifiers(attacker, ability, defender);

const totalDamage = baseDamage + diceRoll + modifiers;

return {
  baseDamage,
  diceRoll,
  modifiers,
  totalDamage,
  isCritical: this.rollForCritical(attacker),
  statusEffects: ability.statusEffects || []
};

}

parseFormula(formula, attacker) {
// Example formula: “(STR * 1.5) + (Weapon * 0.8) + 10”
return formula
.replace(/STR/g, attacker.strength)
.replace(/INT/g, attacker.intelligence)
.replace(/DEX/g, attacker.dexterity)
.replace(/VIT/g, attacker.vitality)
.replace(/WIS/g, attacker.wisdom)
.replace(/Weapon/g, attacker.weaponPower)
// Then evaluate safely
.split(‘)’).reduce((acc, val) => {
// Safe evaluation with constraints
return acc;
});
}

rollDice(dicePool) {
// Parse “2d8+1” format
const [dice, modifier] = dicePool.split(‘+’);
const [count, sides] = dice.split(‘d’);

let total = 0;
for (let i = 0; i < count; i++) {
  total += Math.floor(Math.random() * sides) + 1;
}
return total + (modifier ? parseInt(modifier) : 0);

}

calculateModifiers(attacker, ability, defender) {
let total = 0;

// Scaling modifier
if (ability.scaling) {
  total += attacker.level * ability.scaling.perLevel;
}

// Weakness/Resistance
if (defender && ability.damageType) {
  const resistance = defender.resistances[ability.damageType] || 0;
  total -= total * (resistance / 100);
}

// Status effects on attacker
if (attacker.statusEffects) {
  attacker.statusEffects.forEach(effect => {
    if (effect.damageModifier) {
      total *= (1 + effect.damageModifier);
    }
  });
}

return total;

}

rollForCritical(attacker) {
const critChance = (attacker.dexterity / 100) * 10;
return Math.random() * 100 < critChance;
}
}
5.4 World Forge (State Management)
JavaScript
class WorldForge {
constructor(initialState) {
this.state = initialState;
this.history = [];
}

async update(narrativeLayer, mechanicsLayer) {
const change = {
timestamp: Date.now(),
narrative: narrativeLayer,
mechanics: mechanicsLayer,
factionImpact: this.calculateFactionImpact(narrativeLayer),
difficultyShift: this.calculateDifficultyShift(mechanicsLayer)
};

this.history.push(change);
this.applyChange(change);

return {
  currentRegion: this.state.currentRegion,
  activeBiome: this.state.activeBiome,
  factionStandings: this.state.activeFactions,
  threatLevel: this.state.threatLevel,
  environmentalHazards: this.state.hazards,
  npcs: this.state.npcLocations
};

}

calculateFactionImpact(narrativeLayer) {
// If player defeats enemy aligned with Faction A
// Faction A loses power, Faction B gains relations
const impacts = {};

if (narrativeLayer.defeated) {
  const defeatedFaction = this.getFaction(narrativeLayer.defeated);
  if (defeatedFaction) {
    impacts[defeatedFaction] = -5; // Power loss
  }
}

return impacts;

}

calculateDifficultyShift(mechanicsLayer) {
// After player wins, increase nearby threats by 1-2 levels
if (mechanicsLayer.playerVictory) {
return Math.min(10, this.state.difficulty + 1);
}
return this.state.difficulty;
}

applyChange(change) {
// Update faction standings
Object.entries(change.factionImpact).forEach(([faction, impact]) => {
if (this.state.activeFactions[faction]) {
this.state.activeFactions[faction].powerLevel += impact;
}
});

// Update difficulty
this.state.difficulty = change.difficultyShift;

// Record timeline event
this.state.timeline.push({
  timestamp: change.timestamp,
  event: change.narrative.summary
});

}
}
5.5 Visual Prompt Engine
JavaScript
class VisualPromptEngine {
async render(narrative, character, world) {
const components = {
subject: this.renderSubject(character),
setting: this.renderSetting(world),
action: this.renderAction(narrative),
mood: this.renderMood(narrative),
technical: this.renderTechnical(world.difficulty)
};

return {
  prompt: this.assemblePrompt(components),
  tags: this.generateTags(character, world),
  style: this.selectStyle(narrative.tone)
};

}

renderSubject(character) {
return ${character.archetype} in detailed ${character.armorType} armor,
glowing ${character.auraType} effects, dramatic pose
;
}

renderSetting(world) {
return ${world.currentRegion} at ${world.timeOfDay},
${world.weather} conditions, ${world.lighting}
;
}

renderAction(narrative) {
return narrative.actionDescription || ‘standing in battle-ready stance’;
}

renderMood(narrative) {
const moodMap = {
‘dark’: ‘ominous shadows, desaturated colors, grim atmosphere’,
‘heroic’: ‘golden lighting, dramatic composition, triumphant pose’,
‘mystical’: ‘ethereal glow, magical particles, surreal environment’,
‘tense’: ‘sharp focus, high contrast, dynamic motion blur’
};
return moodMap[narrative.tone] || ‘cinematic lighting’;
}

renderTechnical(difficulty) {
const qualityLevels = {
1: ‘4k resolution’,
5: ‘8k resolution, high detail’,
10: ‘8k resolution, ultra high detail, photorealistic’
};
return qualityLevels[Math.ceil(difficulty / 2)] || ‘8k resolution’;
}

assemblePrompt(components) {
return
${components.subject}, ${components.action},
${components.setting},
${components.mood},
${components.technical},
professional fantasy art, cinematic masterpiece
.trim();
}

generateTags(character, world) {
return [
character.class,
character.auraType,
world.currentRegion,
world.biome,
‘fantasy’,
‘cinematic’
];
}
}

  1. DEPLOYMENT INSTRUCTIONS
    6.1 Node.js Backend Setup
    bash
    # Initialize project
    npm init -y
    npm install express axios dotenv cors

Directory structure

project/
├── core/
│ ├── myth-os-compiler.js
│ ├── narrative-engine.js
│ ├── character-generator.js
│ ├── mechanics-lab.js
│ ├── world-forge.js
│ └── visual-prompt-engine.js
├── database/
│ ├── schemas.js
│ ├── classes.json
│ ├── abilities.json
│ └── world-data.json
├── api/
│ ├── routes.js
│ └── middleware.js
├── server.js
└── .env
6.2 Express Server Setup
JavaScript
// server.js
const express = require(‘express’);
const cors = require(‘cors’);
const MythOSCompiler = require(‘./core/myth-os-compiler’);

const app = express();
app.use(express.json());
app.use(cors());

const compiler = new MythOSCompiler({
difficulty: 5,
theme: ‘Dark High-Fantasy’,
auraSystem: ‘Elemental’
});

app.post(‘/api/compile’, async (req, res) => {
try {
const { input, command } = req.body;

if (command === '/init') {
  compiler.initialize(input);
  return res.json({ status: 'Initialized', globalState: compiler.globalState });
}

const output = await compiler.compile(input);
res.json(output);

} catch (error) {
res.status(500).json({ error: error.message });
}
});

app.get(‘/api/export’, (req, res) => {
const json = compiler.exportJSON(compiler.lastCompiled);
res.setHeader(‘Content-Type’, ‘application/json’);
res.setHeader(‘Content-Disposition’, ‘attachment; filename=world-export.json’);
res.send(JSON.stringify(json, null, 2));
});

app.listen(3000, () => console.log(‘MYTH-OS running on port 3000’));
6.3 Frontend Integration (HTML/React)
HTML
<!DOCTYPE html>

MYTH-OS Agent Interface

<br>
* { margin: 0; padding: 0; box-sizing: border-box; }<br>
body { font-family: &#39;Cinzel&#39;, serif; background: #070604; color: #f0e0c0; }</p>
<div class=”highlight”><pre class=”highlight plaintext”><code>.container {
max-width: 1400px;
margin: 0 auto;
padding: 2rem;
}

.command-input {
display: flex;
gap: 1rem;
margin-bottom: 2rem;
}

.command-input input {
flex: 1;
padding: 0.8rem;
background: #1a1208;
border: 2px solid #c8960a;
color: #f0e0c0;
font-family: inherit;
border-radius: 2px;
}

.command-input button {
padding: 0.8rem 1.5rem;
background: linear-gradient(135deg, #c8960a, #f0b820);
color: #0f0c08;
border: none;
font-weight: 700;
cursor: pointer;
border-radius: 2px;
transition: all 0.2s;
}

.command-input button:hover {
transform: translateY(-2px);
box-shadow: 0 8px 16px rgba(200, 150, 10, 0.3);
}

.output-panel {
background: linear-gradient(135deg, #1a1208, #0f0c08);
border: 2px solid #a87820;
border-radius: 2px;
padding: 1.5rem;
margin-bottom: 1.5rem;
max-height: 600px;
overflow-y: auto;
font-size: 0.9rem;
line-height: 1.6;
}

.section-header {
color: #f0b820;
font-size: 1.1rem;
margin-top: 1rem;
margin-bottom: 0.5rem;
text-transform: uppercase;
letter-spacing: 0.1em;
}

.json-export {
background: #0a0804;
border: 1px solid #3d2810;
padding: 1rem;
border-radius: 2px;
font-family: ‘Courier New’, monospace;
font-size: 0.8rem;
overflow-x: auto;
}

.branches {
display: grid;
grid-template-columns: repeat(auto-fill, minmax(200px, 1fr));
gap: 0.75rem;
margin-top: 1rem;
}

.branch-btn {
padding: 0.8rem;
background: linear-gradient(135deg, #2a3a50, #1a2a40);
border: 1px solid #4a7aaa;
color: #80b8e0;
cursor: pointer;
border-radius: 2px;
font-size: 0.85rem;
transition: all 0.2s;
}

.branch-btn:hover {
background: linear-gradient(135deg, #3a4a60, #2a3a50);
box-shadow: 0 0 8px rgba(74, 122, 170, 0.3);
}
</code></pre></div>
<p>

🛡️ MYTH-OS v2.0 PRO

EXECUTE

Awaiting input. Start with /init [Theme] or describe a scene.

async function executeCommand() {
const input = document.getElementById(‘commandInput’).value;

try {
const response = await fetch(‘http://localhost:3000/api/compile’, {
method: ‘POST’,
headers: { ‘Content-Type’: ‘application/json’ },
body: JSON.stringify({ input })
});

const result = await response.json();
displayOutput(result);
} catch (error) {
console.error(‘Error:’, error);
}
}

function displayOutput(result) {
const panel = document.getElementById(‘outputPanel’);
panel.innerHTML = formatOutput(result);
}

function formatOutput(result) {
return `
<div class=”section-header”>🖋️ Narrative Breakdown</div>
<p>${result.narrative?.summary || ”}</p>

<div class=”section-header”>👤 Character Layer</div>
<p>Name: <strong>${result.character?.name || ‘Unknown’}</strong></p>
<p>Class: <strong>${result.character?.class || ”}</strong> / ${result.character?.subclass || ”}</p>
<p>Level: ${result.character?.level || 1}</p>

<div class=”section-header”>⚔️ System Mechanics</div>
${result.mechanics?.abilities?.map(a => `
<p><strong>${a.name}</strong> – ${a.type}</p>
<p style=”opacity: 0.8;”>${a.description}</p>
`).join(”) || ”}

<div class=”section-header”>🗺️ World Data</div>
<p>Region: <strong>${result.world?.region || ”}</strong></p>
<p>Threat Level: ${result.world?.threatLevel || 5}/10</p>

<div class=”section-header”>🎨 Visual Prompt</div>
<p style=”opacity: 0.8; font-style: italic;”>${result.visual?.prompt || ”}</p>

<div class=”section-header”>📟 JSON Export</div>
<div class=”json-export”>
<pre>${JSON.stringify(result.json, null, 2)}</pre>
</div>

<div class=”branches”>
${[1, 2, 3, 4, 5, 6].map(i => `
<button class=”branch-btn” onclick=”selectBranch(${i})”>
Branch [${i}]
</button>
`).join(”)}
</div>
`;
}

function selectBranch(num) {
const commands = [
‘/branch 1 – Deepen Mechanics’,
‘/branch 2 – Expand World’,
‘/branch 3 – Narrative Progression’,
‘/branch 4 – Simulate Combat’,
‘/branch 5 – Character Expansion’,
‘/branch 6 – Dialogue Tree’
];

document.getElementById(‘commandInput’).value = commands[num – 1];
executeCommand();
}

// Allow Enter key to execute
document.addEventListener(‘DOMContentLoaded’, () => {
document.getElementById(‘commandInput’).addEventListener(‘keypress’, (e) => {
if (e.key === ‘Enter’) executeCommand();
});
});

  1. GAME ENGINE INTEGRATION
    7.1 Unity Integration (C#)
    C#
    using UnityEngine;
    using Newtonsoft.Json;

public class MythOSIntegration : MonoBehaviour {
[System.Serializable]
public class CompileResult {
public string narrative;
public Character character;
public Mechanics mechanics;
public World world;
}

async void CompileSceneFromAI(string input) {
    var response = await APIClient.PostAsync("http://localhost:3000/api/compile", 
        JsonConvert.SerializeObject(new { input }));

    var result = JsonConvert.DeserializeObject<CompileResult>(response);

    // Apply to scene
    SpawnCharacter(result.character);
    GenerateTerrain(result.world);
    ConfigureEnemies(result.mechanics);
}

void SpawnCharacter(Character charData) {
    var prefab = Resources.Load<GameObject>($"Characters/{charData.archetype}");
    var instance = Instantiate(prefab);

    var stats = instance.GetComponent<CharacterStats>();
    stats.health = charData.maxHP;
    stats.aura = charData.maxAura;
    stats.armor = charData.armorRating;
}

}
7.2 Godot Integration (GDScript)
GDScript

character.gd

extends Node

var myth_os_data = {}

func _ready():
var result = await call_api(“/api/compile”, “Generate Fire Knight”)
myth_os_data = result
apply_stats(result.character)

func apply_stats(char_data):
$Stats.max_health = char_data.maxHP
$Stats.max_aura = char_data.maxAura
$AnimatedSprite.animation = char_data.class

for ability in char_data.abilities:
    $Abilities.add_ability(ability)

async func call_api(endpoint, input):
var http = HTTPRequest.new()
add_child(http)
var response = await http.request_completed
return JSON.parse_string(response[3].get_string_from_utf8())

  1. ADVANCED FEATURES
    8.1 Faction Reputation System
    JavaScript
    class FactionSystem {
    calculateReputationChange(playerAction, faction) {
    const impacts = {
    ‘defeat_enemy’: 15,
    ‘complete_quest’: 25,
    ‘help_npc’: 10,
    ‘attack_member’: -30,
    ‘steal_from’: -40,
    ‘save_leader’: 50
    };

    return impacts[playerAction] || 0;
    }

getFactionStance(reputation) {
if (reputation > 80) return ‘Allied’;
if (reputation > 40) return ‘Friendly’;
if (reputation > 0) return ‘Neutral’;
if (reputation > -40) return ‘Wary’;
return ‘Hostile’;
}
}
8.2 Dynamic Difficulty Scaling
JavaScript
class DifficultyScaler {
calculateScaledEnemy(baseEnemy, playerLevel, regionalDifficulty) {
const scaleFactor = (playerLevel / 10) + (regionalDifficulty / 20);

return {
  ...baseEnemy,
  health: baseEnemy.health * scaleFactor,
  damage: baseEnemy.damage * scaleFactor,
  loot: this.calculateLoot(baseEnemy, scaleFactor)
};

}
}
8.3 Quest Generation
JavaScript
class QuestGenerator {
generateQuest(region, playerLevel) {
return {
id: this.generateID(),
title: this.generateTitle(),
description: this.generateDescription(),
objectives: this.generateObjectives(),
rewards: this.calculateRewards(playerLevel),
difficulty: this.calculateDifficulty(playerLevel),
region: region
};
}
}

  1. CONCLUSION & NEXT STEPS
    MYTH-OS v2.0 PRO provides a production-ready framework for:

✅ Deterministic RPG Generation – All mechanics are mathematically sound ✅ Persistent World State – Actions have lasting consequences ✅ Game Engine Integration – Direct JSON export for Unity, Godot, Unreal ✅ Scalable Architecture – From indie games to MMOs ✅ Professional Quality – Enterprise-level code organization

Future Enhancements:

Machine learning for balance optimization
Real-time multiplayer faction wars
Procedural dungeon generation
Voice-driven command system
Cross-platform mobile app
📚 REFERENCES & RESOURCES
Game Balance Resources: GDC (Game Developers Conference)
Fantasy World Building: “Wonderbook” by Jeff VanderMeer
RPG Mechanics: “Game Design Fundamentals” by Joris Dormans
JSON Schema Validation: https://json-schema.org/
Document Version: 2.0
Last Updated: 2026-03-30
Author: MythWeaver Development Team
License: Open Source (MIT)

This comprehensive whitepaper provides everything needed to build, deploy, and integrate a professional-grade RPG generation system using the Compiler Pattern. The system bridges creative narrative AI with deterministic game mechanics, enabling developers to generate entire game worlds programmatically.

Make these code changes?
whitepapers/MYTH-OS_Whitepaper.md

md

MYTH-OS: The Compiler Pattern for Systemic RPG Generation

Abstract

This whitepaper provides a comprehensive overview of MYTH-OS, a full-stack JavaScript RPG Generation Agent system based on the Compiler Pattern methodology. It addresses the challenges of procedural generation in role-playing games (RPGs) and outlines a systematic approach to creating deterministic fantasy world-building.

Introduction

Role-playing games have evolved significantly, and their procedural generation aspects play a crucial role in enhancing player experiences. The Compiler Pattern offers a structured way to implement these systems efficiently. This document will guide you through designing and building an RPG generation system using this methodology.

Architectural Overview

Components of the System

  1. Frontend: Built with React.js for an interactive user experience.
  2. Backend: Node.js and Express for server-side logic and API management.
  3. Database: MongoDB for flexible data storage.

Implementation Guide

Step 1: Setup the Environment

  • Ensure you have Node.js and MongoDB installed.
  • Initialize your project with npm init.

Step 2: Installation of Dependencies


bash
npm install express mongoose cors
Technical Specifications
Performance Requirements
Node.js version: 14.x and above
MongoDB version: 4.x and above
Code Examples
Character Generation Example
JavaScript
function generateCharacter(name) {
    return {
        name: name,
        level: Math.floor(Math.random() * 100),
        attributes: {
            strength: Math.floor(Math.random() * 20),
            agility: Math.floor(Math.random() * 20),
            intelligence: Math.floor(Math.random() * 20)
        }
    };
}
System Prompts
"Generate a quest involving a dragon that threatens the village."
JSON Schemas
Character Schema
JSON
{
    "type": "object",
    "properties": {
        "name": {"type": "string"},
        "level": {"type": "integer"},
        "attributes": {
            "type": "object",
            "properties": {
                "strength": {"type": "integer"},
                "agility": {"type": "integer"},
                "intelligence": {"type": "integer"}
            }
        }
    }
}
Integration Guides
Integration with third-party APIs can be handled via RESTful services. Aim for clear documentation of endpoints for ease of connection.

Deployment Instructions
Environment Configuration
Set up a .env file with your database URI.
Deploy using platforms like Heroku or Vercel.
Conclusion
The Compiler Pattern provides a powerful framework for RPG generation, ensuring a structured yet flexible approach to building rich fantasy worlds.

References
Procedural Content Generation in Games, Noor Shaker et al.
The Art of Game Design, Jesse Schell.

Frontend Art Submission — Gender Beyond Boundaries 👨‍🦰👩‍🦳

This is a submission for the 2026 WeCoded Challenge: Frontend Art

👨‍🦰👩‍🦳 Frontend Art Submission — Gender Beyond Boundaries

I built an interactive 3D experience using Next.js and Three.js that visually represents gender equality across professions.

The project features two avatars — a male on the left and a female on the right — dynamically showcasing 10 different professions. Alongside the visuals, contextual metadata appears, including real-world role models for each gender, reinforcing that capability and excellence are not defined by gender.

👉 Live Preview
👉 Github

💡 Inspiration

This project is a tribute to gender equality — a statement that professions, skills, and ambitions belong to everyone.

Growing up, many of us are subtly (or explicitly) told what we can or cannot become based on gender. I wanted to challenge that narrative using immersive web technology.

Each profession highlights real individuals who broke barriers, showing that talent, courage, and intelligence are universal traits. The dual-avatar system visually reinforces a simple but powerful idea:

There is no “male job” or “female job” — only human potential.

🧠 Featured Professions & Role Models

📰 Journalist

A fearless seeker of truth shaping public narratives.

  • Male: James Baldwin
  • Female: Nellie Bly

🌾 Farmer

The backbone of global food security and sustainability.

  • Male: George Washington Carver
  • Female: Karen Washington

🚒 Firefighter

A symbol of courage and selfless service.

  • Male: Patrick Hardison
  • Female: Molly Williams

💻 Software Engineer

Architects of the digital world.

  • Male: Alan Turing
  • Female: Ada Lovelace

🔧 Mechanic

Masters of machines and precision engineering.

  • Male: Henry Ford
  • Female: Patrice Banks

🏥 Nurse

The heartbeat of healthcare systems.

  • Male: James Derham
  • Female: Florence Nightingale

✈️ Pilot

Leaders navigating the skies.

  • Male: Charles Lindbergh
  • Female: Amelia Earhart

👮 Police Officer

Guardians of justice and public safety.

  • Male: August Vollmer
  • Female: Alice Stebbins Wells

🛍️ Retail Salesperson

Drivers of commerce and community connection.

  • Male: Marshall Field
  • Female: Madam C.J. Walker

🩺 Doctor

Leaders in healing and medical innovation.

  • Male: Jonas Salk
  • Female: Elizabeth Blackwell

💻 My Code

Built with:

  • Next.js for structure and performance
  • Three.js for immersive 3D rendering
  • Custom logic for dynamic avatar switching and metadata display

👉 Source Code

✨ Final Thought

This project isn’t just about visuals — it’s about perspective.

By placing male and female avatars side by side in every profession, I wanted users to feel equality, not just read about it. Technology has the power to shape narratives, and this is my small contribution toward a more inclusive one.

🚀 Performance & Optimization Note

As of this submission, I am actively working on further optimizing the asset delivery. Since high-quality Avatar GLB files can be heavy, they currently take a moment to fully render depending on the connection.

Thanks for reading! 🙌
Until next time, 🫡
Usman Awan (your friendly dev 🚀)

Kontiki, an async microservices framework in Python

Kontiki is a Python microservices framework built on AMQP (RabbitMQ) via aio-pika and asyncio. For teams familiar with Nameko, the overall philosophy will feel familiar: message-driven services on top of RabbitMQ, with RPC and events as first-class primitives. Kontiki lives in the same “family” of frameworks, while leaning into an asyncio-native implementation, a delegate-oriented service structure, and a configuration-driven runner.

Kontiki focuses on keeping service code minimal and pushing infrastructure concerns into the framework. It is open source (Apache-2.0) and the code is available on GitHub: kontiki-org/kontiki.

1. Writing a service

Kontiki encourages keeping the service class as an entrypoint layer and moving domain logic into delegates (ServiceDelegate) with setup/start/stop lifecycle hooks.

from kontiki.delegate import ServiceDelegate
from kontiki.messaging import Messenger, on_event, rpc


class MyDelegate(ServiceDelegate):
    async def setup(self):
        # initialize from self.container.config
        pass

    async def start(self):
        # optional: start background tasks / open connections
        pass

    async def stop(self):
        # optional: stop background tasks / close connections
        pass

    def do_something(self, x: int) -> int:
        return x * 2


class MyService:
    name = "compute-api"  # optional; defaults to class name
    delegate = MyDelegate()
    messenger = Messenger()  # publish events / call other services

    @rpc
    async def compute(self, x: int):
        return self.delegate.do_something(x)

    @on_event("thing_happened")
    async def on_thing(self, payload):
        await self.messenger.publish("thing_processed", {"payload": payload})

Running a service

To run a service consistently across environments, expose it as a CLI entrypoint via cli.run(...) and register it as a script:

First, define a small run() entrypoint that delegates startup to Kontiki:

# e.g. myapp.main
from kontiki.runner import cli

def run():
    cli.run(MyService, "Example Kontiki service.", version="1.0.0")

Then, expose that entrypoint as an executable command:

[tool.poetry.scripts]
my_service = "myapp.main:run"

Finally, run the service with one (or more) config files:

my_service --config config.yaml

2. Publishing and consuming events

Events are fire-and-forget. Consumers subscribe with @on_event("event_type"), and publishers emit events via Messenger.publish(...).

# Server-side (service)
class UserEventsService:
    @on_event("user.created")
    async def on_user_created(self, payload: dict):
        ...


# Client-side (standalone script)
async def publish_event_from_script():
    async with Messenger(standalone=True) as messenger:
        await messenger.publish("user.created", {"id": "u_123"})


# Client-side (from another service)
class BillingService:
    messenger = Messenger()

    @rpc
    async def create_invoice(self, user_id: str):
        await self.messenger.publish("user.created", {"id": user_id})
        return "ok"

3. Calling services with RPC

Kontiki RPC is synchronous request/reply over AMQP. On the server side, handlers are exposed with @rpc (and can return rpc_error(code, message)); on the client side, calls go through a RpcProxy.

# Server-side (service)
class RpcService:

    @rpc
    async def rpc_example(self, feature: str):
        if feature == "bad_input":
            return rpc_error("USER_INPUT_ERROR", "Invalid feature value")
        return "ok"


# Client-side (standalone script)
async def call_rpc_from_script():
    async with Messenger(standalone=True) as messenger:
        rpc_service = RpcProxy(messenger, service_name="RpcService")
        return await rpc_service.rpc_example("bad_input")


# Client-side (from another service)
class ApiGatewayService:
    messenger = Messenger()

    @rpc
    async def compute(self, feature: str):
        rpc_service = RpcProxy(self.messenger, service_name="RpcService")
        return await rpc_service.rpc_example(feature)

4. HTTP entrypoints

Kontiki can expose HTTP routes directly in the service using @http(...), optionally validating request bodies with Pydantic models and generating OpenAPI docs/Swagger UI.

class SimpleHttpService:
    http_error_handlers = {HttpExampleError: (400, "Example error occurred")}

    @http("/health", "GET", version="v1", response_model=HelloResponse)
    async def health(self, request):
        return HelloResponse(message="ok").model_dump()

5. Periodic tasks

Use @task(interval=..., immediate=...) to run periodic async work inside the service loop.

class TaskService:

    @task(interval=10, immediate=True)
    async def task_example(self):
        ...

6. Configuration: YAML merge + dot-based parameters

Running a service with multiple configuration files

Services can be started with multiple YAML files via repeatable --config (e.g. a shared base.yaml plus an environment-specific env.yaml).

# base.yaml
kontiki:
  amqp:
    url: amqp://guest:guest@localhost/

app:
  cache:
    ttl_seconds: 60
# env.yaml
app:
  cache:
    enabled: true
my_service --config base.yaml --config env.yaml

Reading parameters in delegates

Configuration values are typically loaded in setup() using dot-based paths:

from kontiki.configuration import get_parameter
from kontiki.delegate import ServiceDelegate

class MyDelegate(ServiceDelegate):
    async def setup(self):
        self.cache_ttl_seconds = get_parameter(
            self.container.config,
            "app.cache.ttl_seconds",
            60,
        )

7. Optional registry: heartbeats + degraded state

When the Kontiki registry service is running, services can register and expose operational state:

  • heartbeats at a configurable interval
  • degraded mode checks (custom logic)
  • optional event/exception tracking for visibility
from pathlib import Path


class MyService:
    @degraded_on
    def is_degraded(self) -> bool:
        required_dir = Path("/var/lib/my-service/uploads")
        return not required_dir.exists()

Engineering tooling: kontiki-tui

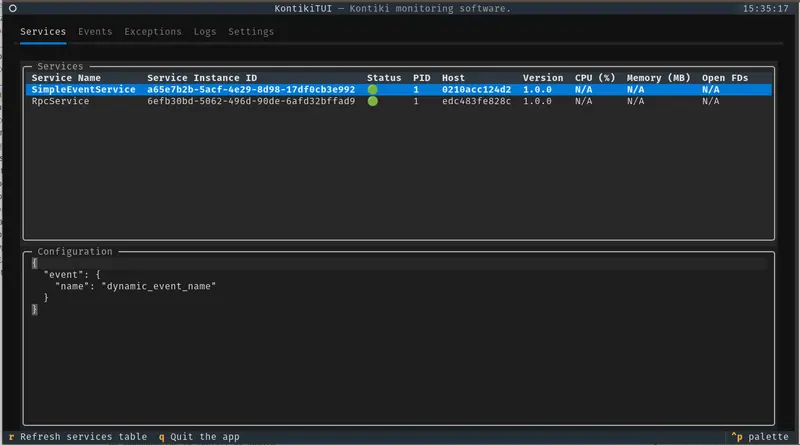
For an operator-friendly view, the kontiki-tui project (sibling repository) provides a terminal UI to inspect/operate the Kontiki ecosystem.

Conclusion

Kontiki is a good fit for asyncio-native, message-driven microservices on RabbitMQ with first-class primitives for events and RPC—without rewriting the AMQP wiring, lifecycle, and operational plumbing for every service. This article is a quick overview: Kontiki also ships advanced options around the core features (sessions, broadcast delivery, message headers, error/retry behavior, and more). This repository ships with a solid set of runnable examples: start RabbitMQ locally and run most of them from the Makefile targets (see make run-amqp and the various run-* commands).

Codacy Security Scanning: Find Vulnerabilities in Your Code

Codacy screenshot

The Short Answer

Codacy ships a solid security scanning suite that covers the major vulnerability categories most development teams care about – SAST for source code flaws, SCA for vulnerable dependencies, secrets detection for leaked credentials, and DAST for runtime issues on the Business plan. It is not a replacement for a dedicated SAST tool if security scanning is your primary concern, but for teams that want security coverage bundled alongside code quality tools at $15/user/month, Codacy delivers genuine value.

This guide walks through exactly what Codacy’s security scanning covers, which tools it uses under the hood, how to configure security quality gates for pull requests, and how it stacks up against dedicated alternatives like Snyk Code and Semgrep.

Codacy screenshot

What Security Scanning Does Codacy Include?

Codacy’s security offering is built across four layers, each targeting a different type of vulnerability or threat.

1. Static Application Security Testing (SAST)

SAST is the foundation of Codacy’s security work. It analyzes your source code without running it, looking for patterns that match known vulnerability classes. This includes the OWASP Top 10 categories – injection, broken authentication, sensitive data exposure, XML external entities, broken access control, security misconfiguration, XSS, insecure deserialization, using components with known vulnerabilities, and insufficient logging.

Codacy runs SAST on every pull request, scanning the changed files and reporting any new issues introduced in that changeset. This incremental approach is important: rather than flooding developers with every existing vulnerability in the codebase, Codacy surfaces only what changed in the current PR. Teams adopting Codacy on a legacy codebase can therefore start enforcing security standards on new code without being paralyzed by historical debt.

2. Software Composition Analysis (SCA)

Dependency vulnerabilities account for a large share of real-world security incidents, and Codacy’s SCA scans your dependency manifests – package.json, requirements.txt, pom.xml, Gemfile.lock, go.sum, and others – to find third-party libraries with known CVEs.

Each finding includes the affected library, the CVE identifier, a severity rating (critical, high, medium, low), and remediation guidance indicating which version resolves the vulnerability. SCA runs alongside SAST on every PR, meaning you get notified when a dependency update introduces a new vulnerability or when a new dependency you add is already known to be insecure.

For teams that need deeper SCA coverage – more comprehensive vulnerability databases, automated fix PRs, or granular license compliance management – dedicated tools like Snyk provide more horsepower. But for teams that want SCA as part of a broader quality and security platform, Codacy’s coverage is sufficient for most use cases.

3. Secrets Detection

Accidentally committing API keys, connection strings, private keys, and other credentials is one of the most common and damaging security mistakes developers make. Codacy’s secrets detection scans every commit and PR for patterns that match sensitive credential formats.

This includes cloud provider credentials (AWS, GCP, Azure), source code hosting tokens (GitHub, GitLab), payment processor keys (Stripe, PayPal), database connection strings, SSH private keys, JWT secrets, and many other categories. Detection runs automatically with no additional configuration required – it is on by default for every repository you connect to Codacy.

4. Dynamic Application Security Testing (DAST)

DAST is different from SAST in a fundamental way: it tests a running application rather than static code. This means it can find vulnerabilities that only appear at runtime – authentication bypasses, server configuration issues, session management flaws, and real-world exploit paths that static analysis cannot simulate.

Codacy’s DAST capability is powered by ZAP (Zed Attack Proxy) and is available exclusively on the Business plan. It requires pointing Codacy at a running instance of your application (typically a staging environment) and running a scan. This is a significant addition for security-conscious teams but is out of reach for developers on the Pro plan.

The Security Tools Running Under the Hood

One of Codacy’s architectural strengths – and one of the key things to understand about its security scanning – is that it does not build its own analyzers from scratch. Instead, it integrates well-established open-source security tools and presents their results through a unified interface. Here is a breakdown of the key security tools Codacy wraps.

Bandit (Python)

Bandit is the standard Python security linter, developed under the PyCQA umbrella. It scans Python code for common security issues including the use of hardcoded passwords, shell injection via subprocess, use of unsafe cryptographic functions, SQL injection patterns, insecure XML parsing, and assertion statements in security-sensitive code. Codacy runs Bandit automatically on Python repositories.

Brakeman (Ruby on Rails)

Brakeman is a static analysis tool specifically designed for Ruby on Rails applications. It understands Rails conventions deeply and can detect Rails-specific vulnerabilities like mass assignment, SQL injection through ActiveRecord, cross-site scripting in views, unprotected redirects, and insecure use of send and eval. For Rails teams, Brakeman’s integration in Codacy is a significant value-add.

SpotBugs and Find Security Bugs (Java)

SpotBugs is the successor to FindBugs and analyzes Java bytecode for bug patterns. The Find Security Bugs plugin extends SpotBugs with over 130 security-specific detectors covering vulnerabilities like LDAP injection, XPath injection, insecure random number generation, use of MD5 or SHA-1 for cryptography, and deserialization vulnerabilities. Codacy integrates both SpotBugs and Find Security Bugs for Java projects.

Semgrep (Multi-language)

Semgrep is a powerful pattern-matching engine that Codacy uses for cross-language security scanning. It supports JavaScript, TypeScript, Python, Java, Go, Ruby, PHP, C, C++, and more. Codacy runs Semgrep with a curated set of security rules covering injection patterns, insecure API usage, and OWASP Top 10 categories across these languages. If you also use Semgrep directly, note that Codacy’s integration runs a pre-configured subset of rules rather than the full Semgrep Registry.

ESLint Security Plugins (JavaScript/TypeScript)

For JavaScript and TypeScript, Codacy leverages ESLint with security-focused plugins including eslint-plugin-security and eslint-plugin-no-unsanitized. These catch patterns like unsafe use of innerHTML, eval, insecure regular expressions vulnerable to ReDoS, and unsafe object property access patterns. They complement the SAST rules from Semgrep to provide layered JavaScript security coverage.

PHP_CodeSniffer Security Rules (PHP)

For PHP codebases, Codacy uses PHP_CodeSniffer with security-oriented rulesets to detect common PHP vulnerabilities including SQL injection through unparameterized queries, command injection via exec and shell_exec, use of deprecated cryptographic functions, and unsafe file inclusion patterns.

Codacy screenshot

The Codacy Security Dashboard

The security dashboard is where you get the repository-level view of all open security issues. It is one of the more useful parts of Codacy’s interface for security-focused work.

Issues are organized first by severity – critical, high, medium, low, and info – and then by category. The categories map loosely to vulnerability classes: injection, authentication, cryptography, input validation, authorization, sensitive data, and so on. This categorization makes it easy to identify if your codebase has a systematic problem in a particular area – for example, a pattern of not validating user input across multiple files.

The dashboard shows historical trends, so you can see whether your security debt is growing or shrinking over time. This is useful for security program metrics and for demonstrating progress to management or compliance teams. You can filter by file path, tool, category, and date range to drill into specific areas of concern.

One practical limitation: the dashboard shows findings from the last full scan of the default branch. PR-level findings appear in the PR itself, not automatically in the dashboard until they are merged. This means the dashboard always reflects the state of production code rather than in-flight work, which is the correct behavior but worth understanding when triaging issues.

PR-Level Security Checks

The pull request integration is where most developers interact with Codacy’s security scanning day to day. When a PR is opened or updated, Codacy posts a summary comment and inline comments at the specific lines where security issues were found.

Inline comments include the issue description, the rule that triggered it, a severity label, and often a brief explanation of why the pattern is problematic and how to fix it. The quality of these explanations varies by tool – Semgrep rules tend to have the most useful fix guidance, while some of the tool-specific rules provide more terse descriptions.

The PR summary comment shows a breakdown of new issues by severity, any resolved issues from the baseline, and the overall quality gate status. If you have security quality gates configured, the comment will show clearly whether the PR passes or fails the security threshold.

Configuring Security Quality Gates

Quality gates are Codacy’s mechanism for enforcing security standards on every PR. They are configured at the repository or organization level and create pass/fail criteria that integrate with your Git provider’s branch protection rules.

For security specifically, you can configure gates such as:

  • Zero new critical severity security issues allowed
  • Zero new high severity security issues allowed
  • Security issues introduced must be zero regardless of severity
  • Maximum total open security issues across the codebase

When a quality gate fails, Codacy posts a failing status check on the PR. If you have branch protection rules set to require Codacy’s status check to pass, the PR cannot be merged until the developer resolves the blocking issues or a code owner overrides the gate.

Setting security quality gates requires thinking about what level of strictness is realistic for your team. Starting with “no new critical issues” is a reasonable baseline that prevents the most dangerous vulnerabilities from reaching production without overwhelming developers with medium and low-severity findings. You can tighten the gates over time as the team builds familiarity with the tooling.

Codacy Security vs. Dedicated SAST Tools

If your primary requirement is security scanning, it is worth understanding where Codacy’s bundled security fits on the spectrum compared to dedicated SAST tools.

Codacy vs. Snyk Code

Snyk Code is a dedicated SAST tool with a significant focus on developer experience. Its strength is real-time scanning in the IDE and deep integration with Snyk’s vulnerability intelligence. Snyk’s SCA database is larger and more frequently updated than Codacy’s, and its dependency scanning provides more actionable remediation paths including automated fix PRs via Snyk’s PR automation.

Codacy offers broader coverage in a single platform – you get quality analysis, coverage tracking, and AI review alongside security. Snyk Code offers deeper security-specific functionality. If you are trying to decide between the two, consider whether security is your primary concern (Snyk) or whether you want a consolidated platform for quality and security together (Codacy). For a detailed breakdown, see the Codacy vs Snyk comparison.

Codacy vs. Semgrep

Semgrep gives security and engineering teams full control over static analysis rules. The Semgrep Registry contains thousands of community-contributed and Semgrep-maintained rules, and you can write custom rules in Semgrep’s pattern syntax to match vulnerabilities specific to your codebase and frameworks.

Codacy uses Semgrep internally but in a pre-configured, opinionated way. You do not get access to the full Semgrep Registry or the ability to write custom Semgrep rules through Codacy’s interface. If your security requirements include custom rule development or fine-grained control over which Semgrep rulesets run on your code, running Semgrep directly is a better choice. See the Codacy vs Semgrep comparison for more detail.

For a broader comparison of security scanning tools, the best SAST tools guide covers the full landscape.

CodeAnt AI: A Modern Alternative Worth Considering

If you are evaluating Codacy’s security scanning, CodeAnt AI is worth putting in the comparison set. It is a Y Combinator-backed platform priced at $24-40/user/month that bundles several capabilities that Codacy either lacks or offers only on higher-tier plans.

The security capabilities in CodeAnt AI include SAST with AI-powered analysis of security findings, secrets detection, and – notably – IaC security scanning for infrastructure-as-code configurations. Terraform, CloudFormation, and Kubernetes manifests are increasingly part of the attack surface for modern applications, and most static analysis platforms do not cover them well. CodeAnt AI’s IaC security fills that gap directly.

Beyond security, CodeAnt AI combines AI PR review with DORA metrics tracking and code health analytics. The AI review component is more sophisticated than Codacy’s AI Reviewer, offering deeper contextual analysis of security issues and their business risk rather than just pattern-match detections. For teams where AI-powered review and infrastructure security are priorities, CodeAnt AI is a compelling alternative to Codacy, though at a higher price point per user.

Codacy remains the stronger choice if you need broad language coverage (49 languages vs. CodeAnt AI’s narrower support), mature SCA with dependency scanning, or the lower $15/user/month entry price. The right choice depends on whether your team prioritizes language breadth or AI depth and infrastructure coverage.

Supported Languages for Security Scanning

Security scanning in Codacy is available for the major languages through the integrated tool ecosystem:

  • Python – Bandit, Semgrep, Pylint security rules
  • Java – SpotBugs, Find Security Bugs, PMD security rules
  • JavaScript and TypeScript – ESLint security plugins, Semgrep
  • Ruby – Brakeman (Rails), Semgrep
  • PHP – PHP_CodeSniffer security rules, Semgrep
  • Go – Semgrep, staticcheck
  • C and C++ – Semgrep, Cppcheck
  • Kotlin – Detekt security rules
  • Scala – Scalastyle, Semgrep
  • Swift – SwiftLint with security configurations

Coverage depth varies. Python (via Bandit) and Java (via SpotBugs and FindSecBugs) have the most mature security analysis. JavaScript and TypeScript benefit from both ESLint plugins and Semgrep. Languages covered primarily through Semgrep depend on the quality of available Semgrep rulesets for that language.

Setting Up Security Scanning in Codacy

Getting Codacy’s security scanning running takes under 15 minutes for most teams.

Step 1: Connect your repository. Sign into Codacy with your GitHub, GitLab, or Bitbucket account and authorize the integration. Select the repositories you want to analyze. Codacy triggers an initial full scan automatically.

Step 2: Review initial findings. The first scan will surface existing security issues across the codebase. Do not try to fix everything immediately. Use the security dashboard to understand the shape of your current security debt – which categories are most common, which files have the most issues, and what the severity distribution looks like.

Step 3: Configure code patterns. In the repository settings, go to Code Patterns to review which security rules are enabled. The defaults are reasonable for most teams, but you may want to disable rules that generate too many false positives for your specific codebase, or enable additional rules in tool categories that are relevant to your tech stack.

Step 4: Set quality gates. Configure security quality gates to fail PRs that introduce new critical or high-severity security issues. Start with a threshold that is achievable – “no new critical issues” is a good starting point. Tighten over time.

Step 5: Enable branch protection. In your Git provider’s repository settings, require the Codacy status check to pass before PRs can be merged. This enforces the quality gates in the development workflow.

Step 6: Review PR feedback. From this point forward, security findings from new PRs will appear as inline comments and a summary on each pull request, and the quality gate will reflect your configured security standards.

Practical Tips for Getting the Most Out of Codacy Security

Triage your baseline before enforcing gates. If you connect Codacy to a large existing codebase and immediately enable strict security gates, your development velocity will grind to a halt while the team addresses historical findings. Take a week to triage the baseline, mark pre-existing issues as accepted or false positives, and then enable gates that only apply to new code.

Use the category view to find systemic issues. If you see 30 “SQL injection” findings across 15 files, that is not just 30 individual bugs – it is a systemic pattern suggesting a shared anti-pattern in how your team writes database queries. The category grouping in the dashboard helps surface these systemic issues.

Supplement with secrets scanning in CI. While Codacy’s secrets detection is good, adding a dedicated secrets scanning step in your CI pipeline (using a tool like truffleHog or git-secrets) provides a second layer of defense and runs even on commits that go directly to the main branch.

Review the SCA findings regularly. New CVEs for existing dependencies are discovered constantly. Make it a habit to check the SCA section of the Codacy dashboard weekly and keep your dependency manifests current. Codacy will alert you to new vulnerabilities in existing dependencies when it rescans the default branch.

Consider Semgrep for custom rules. If your codebase has security concerns specific to your business logic or internal APIs, Codacy’s pre-configured Semgrep rules will not catch them. In those cases, running Semgrep directly alongside Codacy – with custom rules tuned to your codebase – provides the coverage that Codacy cannot.

Further Reading

If you are evaluating Codacy more broadly or comparing it to alternatives, these related guides cover the adjacent territory:

Conclusion

Codacy’s security scanning is a genuine and capable component of its platform – not a checkbox feature. The combination of SAST via integrated tools like Bandit, Brakeman, SpotBugs, and Semgrep; SCA for dependency CVEs; and secrets detection on every PR gives development teams meaningful security coverage without requiring a separate tool subscription.

Where Codacy falls short of dedicated SAST tools is in customizability and depth. You cannot write custom Semgrep rules through Codacy, the SCA database is smaller than Snyk’s, and DAST is gated behind the Business plan. Teams with serious security requirements – regulated industries, security-sensitive products, or active bug bounty programs – should layer Codacy with a dedicated SAST or SCA tool to fill the gaps.

For the majority of development teams, though, Codacy’s security scanning represents excellent value as part of its all-in-one offering. The PR-level security checks, configurable quality gates, and security dashboard give teams the visibility and enforcement they need to prevent the most common vulnerabilities from reaching production without the operational overhead of managing a separate security toolchain.

Frequently Asked Questions

What security vulnerabilities does Codacy detect?

Codacy detects a broad range of security vulnerabilities including SQL injection, cross-site scripting (XSS), insecure deserialization, hardcoded credentials, path traversal, XML injection, insecure cryptography, and dozens of other OWASP Top 10 and CWE patterns. It runs SAST, SCA for dependency CVEs, and secrets detection on every PR. The Business plan also adds DAST for runtime security testing.

Does Codacy cover the OWASP Top 10?

Yes, Codacy’s security scanning covers all OWASP Top 10 categories including injection flaws, broken authentication, sensitive data exposure, XML external entities, broken access control, security misconfiguration, cross-site scripting, insecure deserialization, vulnerable components, and insufficient logging. Coverage depth varies by language depending on which underlying analysis tools are integrated.

Which security tools does Codacy integrate?

Codacy integrates a range of specialized security tools including Bandit for Python, Brakeman for Ruby on Rails, SpotBugs for Java, FindSecBugs for Java bytecode, Semgrep for cross-language pattern matching, ESLint security plugins for JavaScript, PHP_CodeSniffer security rules for PHP, and more. These tools run under a unified configuration and reporting layer.

How does Codacy security scanning compare to Snyk?

Codacy offers a broader security bundle at $15/user/month including SAST, SCA, secrets detection, and DAST (Business plan), whereas Snyk specializes deeply in SCA and vulnerability databases. Snyk’s dependency scanning is more comprehensive with a larger vulnerability database and better remediation guidance. Codacy is better if you want all-in-one quality plus security. Snyk is better if dependency security is your primary concern.

How does Codacy compare to Semgrep for security?

Codacy uses Semgrep as one of its integrated engines, so it inherits Semgrep’s cross-language pattern matching capabilities. However, running Semgrep directly gives you full control over custom rules, rulesets from the Semgrep Registry, and deeper configuration. Codacy wraps Semgrep in a pre-configured way that is easier to set up but less customizable than running Semgrep standalone.

Can Codacy security scanning block pull requests?

Yes. Codacy supports quality gates for security that can be configured to fail the PR status check if security issues above a certain severity are introduced. You can require that new PRs add zero critical or high-severity security issues before merging, enforced through GitHub, GitLab, or Bitbucket branch protection rules.

Does Codacy detect secrets and API keys?

Yes, Codacy includes built-in secrets detection that scans commits and pull requests for exposed API keys, tokens, passwords, connection strings, private keys, and other sensitive credentials. It runs automatically on every scan without additional configuration and can be tuned to reduce false positives for common patterns.

What is the Codacy security dashboard?

The Codacy security dashboard provides a repository-level view of all open security issues, organized by severity (critical, high, medium, low, info) and category (injection, cryptography, authentication, etc.). It tracks security debt over time, shows which issues are new versus pre-existing, and provides filtering by file, category, and tool. It is available on the Pro and Business plans.

Is Codacy good for finding vulnerabilities in dependencies?

Codacy includes SCA (Software Composition Analysis) that scans dependency manifests like package.json, requirements.txt, pom.xml, Gemfile.lock, and others for known CVEs. It provides severity ratings and remediation suggestions. For teams that need deeper SCA with more comprehensive vulnerability databases and automated fix PRs, dedicated tools like Snyk or Dependabot may be preferable.

What is CodeAnt AI and how does it compare to Codacy for security?

CodeAnt AI is a Y Combinator-backed AI code health platform priced at $24-40/user/month that bundles SAST, secrets detection, IaC security (for Terraform, CloudFormation, Kubernetes), AI PR review, and DORA metrics. It offers deeper AI-powered security review than Codacy and adds infrastructure-as-code security coverage. Codacy covers more languages and has more mature SCA. CodeAnt AI is better for teams prioritizing AI-powered security review and IaC coverage.

How do I configure security rules in Codacy?

Codacy lets you configure security rules through the Code Patterns settings in your repository dashboard. You can enable or disable specific rules from each integrated tool, adjust severity levels, and add file exclusions. For Semgrep rules specifically, you can add custom rulesets via the Codacy configuration file (.codacy.yml) in your repository root.

Does Codacy security scanning work on every commit?

Codacy runs security scans on every pull request by default. It can also be triggered on commits to the main branch. The analysis focuses on changes introduced in the current changeset, though the security dashboard shows cumulative findings across the entire codebase from the last full repository scan.

Originally published at aicodereview.cc

Why Every AI Tool You Use Forgets You (And How I Fixed It)

Open Claude Desktop. Explain your preferences. Switch to Cursor. Explain them again. Open a new chat tomorrow. Start from zero. Again.

Every AI tool today treats you like a stranger. Not because the models can’t remember – because nothing connects them. There’s no shared memory, no persistent identity, no accumulated context. Each session is a blank slate.

I kept running into this while using AI coding assistants and desktop clients across my workflow. The tools are powerful individually, but collectively they have amnesia. The same questions, the same corrections, the same context-setting ritual, every single time.

So I built GroundMemory.

What it is

GroundMemory is a persistent memory layer for AI agents. It runs as an MCP server (or Python library) that any MCP-compatible tool can connect to – Claude Desktop, Cursor, Cline, Windsurf, Claude Code, Open WebUI, n8n, and more.

Once connected, your agent has:

  • Long-term memory (MEMORY.md) – facts, preferences, decisions that survive forever
  • A user profile (USER.md) – who you are, how you work, what you care about
  • Agent instructions (AGENTS.md) – how the AI should behave with you
  • An entity relationship graph (RELATIONS.md) – people, projects, teams, and how they connect
  • Daily logs (daily/YYYY-MM-DD.md) – session-by-session context

At every session start, all of this is injected into the agent’s context. Between sessions, the agent can search across everything using hybrid BM25 + vector search.

The key insight: one identity, every tool

The part that changed things for me wasn’t just “memory for one assistant.” It was connecting multiple tools to the same GroundMemory server.

Claude Desktop knows my communication preferences. Cursor knows my tech stack and architectural decisions. Cline knows the tasks I’m working on this week. And they all share that knowledge because they all read from and write to the same workspace.

You stop being a stranger every time you open a different tool.

Zero-setup, local-first

GroundMemory runs entirely on SQLite with FTS5 in its default mode. No API key, no GPU, no cloud service, no external dependencies. Install and run:

pip install groundmemory && groundmemory-mcp

Connect any MCP client to http://127.0.0.1:4242/mcp and you’re done.

Want vector search? Plug in any OpenAI-compatible embedding endpoint (OpenAI, Ollama, LM Studio) or use local sentence-transformers. The BM25-only mode always works as a fallback.

Everything is Markdown

All memory is stored as human-readable Markdown files in a local directory. You can browse them, edit them manually, version them with Git. Nothing is opaque. If the agent writes something wrong, you open the file and fix it.

How it compares

I looked at every major memory solution in this space before building this. Mem0, Letta, memsearch, Zep – they all solve parts of the problem, but none of them hit the combination I needed:

  • Zero-setup (no API key to get started)
  • Local-first and offline-capable
  • Human-readable Markdown storage
  • Structured memory tiers (not a flat semantic store)
  • MCP-native (not SDK-first with MCP bolted on)
  • Framework-agnostic (just infrastructure, not a framework)

There’s a detailed comparison table in the repo README.

Try it

It’s MIT licensed, has 449 tests, and the full docs cover everything from embedding providers to workspace isolation to the Python API.

I’d genuinely love feedback – especially from people using multiple MCP tools in their workflow. What would you want your AI to remember?

From Requirement to git push : UC-TeamSpace x UC-TaskManager Work Pipeline Automation Demo

Why I Built This

The reason I created a sub-agent called uc-taskmanager was simple: when I just gave instructions and handed off requirements, the only thing left after development was the code itself. There was no trace of what was analyzed, what decisions were made, or what was modified. Nothing was recorded.

So I built a sub-agent that runs inside Claude Code, broke the process into stages, and made each stage produce deliverables as output.

Then I realized — if this workflow only runs through the Claude Code CLI, it wouldn’t be accessible to most people. So I thought: what if you could just enter a requirement, review it, approve it, and hit execute — and the sub-agent would run automatically, with all results recorded? That’s how UC TeamSpace was born.

There’s still a long road ahead. I’ve already added a Specifier agent to uc-taskmanager that takes requirements written in plain human language and turns them into detailed specifications for review. But I haven’t integrated that into UC TeamSpace yet.

I’m the kind of person who wants to be lazy. But every time I save some time by building something like this, I end up thinking of the next thing to build. When will I finally get to be lazy? When I’m in the grave, maybe?

Register a single requirement, and AI agents automatically handle analysis → planning → implementation → verification.
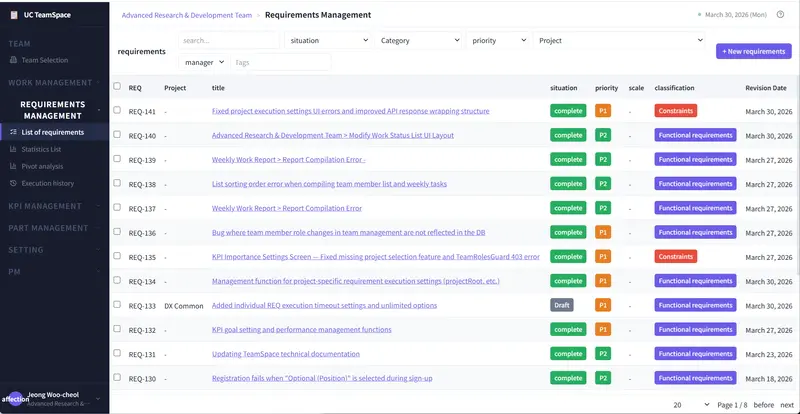
This post walks through the entire process of handling REQ-133 in a live UC TeamSpace instance, with screenshots.

Background: Why This Pipeline Exists

The most time-consuming phase in software development is the transition from “interpreting requirements → design → implementation.” Reading requirement documents, identifying the scope of impact, decomposing work, and writing code demands significant time and focus — even from senior developers.

UC TaskManager automates this transition with a 6-Agent SDD (Spec-Driven Development) pipeline:

Specifier → Planner → Scheduler → Builder → Verifier → Committer

UC TeamSpace integrates this pipeline with a web-based requirements management system, enabling the entire lifecycle — from requirement registration to code commit — to be managed within a single UI.

In this post, we’ll show how a single functional requirement (REQ-133) flows from registration to completed implementation, illustrated with 10 screenshots.

Demo Target: REQ-133

Field Value
REQ ID REQ-133
Title Added individual REQ execution timeout settings and unlimited options
Project DX Common
Priority P1
Category Functional requirements
Author UC Jung
Date written 2026-03-23

Requirement summary: Currently, execution timeouts can only be set at the CliProfile level (default 30 minutes), and it is not possible to specify different timeouts per individual REQ or run them indefinitely. For large-scale WORKs such as KPI calculations, execution cannot complete within 30 minutes, causing repeated timeout failures.

Step 1. Requirement Registration — Draft

REQ-133 is authored in the Requirements Management screen. The status is Draft.

The requirement body is written in a structured markdown format:

  • Outline: Overall summary
  • Current problem: Current issues (4 specific problems listed)
  • Requirements: 3 concrete requirements

    1. Individual REQ Timeout Settings — Add a timeoutMinutes field per REQ
    2. Unlimited Option — Execute without timeout when timeoutMinutes = 0 or null
    3. Priority System — REQ individual setting > CliProfile setting > Default (30 min)

This structured requirement becomes the direct input for the AI agents. The quality of the requirement directly determines the quality of the auto-generated code.

Step 2. Managing Requirements in the List View

This is the requirements list screen. Requirements from REQ-141 to REQ-130 are displayed, with each item’s status (situation), priority, and classification visible at a glance.

REQ-133 is currently in Draft status, assigned to the “DX Common” project. Most other REQs are already in complete status — items that have been processed through this pipeline.

Step 3. Review Request and Approval — Waiting for Execution → Approved

From the Draft state, submitting a Request for review transitions the status to Waiting for execution. A reviewer checks the completeness and feasibility of the requirement.

Once the review passes, the status changes to Approved, and the ▶ Execution Request button becomes active in the top bar. The requirement is now ready for AI pipeline execution.

Step 4. Execution Settings — Specifying the Project Root Path

Clicking the ▶ Execution Request button opens the execution settings dialog.

The key setting is the Project root path. This path (/home/pntadmin/rnd/uc-teamspace) points to the actual project directory where Claude Code CLI will operate. All pipeline agents read, analyze, and modify source code relative to this path.

Clicking ▶ Execution Request starts the pipeline.

Step 5. Pipeline Execution — Execution Monitor

5-1. Start: SPECIFIER Phase

The Execution Monitor displays the pipeline progress in real time.

0000 [2026-03-30 13:39:51] CLAIM START
0001 [RUNNER] Start Claude Code auto-run

The system claims the requirement, and Claude Code begins auto-execution. The [RUNNER] Delivery prompt includes the full requirement body, list of files to modify, execution environment info, and callback API details.

The Execution Information section at the bottom shows execution metadata:

  • Execution ID: cmncp8juo000...
  • Performer: UC Jung
  • Start time: March 30, 2026, 1:39:51 PM
  • Project path: /home/---------/rnd/uc-teamspace
  • Maximum turns: 50
  • Timeout: 180 minutes

5-2. Progress: SPECIFIER DONE → PLANNER START

Once the SPECIFIER finishes analyzing the requirement (SPECIFIER DONE), the PLANNER phase starts automatically.

0005 [2026-03-30 13:43:16] [SPECIFIER][REQ-133] DONE
0006 PLANNER REQ-133 START

At each stage transition, progress is reported back to UC TeamSpace in real time via the callback API:

POST http://192.168.0.101/api/v1/cli-executions/{id}/callback

SCHEDULER → BUILDER → VERIFIER → COMMITTER then execute sequentially, with each agent receiving the previous agent’s output as input.

Step 6. Execution Results — Result Document

When the pipeline completes, the Result document tab displays all deliverables.

The right panel shows the result document tree:

WORK-148 (2026. 3. 30. 1:51:30 PM)
├── PLAN.md
├── TASK-00 (Plan) / TASK-00 (Result)
├── TASK-01 (Plan) / TASK-01 (Result)
└── TASK-02 (Plan) / TASK-02 (Result)

The current view shows the details of TASK-01: Modify Backend Logic:

Scope:

  1. DTO modification — Add timeoutMinutes field to CreateRequirementDto / UpdateRequirementDto
  2. Execution service logic — Apply REQ > DTO > CliProfile > default (30 min) priority in cli-execution.service.ts
  3. Cleanup Service — Exclude executions with timeoutMinutes=0 from stuck checks in execution-cleanup.service.ts
  4. Runner — Skip timer registration when timeoutMinutes=0 in runner.ts, null-safe clearTimeout handling

The Files table shows each target file with its action (MODIFY) and description in a structured format. The AI agents automatically modify code according to this plan, verify it, and commit the changes.

Step 7. Result Review — Awaiting Review

After pipeline execution completes, the status transitions to Awaiting review. Three action buttons appear at the top:

  • Review rejected — Reject if the deliverables are insufficient
  • Review and approval — Approve the review, authorize code merge
  • Forced completion — Force-complete the process

The reviewer examines the PLAN and each TASK Result in the Result document, reviews the actual code changes, and decides to approve or reject.

REQ-133 also appears as Awaiting review in the requirements list, giving the entire team visibility into its progress.

When Review and approval is selected, the corresponding WORK automatically performs a git push and its status transitions to COMPLETED. In other words, a single approval from the reviewer pushes the code to the repository and finalizes the work.

Complete Workflow Summary

[Draft] → [Request for Review] → [Waiting for Execution]
                                         ↓
                                    [Approved]
                                         ↓
                                  [Execution Request]
                                         ↓
                              ┌─── Execution Monitor ───┐
                              │  SPECIFIER → PLANNER     │
                              │  → SCHEDULER → BUILDER   │
                              │  → VERIFIER → COMMITTER  │
                              └──────────────────────────┘
                                         ↓
                              [Awaiting Review]
                                    ↓           ↓
                            [Approved]    [Rejected]
                                ↓
                           [Complete]

Key Takeaways

1. The Requirement IS the Design Document

Structured requirements registered in UC TeamSpace become the direct input for AI agents. There is no need for separate design documents or manual work decomposition. Since the clarity of the requirement directly determines the quality of the output, writing a good requirement becomes the most important development activity.

2. Real-Time Monitoring with Callback-Based Tracking

The Execution Monitor lets you see the start/completion of each agent phase in real time. Callback APIs enable integration with external systems. If execution stalls or something goes wrong, you can immediately identify it and halt with Stop execution.

3. Structured Deliverables with Full Traceability

All pipeline deliverables (PLAN.md, per-TASK Plan/Result) are stored linked to their originating requirement. You get complete traceability: who, when, for which requirement, and what code changes were made.

4. Human Judgment Where It Matters

The pipeline automates “analysis → planning → implementation → verification,” but final approval remains a human decision. The Awaiting review stage, where a reviewer checks the code and decides to approve or reject, maintains the balance between AI automation and human judgment.

Results by the Numbers (It’s guessing.)

Metric Before (Manual) After (Pipeline) Improvement
Team size 3 people 1 (senior) 67% reduction
Duration 2.5–3.5 weeks 3–5 days 80%+ shorter
Cost ~11.9M KRW ~1.9M KRW 84% reduction
M/M Baseline — 90% reduction

Based on senior developer rate premium of 1.5–1.8×, including 3–5 verification cycles

Closing Thoughts

What this demo shows is not just automated code generation. It’s the automation of the entire development lifecycle: requirement management → AI pipeline execution → code review → approval.

UC TeamSpace manages “what to build,” and UC TaskManager executes “how to build it.” Developers focus on improving the quality of requirements, and AI faithfully implements them.

Vibe Coding is fast and intuitive, but it has fundamental limitations: no artifact management, skipped quality verification, and zero reproducibility. UC TeamSpace × UC TaskManager addresses these problems head-on. On top of an automated development process, anyone can perform development through a web service alone — without ever knowing Claude Code CLI — and every development artifact is stored without exception, linked to its originating requirement.

Found errors in the results? Test during the review stage, register the discovered issues as new requirements, and run the pipeline again. Sure, complex requirements may produce many errors in a single execution. But the same thing happens when human developers do it too. The difference is that in this pipeline, bug fixes follow the exact same automated process, and even that process is recorded as deliverables.

Do you really need to learn Claude CLI or the terminal? Just a browser — write a requirement, click a button, review the results. What do you think?

UC TeamSpace is currently in use internally but has not been open-sourced yet. There are still rough edges from all the experimental development, so it needs more polish. I plan to open-source it once things are more settled.

UC TaskManager: GitHub | npm

Author: UC Jung ([email protected])

A New Way to Look at “Failures”

Pursuing Correctness as Developers

As developers, we are trained from school to prioritize correctness. We focus on logic, clean architecture, and passing tests because, in code, being “right” leads to success while being “wrong” leads to failure. Over time, this conditioning causes us to tie our self-worth to being correct, which can become a major hurdle when we transition into building products for the real world.

When we start creating content or apps, the predictable link between effort and results often disappears. We might build something technically perfect that nobody uses, or write something insightful that nobody reads. This feels like a failure in the traditional sense, but in the market, “errors” aren’t signs of being wrong—they are simply data points.

A World with no Predefinded Correctness

High-performing developers often fall into a trap where they view a lack of traction as a personal flaw. In programming, a bug is a mistake to be fixed, but in entrepreneurship, being wrong is the primary way you learn. It is important to shift our mindset from “I failed” to “That experiment didn’t land,” recognizing that frequent failure is a necessary part of the process.

This requires a new definition of confidence. True confidence isn’t the belief that you will always succeed; it’s being okay regardless of the outcome. While developers are used to seeing output as validation, we must learn to see it as an experiment. You can care deeply about the work without letting the market’s reaction judge your personal worth.

A Billion Dollar Product Emerges from Failures

A classic example of this is the origin of Twitch. Justin Kan initially launched Justin.tv to stream his life 24/7, which didn’t succeed as a mainstream concept. However, instead of taking it as a personal failure, he noticed users were interested in the streaming technology itself—specifically for gaming. By viewing the “failed” project as market feedback rather than a dead end, he was able to pivot into a billion-dollar company.

Mindset Shift

Ultimately, we must undergo an identity shift: we are no longer someone who proves value by being right, but someone who creates value by running experiments. This means shipping imperfect things and accepting that we will be ignored or wrong often. By launching/publishing often and observing, we turn failures into data points that fuel long-term growth.

Introduction to RAG (Retrieval-Augmented Generation)

I’ve been diving into Generative AI lately, and one thing is clear: if you’ve spent any time with LLMs, you’ve probably run into their limitations. You ask an LLM a highly specific question about a new software library, your company’s internal documents, or breaking news, and it either politely declines to answer or confidently makes up a complete lie.

The LLMs don’t know about the recent information because they are limited to knowledge available till the time they were trained. And they don’t know about your company’s internal info or documents because they were never trained on them and it is not safe because anyone with access to that model can get your internal information.

So, if you want the LLM to answer the questions based on information or data you provide to it without making it available publicly, how will you do it? Well there are plenty of ways by which you can make this possible. The ways are:

  1. Fine-tuning: With the fine-tuning you can train the existing AI model on your private data and users can then ask questions based on that data. It is a high computation task, time consuming and is very costly.

  2. Large Context Window Prompting: You provide all the information in your prompt and tell the LLM to answer based on your provided data only.

Although these methods can work they have their own limitations. Fine-tuning the LLM on your data is very costly and it requires high resources for computation and if your information is updated you have to fine-tune again which makes it an even more expensive approach. The LLMs have limited context window and when you query a LLM, you are not only sending a query to the user, you also send other stuff like system prompt and chat history along with your query. So, if you give large no. of information or data in prompt, you might hit the context window limit

Now, we need a solution which is cost and computation efficient and you can easily update your information without hitting the context window limit. This is where RAG comes into the picture.

What is RAG?

Retrieval-Augmented Generation (RAG) is an AI framework that improves LLM accuracy by fetching relevant, up-to-date information from external, trusted sources (like databases or company documents) before generating a response. It prevents misinformation (“hallucinations”) by grounding the answer in verified data rather than relying solely on training data.

The RAG is implemented in two phases:

  1. Indexing Phase: Indexing phase involves gathering the information or documents, generating embeddings and storing it in vector stores or vector DB.

  2. Retrieval Phase: This phase involves retrieving the relevant information from vector store or DB and providing it to LLM for generating response based on the user’s query.

Imagine you are hosting a major award show and you have a massive script that contains every single detail. This script includes the names of all the winners, the order of every performance, and every word you need to say. The problem is that the script is far too long for you to memorize entirely, and carrying the whole book on stage is too clumsy when you need to find a specific name quickly.

To solve this, you go through the script and pick out the most important facts to write on small cue cards. Each card contains just one specific piece of information, like the winner of a single category. You keep these cards organized in a small box so you can grab the right one at the right moment. When it is time to announce the Best Actor award, you don’t flip through the whole script. You simply pull out the specific cue card for that award, read the name, and announce it to the crowd.

This process is exactly how RAG works. The long script represents your massive collection of data or documents. The difficulty of memorizing that script is the same as the limit on how much information an AI can “remember” or process at once. Breaking the script down into small cue cards is the same as turning your documents into small chunks. Storing those cards in a box is like putting those chunks into a vector store. Finally, finding the right card and reading the winner’s name is the same as the AI finding the most relevant piece of information and using it to give you a perfect answer.

Components of RAG

A RAG pipeline consists of various components which makes the implementation of indexing phase and retrieval phase possible.

Document Ingestion & Indexing: This is responsible for gathering the information or documents from various sources and loading them.

Text Splitters: This is a crucial part of a RAG pipeline because this is responsible for dividing your large documents into smaller and manageable chunks. If we don’t convert large documents into small chunks it will not give us good results at the time of retrieval.

Vector Embeddings: This phase involves converting these small chunks into vector embeddings with the help of embedding models. This will help us to capture the semantic meaning of our texts.

Vector Stores & VectorDB: Stores embeddings and enables similarity search for fast information retrieval.

Retriever: Finds and returns the most relevant chunks from the database based on query similarity.

Prompt Augmentation Layer: Combines retrieved chunks with the user’s query to provide context to the LLM.

The Output: The LLM reads the context and provides highly accurate, hallucination-free answers.

Disadvantages of RAG

From the above discussions the advantages of RAG is clear but everything has its own limitations and disadvantages, and so does RAG. Here are some key disadvantages of RAG:

  • Retrieval Dependency and Quality: RAG depends entirely on the retriever component. If the retriever fetches irrelevant, outdated, or incomplete data, the LLM will generate poor-quality, inaccurate, or “hallucinated” answers.

  • Performance and Latency Bottlenecks: The extra step of searching a database (vector retrieval + generation) increases latency, making it unsuitable for some real-time applications.

  • System Complexity and Maintenance: Implementing and maintaining a RAG system involves managing databases, embedding models, and retrieval techniques. Updating knowledge bases requires complex re-indexing and re-embedding.

  • Data Security and Privacy Risks: RAG systems may expose sensitive or proprietary internal data to unauthorized users if access controls are not robustly implemented.

  • Contextual Understanding Failures: RAG systems can struggle with complex, interdisciplinary queries or connecting disparate pieces of retrieved information, leading to incoherent outputs.

  • Cost: Running RAG systems can be expensive, requiring both vector storage infrastructure and increased compute for the retrieval and generation processes

  • Chunking Errors: Improperly splitting documents can cause vital information to be missing or disjointed.

  • Debugging Difficulties: Due to the multiple moving parts (retriever + LLM), identifying the root cause of a poor answer is complex.

Conclusion

In short, RAG is a practical way to make AI smarter and more useful for your specific needs. Instead of spending a lot of time and money trying to “teach” an AI everything from scratch, RAG simply gives the AI the ability to look up facts from your own private documents before it answers a question, much like taking an open-book test.

Announcing LightningChart .NET 12.5.1

LightningChart-.NET-12.5.1-Refined-LegendBoxes

In this release, we focused on improving current features, including LegendBox and PrintPreview, adding new properties to ViewXY, improving .NET Trader’s behavior, and more.

Read the full release note

LegendBox

We are introducing a refined LegendBox rendering that harmonizes all XY, 3D, Polar, Pie3D, and Smith views. We have added new features for LegendBox, including the new VerticalTitlesGap property to control the minimum gap between titles. Furthermore, LegendBox now supports titles with multiple lines, and the mouse events over the LegendBox have more detailed information.

Below is an example of LegendBoxes with multiple line titles, and a normal versus a reduced vertical gap.

LightningChart-.NET-12.5.1-Refined-LegendBoxes

Printing and PrintPreview

Now in WinForms, the PrintPreview dialog is available in several languages, including English, German, and Finnish. We have also slightly changed the printing dialogue UI, and users can now control which items to show and which default values are set. Below is an example of the improved PrintPreview dialog window:

LightningChart-.NET-12.5.1-PrintPreview

ViewXY: new AutoPadding property

We are introducing the new AutoPadding property for ViewXY, which is the padding for PXs that controls edges, such as outer edges or the rim of a chart, which encloses ViewXY margins.

AutoPadding can be used when Margins are auto-adjusted (AxisLayout.AutoAdjustMargins is enabled). Chart objects like Annotations and LegendBoxes can be placed in the padded area. AutoPadding is a padding structure in WinForms and a thickness structure in WPF. Below is a simple ViewXY.AutoPadding example where the padded area is pseudo-colored differently (in grey) for clarity (with Annotation help).

LightningChart-.NET-12.5.1-AutoPadding

Other improvements

  • Improved .NET Trader behavior: Band’s border now has an inner, outer, and none BorderType property
  • Added support for 24-bit and 32-bit WAV audio files
  • Improved handling of D3DImage failure

Get Started with LightningChart .NET