Exception Handling in Java

What is an Exception?

An exception is an event that disrupts the normal execution of a program.

Example:

int a = 10 / 0;

Output:

ArithmeticException

Here, dividing by zero causes an exception.

Exception Handling

Exception handling is a mechanism used to handle runtime errors so the program does not terminate suddenly.

It allows the program to continue execution normally.

Why Exception Handling is Used

Without exception handling:

  • Program stops immediately when an error occurs.

With exception handling:

  • Error can be handled properly.
  • Remaining code can continue executing.

Example:

class Test {
    public static void main(String[] args) {

        System.out.println("Start");

        int a = 10 / 0;

        System.out.println("End");
    }
}

Output
Start
Exception in thread "main" java.lang.ArithmeticException

End will not execute.

try-catch in Java

  • try-catch is used to handle exceptions.

Syntax

try {
    // risky code
}
catch(ExceptionType e) {
    // handling code
}

Example of try-catch

class Test {
    public static void main(String[] args) {

        try {
            int a = 10 / 0;
        }

        catch(ArithmeticException e) {
            System.out.println("Cannot divide by zero");
        }

        System.out.println("Program continues");
    }
}

Output:

Cannot divide by zero
Program continues

Real-Time Example

ATM application:

  • If wrong PIN is entered,program should show error message instead of stopping.

  • Banking apps, websites, and mobile apps use exception handling to avoid crashes.

Building a Secure Real-Time Messaging App with .NET 8 and Angular 18

A deep dive into JWT authentication, AES-256-GCM encryption, SignalR, and production security patterns.

Introduction

Real-time messaging apps are everywhere, but most tutorials gloss over the hard parts — the security. In this post I’ll walk you through SecureChat, a production-grade messaging app I built with .NET 8 and Angular 18. By the end you’ll understand:

  • How to encrypt messages at rest using AES-256-GCM
  • How to build a JWT + rotating refresh token authentication flow
  • How to wire up SignalR with a Redis backplane for real-time delivery
  • How to implement a silent token refresh interceptor in Angular
  • How to layer in rate limiting, security headers, and an audit trail

The full source is on GitHub: github.com/naimulkarim/SecureChat

Architecture Overview

Before we dive into code, here’s the full picture:

┌─────────────────────────────────────────────┐
│             Angular 18 Frontend             │
│   Auth guard · Chat module · JWT interceptor│
└──────────────────┬──────────────────────────┘
                   │ HTTPS + WSS (TLS 1.3)
┌──────────────────▼──────────────────────────┐
│              .NET 8 Web API                 │
│  Auth API · Messages API · SignalR Hub      │
│  Rate limiting · JWT · Security headers     │
└────┬──────────────────┬───────────────┬─────┘
     │                  │               │
┌────▼────┐     ┌───────▼──────┐  ┌────▼─────┐
│SQL Server│     │    Redis     │  │  Azure   │
│Users/Msgs│     │Cache/Backpl. │  │  Blobs   │
└──────────┘     └──────────────┘  └──────────┘

The key design decisions:

  • Short-lived JWTs (15 min) limit the blast radius if a token is stolen
  • Rotating refresh tokens mean a stolen refresh token can only be used once
  • AES-256-GCM encrypts every message before it hits the database
  • Redis backplane allows the SignalR hub to scale across multiple API instances
  • Per-user SignalR groups deliver messages to all of a user’s devices simultaneously

Part 1 — The .NET 8 Backend

Setting up Program.cs

The entry point wires together every security concern. Let me break it down section by section.

JWT Authentication

builder.Services.AddAuthentication(JwtBearerDefaults.AuthenticationScheme)
    .AddJwtBearer(options =>
    {
        options.TokenValidationParameters = new TokenValidationParameters
        {
            ValidateIssuerSigningKey = true,
            IssuerSigningKey = new SymmetricSecurityKey(
                Encoding.UTF8.GetBytes(jwtKey)),
            ValidateIssuer   = true,
            ValidIssuer      = builder.Configuration["Jwt:Issuer"],
            ValidateAudience = true,
            ValidAudience    = builder.Configuration["Jwt:Audience"],
            ValidateLifetime = true,
            ClockSkew        = TimeSpan.Zero   // ← no grace period on expiry
        };

        // SignalR WebSocket upgrades can't send headers,
        // so we read the token from the query string instead
        options.Events = new JwtBearerEvents
        {
            OnMessageReceived = ctx =>
            {
                var token = ctx.Request.Query["access_token"];
                if (!string.IsNullOrEmpty(token) &&
                    ctx.HttpContext.Request.Path.StartsWithSegments("/hubs"))
                    ctx.Token = token;
                return Task.CompletedTask;
            }
        };
    });

The ClockSkew = TimeSpan.Zero is intentional. The default is 5 minutes, meaning a “15-minute” token actually lives for 20 minutes. That’s an unnecessary exposure window.

The OnMessageReceived event is needed because WebSocket upgrade requests can’t carry Authorization headers — the browser spec doesn’t allow it. So the Angular client appends the JWT as a query parameter only for hub connections.

Rate Limiting

builder.Services.AddRateLimiter(opt =>
{
    opt.AddFixedWindowLimiter("message", lim =>
    {
        lim.Window      = TimeSpan.FromMinutes(1);
        lim.PermitLimit = 60;
    });
    opt.AddFixedWindowLimiter("auth", lim =>
    {
        lim.Window      = TimeSpan.FromMinutes(5);
        lim.PermitLimit = 10;   // max 10 login attempts per 5 min
    });
});

Auth endpoints get a stricter limit to slow down brute-force attacks. Message endpoints are generous enough for normal usage but will stop a script flooding the server.

Security Headers

app.Use(async (ctx, next) =>
{
    ctx.Response.Headers.Append("X-Content-Type-Options", "nosniff");
    ctx.Response.Headers.Append("X-Frame-Options",        "DENY");
    ctx.Response.Headers.Append("X-XSS-Protection",       "1; mode=block");
    ctx.Response.Headers.Append("Referrer-Policy",         "no-referrer");
    ctx.Response.Headers.Append("Content-Security-Policy",
        "default-src 'self'; connect-src 'self' wss:");
    await next();
});

These headers are cheap to add and block an entire category of attacks — MIME sniffing, clickjacking, and cross-site scripting.

Authentication Service — JWT + BCrypt + Refresh Tokens

The AuthService handles the full auth lifecycle.

Registration

public async Task<AuthResult> RegisterAsync(RegisterRequest req)
{
    if (await _db.Users.AnyAsync(u => u.Email == req.Email.ToLower()))
        return AuthResult.Fail("Email already registered.");

    var user = new User
    {
        Id           = Guid.NewGuid().ToString(),
        Email        = req.Email.ToLower().Trim(),
        DisplayName  = req.DisplayName.Trim(),
        PasswordHash = BCrypt.Net.BCrypt.HashPassword(req.Password, workFactor: 12),
        CreatedAt    = DateTime.UtcNow,
    };

    _db.Users.Add(user);
    await _db.SaveChangesAsync();
    await _audit.LogAsync("auth.register", user.Id, null);

    return await IssueTokensAsync(user);
}

Work factor 12 for BCrypt means ~250ms to hash a password on modern hardware — fast enough for users, slow enough to make brute-forcing impractical.

JWT Generation

private string GenerateJwt(User user)
{
    var key   = new SymmetricSecurityKey(
        Encoding.UTF8.GetBytes(_config["Jwt:Key"]!));
    var creds = new SigningCredentials(key, SecurityAlgorithms.HmacSha256);

    var claims = new[]
    {
        new Claim(ClaimTypes.NameIdentifier, user.Id),
        new Claim(ClaimTypes.Email,          user.Email),
        new Claim(ClaimTypes.Name,           user.DisplayName),
        new Claim(JwtRegisteredClaimNames.Jti, Guid.NewGuid().ToString()),
    };

    var token = new JwtSecurityToken(
        issuer:             _config["Jwt:Issuer"],
        audience:           _config["Jwt:Audience"],
        claims:             claims,
        expires:            DateTime.UtcNow.AddMinutes(15),
        signingCredentials: creds);

    return new JwtSecurityTokenHandler().WriteToken(token);
}

The Jti (JWT ID) claim is a unique identifier for each token. This is what lets you build a token blocklist if you ever need to revoke individual tokens before expiry.

Rotating Refresh Tokens

public async Task<AuthResult> RefreshAsync(string refreshToken)
{
    var stored = await _db.RefreshTokens
        .Include(r => r.User)
        .FirstOrDefaultAsync(r => r.Token == refreshToken && !r.IsRevoked);

    if (stored is null || stored.ExpiresAt < DateTime.UtcNow)
        return AuthResult.Fail("Invalid or expired refresh token.");

    stored.IsRevoked = true;   // ← revoke old token immediately
    await _db.SaveChangesAsync();

    return await IssueTokensAsync(stored.User);   // ← issue fresh pair
}

Rotation means every successful refresh invalidates the old token and issues a new one. If an attacker steals a refresh token and uses it, the legitimate user’s next refresh will detect the conflict (token already revoked) and you can force a full re-login.

Encryption Service — AES-256-GCM

This is the most security-critical piece of the backend.

public string Encrypt(string plaintext)
{
    // Fresh 96-bit nonce for every single message
    var nonce = new byte[AesGcm.NonceByteSizes.MaxSize];
    RandomNumberGenerator.Fill(nonce);

    var plaintextBytes = Encoding.UTF8.GetBytes(plaintext);
    var ciphertext     = new byte[plaintextBytes.Length];
    var tag            = new byte[AesGcm.TagByteSizes.MaxSize]; // 128-bit auth tag

    using var aes = new AesGcm(_key, tag.Length);
    aes.Encrypt(nonce, plaintextBytes, ciphertext, tag);

    // Pack: [nonce 12B][tag 16B][ciphertext nB]
    var combined = new byte[nonce.Length + tag.Length + ciphertext.Length];
    Buffer.BlockCopy(nonce,      0, combined, 0,                        nonce.Length);
    Buffer.BlockCopy(tag,        0, combined, nonce.Length,              tag.Length);
    Buffer.BlockCopy(ciphertext, 0, combined, nonce.Length + tag.Length, ciphertext.Length);

    return Convert.ToBase64String(combined);
}

Why AES-256-GCM specifically?

  • AES-256 — the key length (256 bits) is computationally infeasible to brute-force
  • GCM mode — provides both confidentiality (encryption) and integrity (the 128-bit authentication tag). If anyone tampers with the ciphertext in the database, decryption throws an exception rather than silently returning garbage
  • Fresh nonce per message — reusing a nonce with the same key in GCM mode catastrophically breaks security. We use RandomNumberGenerator.Fill (cryptographically secure) for each encryption call

The nonce and tag are packed together with the ciphertext so decryption is self-contained — no separate columns needed.

SignalR Hub

[Authorize]
public class ChatHub : Hub
{
    public override async Task OnConnectedAsync()
    {
        var userId = GetUserId();
        // Each user gets a personal group across all their devices
        await Groups.AddToGroupAsync(Context.ConnectionId, $"user:{userId}");
        await _audit.LogAsync("hub.connected", userId,
            Context.GetHttpContext()?.Connection.RemoteIpAddress?.ToString());
        await base.OnConnectedAsync();
    }

    public async Task SendMessage(SendMessageRequest request)
    {
        if (string.IsNullOrWhiteSpace(request.Content) || request.Content.Length > 4000)
            throw new HubException("Invalid message content.");

        var senderId = GetUserId();
        var saved    = await _messages.SaveAsync(senderId, request);

        // Fan out to every participant's group (covers multi-device)
        foreach (var participantId in saved.ParticipantIds)
        {
            await Clients.Group($"user:{participantId}")
                .SendAsync("ReceiveMessage", saved);
        }
    }

    public async Task SendTyping(string conversationId, bool isTyping)
    {
        var userId       = GetUserId();
        var participants = await _messages.GetParticipantsAsync(conversationId, userId);

        foreach (var participantId in participants.Where(p => p != userId))
        {
            await Clients.Group($"user:{participantId}")
                .SendAsync("TypingIndicator",
                    new { conversationId, userId, isTyping });
        }
    }
}

A few design decisions worth noting:

Personal groups vs connection IDs. We add each connection to user:{userId} instead of tracking individual ConnectionId values. This means if a user has two browser tabs open, both get the message without any extra code. If you used ConnectionId you’d need a lookup table mapping users to connections.

Typing indicators are never persisted. They’re pure ephemeral SignalR events — no database write, no message history. They disappear the moment the connection drops.

HubException for client-visible errors. Regular C# exceptions become generic 500-style errors on the client. HubException propagates the message string to the caller, which lets Angular show a human-readable error.

Part 2 — The Angular 18 Frontend

JWT Interceptor with Silent Refresh

This is the piece most tutorials get wrong. The naive approach — refresh on 401, retry — breaks badly when multiple requests expire simultaneously. Our interceptor queues concurrent requests while a refresh is in flight.

let isRefreshing = false;
const refreshSubject = new BehaviorSubject<string | null>(null);

export const authInterceptor: HttpInterceptorFn = (req, next) => {
  const auth  = inject(AuthService);
  const token = auth.accessToken();

  const addToken = (r: typeof req, t: string) =>
    r.clone({ setHeaders: { Authorization: `Bearer ${t}` } });

  const request = token ? addToken(req, token) : req;

  return next(request).pipe(
    catchError((err: HttpErrorResponse) => {
      if (err.status !== 401 || req.url.includes('/auth/'))
        return throwError(() => err);

      if (isRefreshing) {
        // Another request is already refreshing — wait for it
        return refreshSubject.pipe(
          filter((t): t is string => t !== null),
          take(1),
          switchMap(t => next(addToken(req, t)))
        );
      }

      isRefreshing = true;
      refreshSubject.next(null);   // signal "refreshing in progress"

      return auth.refresh$().pipe(
        switchMap(newToken => {
          isRefreshing = false;
          refreshSubject.next(newToken);   // unblock queued requests
          return next(addToken(req, newToken));
        }),
        catchError(refreshErr => {
          isRefreshing = false;
          auth.logout();
          return throwError(() => refreshErr);
        })
      );
    })
  );
};

Walk through the flow:

  1. Request goes out with the current JWT
  2. Server returns 401 (token expired)
  3. If no refresh is in progress, start one and set isRefreshing = true
  4. All other requests that 401 in the meantime subscribe to refreshSubject and wait
  5. When refresh succeeds, refreshSubject.next(newToken) unblocks all queued requests
  6. Each queued request clones itself with the new token and retries

Without this queuing, three simultaneous expired requests would trigger three parallel refresh calls, the second and third would fail (token already rotated), and the user would be logged out unexpectedly.

SignalR Chat Service with Angular Signals

@Injectable({ providedIn: 'root' })
export class ChatService {
  // Reactive state using Angular 18 signals
  messages      = signal<Message[]>([]);
  conversations = signal<Conversation[]>([]);
  typingUsers   = signal<TypingIndicator[]>([]);
  connected     = signal(false);

  // Derived state — no manual subscription management
  unreadCount = computed(() =>
    this.conversations().reduce((sum, c) => sum + c.unreadCount, 0)
  );

  async connect(): Promise<void> {
    this.hub = new signalR.HubConnectionBuilder()
      .withUrl(`${environment.apiUrl}/hubs/chat`, {
        accessTokenFactory: () => this.auth.accessToken() ?? '',
        transport: signalR.HttpTransportType.WebSockets,
        skipNegotiation: true,
      })
      .withAutomaticReconnect([0, 2000, 5000, 10000, 30000])
      .build();

    this.hub.on('ReceiveMessage', (msg: Message) => {
      this.messages.update(msgs => [...msgs, msg]);
      this.conversations.update(convs =>
        convs.map(c =>
          c.id === msg.conversationId
            ? { ...c, lastMessage: msg, unreadCount: c.unreadCount + 1 }
            : c
        )
      );
    });

    // ...
    await this.hub.start();
    this.connected.set(true);
  }
}

accessTokenFactory is a function, not a value. SignalR calls it on every reconnect attempt, so it will always pick up the freshest token (including any that were silently refreshed by the interceptor).

withAutomaticReconnect([0, 2000, 5000, 10000, 30000]) defines a custom backoff schedule — immediate retry, then 2s, 5s, 10s, 30s. After exhausting this list SignalR stops retrying, which lets you show a “connection lost” UI rather than hammering the server forever.

Using Angular signals instead of RxJS BehaviorSubject keeps the state management simple — components read chatService.messages() directly in their templates and Angular handles change detection automatically.

Part 3 — Security Checklist

Here’s every security mechanism in the app and why it’s there:

Threat Mitigation
Password database breach BCrypt, work factor 12
Token theft JWT expiry 15 min, ClockSkew = Zero
Refresh token theft Server-side rotation — stolen token is single-use
Eavesdropping in transit HTTPS + WSS enforced, TLS 1.3
Database breach (messages) AES-256-GCM at rest
GCM nonce reuse RandomNumberGenerator.Fill per message
Message tampering GCM authentication tag — tampered ciphertext throws
Brute-force login Rate limit: 10 attempts / 5 min
Message flooding Rate limit: 60 messages / min
Clickjacking X-Frame-Options: DENY
MIME sniffing X-Content-Type-Options: nosniff
Unauthorized hub access [Authorize] attribute, JWT validated on upgrade
Hub conversation access Server-side participant check before join/deliver
XSS Content-Security-Policy: default-src 'self'
Forensics / incident response Append-only audit log on every auth event

Part 4 — Running It Locally

# Clone
git clone https://github.com/naimulkarim/SecureChat.git
cd SecureChat

# Generate secrets
openssl rand -base64 32   # → Encryption:Key
openssl rand -base64 64   # → Jwt:Key

# Backend
cd SecureChat.API
# Add secrets to appsettings.Development.json (never commit this file)
dotnet ef database update
dotnet run

# Frontend (new terminal)
cd ../secure-chat-ui
npm install
ng serve

Navigate to https://localhost:4200.

What’s Next

There are a few things I’d add before calling this truly production-ready:

Key management — move the AES key and JWT secret out of appsettings.json and into Azure Key Vault (or AWS Secrets Manager). The current setup is fine for local dev but secrets should never live in a config file in a real deployment.

Client-side encryption — the current model encrypts at the server before writing to the DB. True end-to-end encryption (where even the server can’t read messages) requires encrypting on the client with the recipient’s public key. This would involve WebCrypto API on the Angular side and a public key exchange flow.

Message deletion / expiry — a GDPR-friendly implementation needs the ability to delete or expire messages, with the encrypted blobs actually removed from storage.

Push notifications — when the user isn’t connected to the hub, they need push notifications. Web Push API + a service worker can deliver notifications even when the tab is closed.

Conclusion

The patterns in this post — short-lived JWTs with rotating refresh tokens, AES-GCM encryption at rest, request queuing during token refresh, and per-user SignalR groups — are the foundations of any serious real-time app. None of them are particularly exotic, but getting all the details right (nonce freshness, clock skew, refresh token rotation, concurrent refresh queuing) makes the difference between a demo and something you’d trust with real user data.

The full source is at github.com/naimulkarim/SecureChat. PRs and issues welcome.

Tags: dotnet angular security signalr webdev csharp typescript

Supabase Edge Functions Review: Deno on the Edge for Postgres Backends

I deployed my first Supabase Edge Function in January 2026 — a webhook handler that received Stripe payment events, validated them against the Supabase auth system, and inserted records into a Postgres table with row-level security enforced at the database layer. I have since deployed twelve more functions handling authentication callbacks, file processing triggers, API endpoints for a mobile app, and a scheduled cleanup job. After five months of production use alongside Cloudflare Workers and AWS Lambda functions that serve the same application, I have a clear picture of where Supabase Edge Functions deliver unique value and where they fall short of the alternatives.

The Deno Runtime: TypeScript Without the Build Chain

Supabase’s decision to use Deno as the Edge Functions runtime is the most consequential architectural choice in the product, and it took me about two weeks of use to understand why it matters. A Deno-based Edge Function is a single TypeScript file — no tsconfig.json, no bundler configuration, no node_modules, and no build step. You write a handler function that receives a Request and returns a Response, deploy it with supabase functions deploy, and it runs.

When I built the same Stripe webhook handler as a Cloudflare Worker, the workflow required installing wrangler, configuring a wrangler.toml file, writing the handler in a module syntax that esbuild could bundle, and managing a separate build step that produced the bundled output. With AWS Lambda and the Serverless Framework, the workflow required a serverless.yml configuration, a deployment package build step, and IAM role configuration that took three iterations to get right because the function needed both DynamoDB and SQS permissions. The Supabase Edge Function workflow eliminated all of that: I wrote a stripe-webhook/index.ts file, ran supabase functions deploy stripe-webhook, and the function was live at https://[project-ref].functions.supabase.co/stripe-webhook in approximately 40 seconds from deploy command to working endpoint.

The Deno standard library provides web-standard APIs that eliminate dependency overhead. Request and Response are native types, fetch is available without importing node-fetch, crypto.subtle handles JWT verification and HMAC signing without a library, and URLPattern provides route matching. My Stripe webhook handler — including Stripe signature verification, database writes, and error responses — is 94 lines of TypeScript with zero npm dependencies. The equivalent Node.js version with Express, the Stripe SDK, and a database client would require a package.json with 8 to 12 dependencies and a bundler configuration.

The Database and Auth Integration Is the Real Differentiator

The feature that sold me on Edge Functions — and the feature that has kept me using them for new endpoints — is the pre-wired integration with the Supabase platform. When an Edge Function receives a request, the Supabase client is available in the execution context with the project’s API key, database URL, and authentication token already configured. If the request includes a Supabase auth token in its Authorization header, the client automatically validates it against GoTrue, identifies the user, and enforces Row Level Security (RLS) policies at the database layer.

I want to illustrate this with a concrete example. My application has an API endpoint that returns a user’s order history. The endpoint requires that the user is authenticated and that the query only returns rows where user_id matches the authenticated user. On Supabase Edge Functions, the implementation is a database query that the RLS policy scopes automatically — the function does not need to extract the user ID from the token, validate it against the auth system, or add a WHERE clause to every query. On Cloudflare Workers, the same endpoint required 62 lines of TypeScript just for auth plumbing: extracting the JWT from the Authorization header, fetching the JWKS endpoint from GoTrue, verifying the token signature, extracting the user ID from the claims, and passing it as a parameter to every database query. The Workers version works, but it required maintaining authentication code that Supabase Edge Functions handle in zero lines.

Edge Functions share the same JWT secret as your Supabase project. When a function receives a request with a valid Supabase auth token, the Supabase client inside the function automatically inherits the user’s identity and enforces Row Level Security policies. In my Stripe webhook handler, the function validates the webhook signature from Stripe, looks up the Supabase user by email in the Stripe event, and writes to a billing_events table — all without manually managing auth tokens or database permissions.

The integration extends to storage triggers. I configured an Edge Function to fire on every file upload to a Supabase storage bucket, which runs an image resizing pipeline through the sharp library (available via Deno’s npm compatibility layer). The function receives the file metadata in the event payload, downloads the original from storage, generates three resized variants, and uploads them back to the same bucket. This pattern — serverless function triggered by a platform event, with direct access to the platform’s storage and database — would require a queue, an event bus, and IAM role configuration on AWS. On Supabase, it is a configuration option and a handler function.

Where the Limits Start to Hurt

I need to be direct about the constraints, because the 10-second execution timeout and 256 MB memory limit have forced me to move workloads off Edge Functions twice in five months.

The first time was a batch processing job that needed to generate monthly invoice PDFs for approximately 1,200 users. The job required querying the database for each user’s billing records, rendering an HTML template to PDF, and uploading the result to storage. Each PDF generation took approximately 2.5 seconds, and processing 1,200 users sequentially would exceed the 10-second timeout by two orders of magnitude. I attempted to parallelize by triggering one function invocation per user, but the function’s memory limit prevented loading the HTML template library and a full user record simultaneously for the largest accounts. I moved the job to an AWS Lambda function with a 15-minute timeout and 1,024 MB of memory, where it completes in approximately 52 seconds for all 1,200 users. The Lambda function costs about $0.35 per monthly run and required IAM configuration, but the Supabase Edge Function could not complete the workload at all within its constraints.

The second time was a data export endpoint that needed to stream a CSV file of query results to the client. The function’s memory limit prevented loading the full result set into memory — the largest export was approximately 180 MB of raw data — and the function has no streaming response capability. I ended up generating the export through a database function that wrote to a storage bucket and returning a signed URL, which worked but added complexity that a streaming response would have avoided.

The Deno ecosystem is also smaller than Node.js. When I needed to use the @stripe/stripe-js package for client-side Stripe integration — not the webhook handler, but a checkout session creation endpoint — the npm compatibility layer handled it, but the import took approximately 800 milliseconds of cold-start time to resolve the dependency graph. Hot starts (subsequent invocations within the same deployment) were faster at around 40 milliseconds, but the cold-start penalty for npm packages through the compatibility layer is worth measuring for latency-sensitive endpoints. For packages that have native Deno equivalents — std/http, std/crypto, std/encoding — the import is near-instant.

The Local Development Experience Saves Real Time

Supabase’s local development environment is one of the platform’s strongest selling points, and it works as advertised for Edge Functions. Running supabase start launches a complete local Supabase instance in Docker: Postgres, GoTrue for auth, a storage API compatible with the production storage service, and the Edge Functions runtime. My entire development workflow — writing function code, testing against the local database with RLS policies, simulating auth flows, and verifying storage triggers — runs on my laptop with no network dependency.

I timed my development cycle for a new function compared to Cloudflare Workers. On Supabase, writing the function, testing it locally, and deploying it took 23 minutes from first line of code to verified production endpoint. On Cloudflare Workers, the same function took 41 minutes — 18 minutes of which was spent configuring wrangler dev to proxy auth requests to the remote Supabase instance because Cloudflare’s local runtime cannot replicate Supabase’s auth integration.

The log and debug experience has improved since early 2026. The dashboard shows invocation counts, error rates, and execution durations per function. Real-time logs — streaming console output from deployed functions — became available on the Pro plan in March 2026 and display console.log, console.error, and unhandled exception traces with stack frames. When I need more detailed tracing, I add structured JSON logging to the function’s console output and parse it through an external observability platform, which is not as integrated as AWS CloudWatch but works without additional infrastructure.

When I Choose Edge Functions Over Workers or Lambda

After five months and twelve production functions, my decision framework is straightforward. I choose Supabase Edge Functions when the function’s primary job is to mediate between the client and the Supabase database or storage layer — CRUD endpoints, auth-protected API routes, webhook handlers that write to the database, and file processing triggers. The pre-wired integration saves development time and eliminates auth plumbing that would require writing and maintaining code on any other platform. For a function that queries the database, validates an auth token, and returns a JSON response, an Edge Function typically takes half to one-third the lines of code of an equivalent Cloudflare Worker or Lambda function.

I choose Cloudflare Workers when the function needs to run in multiple geographic regions for latency reasons and when the function does not primarily interact with Supabase — proxy endpoints, redirect logic, A/B testing middleware, and API gateways that route to multiple backends. Workers deploy to 300-plus locations globally, while Supabase Edge Functions deploy to a smaller set of regions that maps to Supabase’s infrastructure footprint. For a function that needs to respond in under 50 milliseconds from anywhere in the world, Workers’ physical footprint is the deciding factor.

I choose AWS Lambda when the function needs to run for more than 10 seconds, use more than 256 MB of memory, or access AWS services that are not available through Supabase — SQS, DynamoDB, EventBridge, or Step Functions. Lambda’s 15-minute timeout and 10 GB memory ceiling make it the only option for batch processing, report generation, and CPU-intensive workloads. I use Lambda as the complement to Edge Functions, not as a replacement — Lambda handles the heavy lifting, and Edge Functions handle the request-response layer.

Originally published at pickuma.com. Subscribe to the RSS or follow @pickuma.bsky.social for new reviews.

MCP SEP-2468: RFC 9207 Iss Parameter for OAuth Mix-Up Defense

What: MCP SEP-2468 aligns the MCP authorization flow with RFC 9207: authorization servers can advertise iss support and include the iss parameter on their responses; clients are required to validate that iss byte-for-byte against the issuer they had originally recorded for the flow.

Why: An MCP host often trusts more than one identity provider — corporate SSO plus a partner IdP plus a developer IdP for local testing — and without a signal naming the AS, an attacker who controls (or holds a valid registration at) any trusted IdP can mix authorization codes between servers and trick the client into spending an attacker code at a legitimate token endpoint.

vs prior: The previous flow had no issuer field on the authorization response, so clients had to guess from session state — the structural gap the OAuth mix-up attack family exploits, and the one capability scoping cannot close because the attacker is abusing the client’s uncertainty about which AS replied, not abusing a scope.

Think of it as

A doorman who matches your wrist stamp to the guest list.

                       AUTH RESPONSE
                            │
              ┌─────────────┴─────────────┐
              │                           │
      ┌───────▼────────┐         ┌────────▼───────┐
      │   stamp: A     │         │   stamp: B     │
      │ (recorded: A)  │         │ (recorded: A)  │
      └───────┬────────┘         └────────┬───────┘
              │                           │
       string-equal OK             string-equal FAIL
       to recorded issuer          to recorded issuer
              │                           │
              ▼                           ▼
        ✓ proceed to               ✗ reject response
          token exchange              mix-up blocked
  • MCP client = the doorman at the door
  • recorded issuer = the one venue name on the guest list
  • authorization response = a guest arriving
  • iss parameter = the venue name printed on the guest’s wrist stamp
  • string-equal check = the doorman reading the stamp letter by letter
  • OAuth mix-up attack = someone arriving with a stamp from the bar next door

Quick glossary

MCP — The Model Context Protocol — an open protocol for connecting LLM hosts to external tool servers. The host runs the model and the agent loop; servers expose tools, resources, and prompts over JSON-RPC. Authorization across hosts and servers is increasingly standardized on OAuth 2.0, which is what SEP-2468 hardens.

SEP — Specification Enhancement Proposal — MCP’s RFC-style change document. SEP-2468 is the proposal that brings RFC 9207’s iss parameter into MCP authorization. Companion proposals include SEP-2663 (async task handles) and SEP-2577 (feature deprecations).

AS (Authorization Server) — The OAuth role that authenticates the user and issues the authorization code and the access token. In MCP, your corporate SSO, a partner identity provider, and a developer-local IdP can all be ASes the client trusts at the same time.

iss parameter (RFC 9207) — A URL string the AS includes in its authorization responses when it advertises RFC 9207 support in its metadata, identifying which AS produced the response. Defined in RFC 9207. Clients are required to compare it byte-for-byte (per RFC 3986 §6.2.1 simple string comparison) against the issuer they had recorded when they started the flow; when an AS does not advertise iss support, clients may apply local policy.

OAuth mix-up attack — A documented attack family where a client that trusts multiple ASes is tricked into sending one AS’s authorization code or token to a different AS. The result is that the client believes it is talking to one IdP while it has actually authenticated to another — a privilege confusion the rest of the agent stack has no signal to detect.

Capability scoping — The defense pattern of granting tools the minimum capability they need (e.g. read-only file access for a summarizer). Capability scoping is a complementary defense — it limits the blast radius of any compromised tool but does NOT tell you which AS issued a given auth response.

Structural defense — A defense that removes a confusion at the protocol layer rather than relying on policy. The iss parameter is structural: the client cannot accidentally validate against the wrong issuer because the response itself names the AS that produced it.

The news. On May 17, 2026, MCP SEP-2468 was merged into the Model Context Protocol specification — proposed March 25, accepted May 5. The change recommends that authorization servers advertise iss support in their metadata and include the parameter in their authorization responses, and requires clients to validate it against the recorded issuer using simple string comparison per RFC 3986 §6.2.1. The motivation, taken directly from RFC 9207, is to close the long-standing OAuth mix-up attack in clients that trust multiple identity providers.

Picture the doorman. He has one name on his guest list — say, idp-a.example — and tonight that is the only venue whose guests he is letting in. A guest walks up. Without a wrist stamp, the doorman has no way to know which venue’s list this person came from. Maybe it really is the right venue. Maybe it’s someone from the bar next door who is hoping you don’t check. The doorman has to guess. That is the OAuth mix-up scenario before SEP-2468: the client kicks off an authorization flow with one AS, an authorization response comes back, and the only signal the client has is its own session state — which the attacker is actively trying to confuse.

The fast path is each guest gets a stamp, printed with the venue name. The doorman doesn’t have to remember faces. He reads the stamp, compares it letter by letter to the name on his list, and decides on the spot. The stamp is the iss parameter. It is not the token. It is metadata about which AS produced the response. The client compares response.iss against the issuer it had recorded when it started the flow, character for character. Match → continue to the token exchange. Mismatch → reject the response, no matter how convincing the rest of the payload looks.

The catch — and this is what makes the structural defense load-bearing — is that capability scoping and other content-layer checks can’t fill in for the issuer check. Suppose every tool in your agent is read-only and every scope is minimal. An attacker still wins the mix-up if the client takes an authorization code minted by idp-b.evil and exchanges it at idp-a.example‘s token endpoint, because the eventual access token will be for the legitimate IdP — minted from the wrong user’s session. The compromised data does not flow through a tool’s parameters; it flows through the client’s confusion about which IdP authenticated the user. That is a layer above the tool attack surface the rest of the agent’s guardrails are built to police, which is exactly why the Layered Guardrails module sequences structural defenses before policy.

Consider a concrete illustration. Picture a workplace MCP host that trusts two authorization servers — idp-a.example (corporate SSO) and idp-b.example (a partner) — and 1,000 agent sessions per hour each completing one OAuth flow. Imagine an attacker who can substitute responses on 0.1% of flows. Pre-iss, the client has no signal to reject substituted responses, so the substitution rate equals the attack rate: 1,000 × 0.001 = 1 mix-up per hour, or ~24 per day (illustrative). Post-iss, a substituted response would carry iss=https://idp-b.example while the client recorded https://idp-a.example. The string-equality check fails for every substituted response that includes iss, so the post-defense rate drops to ~0 mix-ups per day (illustrative) — independent of how clever the substitution gets, with the residual restricted to ASes that do not advertise iss support and where client policy falls back to local rules.

Where the change earns its keep

The shape of what SEP-2468 actually adds is small. The table below contrasts the legacy flow with the SEP-2468 flow.

Aspect Legacy MCP auth flow SEP-2468 (RFC 9207)
Issuer field on auth response None iss required when AS metadata advertises support
How client knows which AS replied Inference from session state Server tells you, via iss
OAuth mix-up defense Out of scope — client policy String-equal response.iss against recorded issuer
String comparison rule N/A RFC 3986 §6.2.1 simple string comparison
Server discovery N/A AS advertises iss support in its metadata; clients may apply local policy on servers that don’t
Layer of defense Capability scoping only Structural (issuer) plus capability scoping

The defense slots in neatly next to the existing guardrail stack. Capability scoping limits the blast radius of any single misuse. The Lethal Trifecta framing limits how private data, untrusted content, and exfiltration vectors are allowed to combine. SEP-2468 sits one layer below both — it ensures the client has not been silently rerouted to a different IdP before any of those checks even runs. None of the layers replaces the others; the value is in stacking them.

There is also a related lesson worth knowing. Mix-up is part of a broader pattern where protocol metadata gets repurposed as protocol contract. RFC 9207’s iss is a small, fixed-shape addition with a single rule: equal or not. That makes it both easy to implement correctly and hard to mis-implement, which is exactly the property a defense-in-depth layer needs — every layer that requires nuanced configuration becomes its own attack surface.

The boundary of what SEP-2468 changes is not “how OAuth works.” Existing single-IdP flows are unaffected; the comparison is trivially https://idp-a.example == https://idp-a.example and continues. The boundary is “what happens when a client trusts more than one AS at the same time” — the multi-IdP topology that production MCP hosts are increasingly running into. For those, the iss check is the difference between a structural defense and a hopeful one.

Related explainers

FAQ

What is the RFC 9207 iss parameter and what does MCP SEP-2468 do with it?

RFC 9207 defines an iss parameter — a URL identifying the authorization server that produced an authorization response. MCP SEP-2468 adopts this: authorization servers can advertise iss support in their metadata and include it in their authorization responses, and clients must compare it byte-for-byte (per RFC 3986 §6.2.1 simple string comparison) against the issuer recorded when the flow started. The check rejects any response whose iss does not match; for ASes that don’t advertise iss support, the client may apply local policy.

Why does an MCP client need this if it already does capability scoping?

Capability scoping limits the blast radius of any compromised tool but does not tell the client which authorization server replied. OAuth mix-up attacks abuse exactly that confusion: an attacker controlling (or registered at) one of multiple trusted IdPs swaps responses between authorization servers, so the client believes it is talking to one IdP while it has authenticated against another. SEP-2468 is a layer below scoping — a structural defense that removes the confusion at the protocol level, with no policy tuning required.

How does SEP-2468 compare to the other MCP SEPs landing this month?

SEP-2468 hardens OAuth, SEP-2663 lands async task handles for long-running tool calls, and SEP-2577 starts the deprecation timer on three legacy features. They sit at different layers of the protocol — authorization, tool execution, and feature lifecycle — and the security model assumed by SEP-2663’s task handles and SEP-2577’s migration windows leans on the same OAuth foundation SEP-2468 is reinforcing.

Originally posted on Learn AI Visually.

Stop paying for idle GPUs in your CI: batching LLM eval jobs

TL;DR: Running LLM evaluations on every PR will burn your GPU budget faster than you can blink. We cut our eval spend by about 60% by batching jobs into windowed runs on shared GPU pools, plus a smarter queue that knows the difference between a “smoke test” eval and a full regression run. Here’s how, and where the trade-offs hurt.

Right, so a few months back I got pulled into a conversation that’s becoming pretty familiar around here. A team had wired up an LLM-based evaluation suite into their CI. Every PR triggered a run against a set of prompts, scored the outputs, and posted results back to the PR. Lovely in theory.

The cloud bill was not lovely.

They were spinning up a g5.xlarge per PR, sometimes three or four in parallel during peak hours, and the GPU sat idle for about 70% of the run because most of the time was spent on cold starts, model loading, and prompt formatting. Classic case of treating GPUs like CPUs.

I reckon a lot of teams are hitting this wall right now. So let’s talk about what actually works.

The problem with “GPU per job”

CI runners are designed for stateless, throwaway compute. That model breaks the second you involve a 7B+ parameter model that takes 30-90 seconds to load into VRAM.

Here’s the rough breakdown of a typical eval job we measured:

Phase Time (avg) GPU utilization
Cold start (instance boot) 45s 0%
Model download from S3 60s 0%
Model load into VRAM 25s ~10%
Actual inference (50 prompts) 40s ~85%
Result upload + teardown 15s 0%

So out of about 3 minutes of billable GPU time, you’re getting 40 seconds of useful work. That’s brutal economics.

Batching: the boring fix that works

The trick isn’t fancy. You stop spinning up a GPU per job and start treating the GPU like a long-lived service that consumes jobs from a queue.

We run a small pool of g5.xlarge instances (usually 2-4 depending on load) that stay warm. Each runner has the model preloaded in VRAM. CI jobs push eval requests to an SQS queue, runners pull from the queue, batch up to N prompts per inference pass, and post results back.

Rough sketch of the runner config:

runner:
  instance_type: g5.xlarge
  pool_size_min: 2
  pool_size_max: 6
  scale_metric: queue_depth
  scale_threshold: 25  # jobs in queue

  model:
    name: llama-3.1-8b-instruct
    preload: true
    keep_warm_seconds: 1800

  batching:
    max_batch_size: 16
    max_wait_ms: 2000

  job_types:
    smoke_eval:
      priority: high
      max_prompts: 10
    full_regression:
      priority: low
      max_prompts: 500
      window: nightly_only

That max_wait_ms is doing the heavy lifting. The runner waits up to 2 seconds to gather a batch before firing inference. For CI, 2 seconds of latency is nothing. For inference throughput, it’s everything.

Routing matters too

Once you’ve got a warm pool, you might as well route different model calls through one place. We have eval suites that hit a mix of self-hosted Llama, Claude via API, and OpenAI. Instead of each CI job authenticating separately and managing keys, we put a gateway in front.

There’s a bunch of options here. LiteLLM is popular, Bifrost (https://github.com/maximhq/bifrost) is another one that does the same kind of multi-provider routing with rate limit handling, and you can roll your own with a thin FastAPI wrapper if you’re feeling keen. The point is you stop scattering API keys across twenty CI configs.

Job classification: don’t run a full eval on every commit

This was the biggest single win, honestly. We split eval jobs into tiers:

  • Smoke evals: 5-10 prompts, run on every PR, catches obvious regressions
  • Standard evals: 50-100 prompts, run on merge to main
  • Full regression: 500+ prompts, run nightly on main

Before this, every PR triggered the full 500-prompt suite because nobody had bothered to think about what they actually needed to know per PR. The answer is “did this change break something obvious?”, not “is this model production-ready?”

Cut our GPU-hours by about 40% just from that change alone, before any of the batching work.

What the numbers looked like

After about three weeks of running the new setup:

Metric Before After
GPU-hours per day 38 14
Avg PR feedback time 4m 20s 1m 50s
Monthly GPU spend (eval only) ~$8,200 ~$3,100
Queue p99 wait time n/a 8s

Faster and cheaper, which is the dream combination you almost never get.

Trade-offs and limitations

Nothing’s free, so here’s what actually hurt:

Cold start on scale-up is still painful. When the queue spikes past what the warm pool can handle, the new runners take 90+ seconds to come online with the model loaded. We mitigated by being more aggressive on the scale_threshold than felt comfortable, which means we’re occasionally paying for idle capacity. You can’t have both.

Batching adds latency variance. A job that arrives just after a batch fires waits the full max_wait_ms. For CI this is fine. For production inference it might not be, so don’t blindly copy this config to your prod inference pipeline.

Pool exhaustion is a real failure mode. If your queue grows faster than you can scale, jobs back up. We had a Friday afternoon where a misconfigured test suite generated 4,000 eval jobs in 10 minutes and the queue depth alert woke me up at 11pm. Add circuit breakers and per-team quotas early, not after the first incident.

Model updates are now an event. When you preload models, swapping versions means a rolling restart of the pool. We do this during low-traffic windows but it’s added operational overhead that didn’t exist with the per-job model.

Further Reading

No worries if your setup looks different. The general shape holds: warm pools, batched jobs, classified workloads. Apply where it fits.

I Built a Browser SDK That Detects LLM Agents. Here’s How It Works.

Three distinct session verdict types: Human, AuthorizedAgent, and UnauthorizedBot. Both unauthorized LLM agents and headless bots resolve to UnauthorizedBot, but badge labels differentiate them for downstream routing.

Every bot detection system I’ve seen works with two actors: human or bot. Block the bot, let the human through.

That model is wrong in 2026.

There is a third actor: AI agents acting legitimately on behalf of real users. Shopping assistants. Automated onboarding flows. Fintech integrations. These agents look like bots by every traditional signal: headless browser characteristics, scripted input patterns, no idle pauses. But blocking them means turning away real business.

I built Nyasa to handle all three.

Why existing tools fail now

CAPTCHA was built for bots that couldn’t read distorted text. Those bots are dead. CAPTCHA farms solve challenges at $0.50 each. LLM vision models solve them in milliseconds.

Device fingerprinting catches webdriver flags and automation markers. Modern headless browsers patch those out. Playwright, Puppeteer, and every major automation framework have community patches specifically for passing fingerprint checks.

Behavioral analytics (typing cadence, mouse movement) catch scripted bots. But LLM agents don’t use scripted input anymore. They type at 60-80 WPM with realistic keystroke intervals, move the mouse in curved paths, and pause at form fields before filling them.

The deeper problem is architectural. Existing systems ask: “Is this a bot?” Nyasa asks: “Who is this session?” The answer is one of three things.

The three-actor model

Nyasa classifies every session as exactly one of:

  • Human: no detection rules fired
  • AuthorizedAgent: holds a valid cryptographic identity claim, automatically bypasses bot rules
  • UnauthorizedBot: one or more detection rules fired

The AuthorizedAgent category is the real addition. An AI shopping assistant built on top of your product shouldn’t have to pass a CAPTCHA. It should present a signed identity claim, and your system should recognize and respect it. Nyasa handles that handshake.

Three distinct session verdict types: Human, AuthorizedAgent, and UnauthorizedBot. Both unauthorized LLM agents and headless bots resolve to UnauthorizedBot, but badge labels differentiate them for downstream routing.

The signal stack

24 signals total, split across three layers.

Behavioral signals (13)

Signal What it measures
Keystroke dwell and flight time How long keys are held, time between keystrokes
Mouse path curvature Deviation from straight-line movement
Paste vs typed ratio Whether text was typed character by character or bulk-pasted
Click precision (center offset) Distance from click point to element center
Session burst-pause rhythm Alternation between fast activity and idle gaps
Backspace corrections Correction frequency during text input
Scroll depth How far down the page a session goes
Touch mechanics Multi-touch patterns and pressure distribution
Field-level timing Time spent on each form field before moving on
Input origin Typed vs pasted vs dropped vs programmatic fill
Tab visibility Whether the session loses and regains focus
File upload mechanics How files are attached (drag, click, or programmatic)
Session rhythm Overall pace and structure of the session

Fingerprint signals (8)

Signal What it catches
Webdriver and CDP markers Automation framework artifacts in the browser object
Iframe vs parent plugin consistency Mismatches between iframe and parent context
Canvas fingerprint hash Rendering environment identifier
WebGL renderer string SwiftShader and LLVMpipe detection (headless GPU emulation)
Audio fingerprint via OfflineAudioContext Audio processing environment
Incognito detection via storage quota probe Private browsing mode
Timezone vs navigator.language consistency Region mismatch between system and browser config
Persistent device UUID with isNew flag Tracks whether this device has been seen before

Network signals (3)

Signal What it measures
Page reaction time Time from page load to first interaction
Connection type Network type reported by Navigator API
Page load timing Performance timing breakdown

Detection rules

Six rules run against the collected signals. Each rule fires independently. Any fired rule pushes the verdict toward UnauthorizedBot, except isAuthorizedAgent which short-circuits to AuthorizedAgent regardless of other rules.

isHeadless reads the fingerprint layer for automation markers: webdriver properties, CDP exposure, WebGL renderer strings like SwiftShader or LLVMpipe, iframe/parent inconsistencies. If the browser environment looks like a headless runner, this fires.

isScripted reads behavioral signals for bot-like input patterns. Scripted bots fill fields in milliseconds, never backspace, and move between fields in perfect sequence. This rule catches that pattern.

isLLMAgent is the hardest one. I’ll cover it in the next section.

isAuthorizedAgent reads the agent identity claim from window.__nyasaAgentSignature or a meta tag. If a valid claim is present, the session is classified as AuthorizedAgent and no further rules are evaluated.

isUploadAutomation checks file upload mechanics. Human uploads involve a file picker dialog or drag interaction. Programmatic uploads bypass both. This rule catches the bypass pattern.

isMultimodalBot looks for cross-signal contradictions: a session that passes one rule but shows soft signals consistent with automation across several others. It reads sibling DetectionResults directly rather than re-sampling signals, which avoids divergence when two rules read the same underlying data at different times.

isLLMAgent deep dive

This is the rule I spent the most time on. LLM agents are genuinely hard to distinguish from fast, focused humans. Seven signals, evaluated together:

  1. Machine-speed keystroke bursts under 20ms. Human dwell times cluster around 80-200ms. Sub-20ms bursts don’t happen in human typing.
  2. Mouse stillness above 70%. Humans move the mouse constantly, even when not clicking. LLM-driven sessions often keep the cursor parked.
  3. Uniform keystroke variance near zero. Human typing has natural rhythm variation. LLM agent keystrokes have suspiciously consistent intervals.
  4. Zero backspace rate. Humans make corrections. An agent filling a form it computed upfront doesn’t backspace.
  5. Pixel-perfect click precision. Humans click near the center of an element but not exactly on it. Agents click at the computed center coordinate.
  6. Missing field exploration. Humans often click into a field, leave, return, re-read the label. LLM agents visit each field once in sequence and move on.
  7. No idle micro-pauses. Humans have sub-second pauses between thoughts. Agent sessions show continuous forward progress.

No single signal is definitive. A fast typist has low keystroke variance. A focused user might not backspace. isLLMAgent requires several of these signals to align before it fires.

Side-by-side comparison of behavioral signals between a human typist and an LLM agent across seven dimensions: keystroke interval distribution, mouse activity, keystroke variance, backspace rate, click precision, field exploration pattern, and micro-pause presence.

Feature extraction architecture

Early versions of Nyasa had each detection rule computing its own derived metrics from raw signals. That caused two problems: duplicated math across rules, and rules diverging when they read the same underlying signal at slightly different times during a session.

The feature extraction layer solves this. It runs once per session and computes 8 shared derived metrics before any detection rule evaluates. Every rule reads from the same computed values.

The metrics include things like overall typing variance, click precision distribution, and mouse activity ratio. Computing them once means a detection rule that needs “mouse stillness percentage” and a sibling rule that also needs it will always agree on the number.

isMultimodalBot benefits from this the most. It reads the DetectionResults of its sibling rules rather than re-running signal evaluation. Near-miss composition (where a session nearly triggers multiple rules without fully triggering any) gets caught without any rule having to re-sample data that may have aged out.

The verdict system

Every session gets a verdict object with three fields:

interface NyasaVerdict {
  type: 'Human' | 'AuthorizedAgent' | 'UnauthorizedBot';
  confidence: number;           // 0.0 to 1.0
  badges: DetectionBadge[];     // which rules fired or nearly fired
}

Confidence is a noisy-OR score across all active rules. If one rule fires with 0.8 confidence and a second fires with 0.6, the combined score is 1 - (1 - 0.8) * (1 - 0.6) = 0.92. Multiple weak signals compound.

Badge labels tell you which rules contributed. A session might come back as UnauthorizedBot with badges for isHeadless and isLLMAgent, which tells you this is a headless LLM agent. That gets different handling than a scripted form filler.

The verdict payload ships via navigator.sendBeacon. Non-blocking, fires after the page interaction completes, survives page unload. Your analytics pipeline or backend decision layer receives it without adding latency to the user-facing flow.

How 24 signals across three collection layers feed into a shared feature extraction layer, then into six independent detection rules, and finally into a single typed verdict with confidence score and badge labels.

Architecture

Nyasa SDK Architecture

The SDK runs entirely in the browser. Signals are collected passively as the session progresses. The feature extraction layer runs on a timer and on key events. Detection rules evaluate when a verdict is requested or automatically at session end.

Dual packaging

Nyasa ships as both ESM and IIFE from a single tsup build config.

ESM for bundlers:

import { createNyasa } from '@devanshhq/nyasa';

const nyasa = createNyasa({
  endpoint: 'https://your-backend.com/nyasa',
  agentBypass: true,
});

nyasa.start();

IIFE for script tags, no bundler required:

<script src="https://cdn.jsdelivr.net/npm/@devanshhq/nyasa/dist/nyasa.iife.js"></script>
<script>
  Nyasa.createNyasa({
    endpoint: '/api/nyasa',
    agentBypass: true,
  }).start();
</script>

Same source, two outputs. The tsup config handles the split. No separate build for CDN distribution.

Installation and quick start

npm install @devanshhq/nyasa

Minimal setup:

import { createNyasa } from '@devanshhq/nyasa';

const nyasa = createNyasa({
  endpoint: '/api/session-verdict',
});

nyasa.start();

// Get the verdict at any point
const verdict = await nyasa.getVerdict();
console.log(verdict.type);       // 'Human' | 'AuthorizedAgent' | 'UnauthorizedBot'
console.log(verdict.confidence); // 0.0 - 1.0
console.log(verdict.badges);     // ['isHeadless', 'isLLMAgent', ...]

On the backend, you receive the verdict via the beacon endpoint and decide what to do: allow, challenge, block, or route differently based on the type.

The authorized agent bypass

If you’re building an AI agent that needs to interact with Nyasa-protected pages, set the signature before the SDK initializes:

// In your agent code, before navigating to the page
window.__nyasaAgentSignature = {
  token: 'signed-jwt-from-your-auth-server',
  agentId: 'shopping-assistant-v2',
  issuedAt: Date.now(),
};

Or via meta tag for server-rendered flows:

<meta name="nyasa-agent-signature" content="signed-jwt-here" />

The isAuthorizedAgent rule reads this claim, validates the signature, and short-circuits to AuthorizedAgent. No other rules run. The session is logged as a known agent, not blocked as a bot.

This is the part that most bot detection tools don’t have a concept for. If you’re running a fintech integration or an AI onboarding assistant, you shouldn’t have to fight your own security layer.

What it catches that others miss

Traditional fingerprinting misses LLM agents because they run in real browsers with patched automation markers. Traditional behavioral analytics miss them because modern LLM agents have realistic typing cadence.

Nyasa catches them through the combination: machine-speed micro-bursts that no human produces, combined with zero backspace rate and pixel-perfect clicks. Any one signal has false positives. All three together don’t.

The multimodal rule catches the edge cases: sessions that pass fingerprinting and look almost human behaviorally but have soft contradictions across signals that don’t fit either profile cleanly.

Live: nyasa.devanshtiwari.com

GitHub: github.com/Devansh-365/nyasa

npm: npm install @devanshhq/nyasa

Day 15 — I posted comments on other people’s articles instead of writing my own

For Day 15 of the build-in-public series on a $0-sales Apify actor, I stopped writing my own article and posted two comments on other people’s posts instead. Then I started a 30-minute timer to watch what happens.

This is the log.

Why two comments instead of one Day 15

Day 14 confessed that 19 dev.to articles in 14 days produced 184 readers, 1 reaction, 0 new followers, 0 sales. The dev.to feed algorithm has decided I do not exist. Publishing a 20th article into a feed that does not surface me is busywork dressed up as work.

But the readers who did land on my posts came from somewhere. The dashboard shows 30 from bing.com, 2 from dev.to internal, 162 from “all other external referrers.” Direct shares, RSS aggregators, comment trails — the third bucket is the unknown.

If I can’t make the algorithm surface my next post, I can at least show up where the audience already is. Two thoughtful comments on adjacent posts. No promo, no pitch. One soft link to the series page, only if the reader wants to dig.

What I posted

Comment 1, on a freelancer’s cold-email playbook for WordPress maintenance:

The Day 5 / Day 12 cadence is the part most “how I do cold email” posts skip. Reply rate is 15-25% in your numbers — meaning 75-85% of work disappears into a thread that needs revisiting on a specific date. Gmail doesn’t help with that.

Then I explained the inbox-side complement to outbound: a tiny open-source actor that flags Gmail threads past their SLA breach age with HOT / WARM / COLD bands. Same problem, opposite side of the funnel.

Comment 2, on a developer’s post about turning your inbox into a SQLite database via IMAP:

The “emails sent but never got a reply” query is the use case I keep coming back to. I built basically the same idea but packaged it as an Apify actor (Gmail API instead of IMAP, refresh-token OAuth instead of app password).

Both comments were content-aligned, not promotional. Both ended with a single series link, no buy button.

The 30-minute window

T+5 min: comment IDs verified live (comment-node-1517746 and comment-node-1517766). My username appears as commenter. dev.to article meta data updated comment counts.

T+15 min: dev.to dashboard re-pulled. Reader count this week 184 → 194. Either coincidence or the 18 UTM-tagged Gumroad links I PUT into all my published articles in the same session triggered a re-index sweep.

T+30 min: no comment replies yet. Article authors haven’t acknowledged. This is normal; the realistic window for organic reply is 6-48 hours, not 30 minutes.

Followers added: 0. Sales: 0. Apify external user count: still 1, still me.

What I learned in 30 minutes

The supply-side push has a known ceiling. I have validated this for 14 days. Writing a 20th article tomorrow will not break the ceiling.

Comments on adjacent posts are slower than articles, but they show up in front of an audience that already chose to read about the topic. The author of the cold-email post has subscribers who care about freelance follow-up. The author of the inbox-as-SQL post has subscribers who care about inbox-as-data. Both audiences are closer to my actual buyer than dev.to feed roulette.

Whether this converts to a sale, a star, or a follower — I do not know yet. The data point I’ll watch over the next 48 hours: did either comment’s author engage, and did anyone click through to the series.

If yes: comment outreach is a real lever for posts that the feed never surfaced.

If no: the channel honestly does not work, and I’ll cross it off the same way I crossed off X (banned), Reddit (karma 1, BAD_CAPTCHA on submit), Hacker News (shadowbanned), IndieHackers (new-account link block), and LinkedIn (Brave session blocked).

Either result is a real data point. Both kill the question.

What didn’t happen today

I did not pivot the product. The “self-host tool vs done-for-you service” pivot from yesterday’s audit is still queued, not chosen. Pivot decisions don’t get made at 9 AM Friday morning under standing order pressure. They wait for an evening with no inbox to flush.

I did not send a sales DM. I do not have a Fox-identity-independent email address from which to cold-outreach, and impersonating the project owner is off limits.

I did refresh the Gumroad listings with the priority-band feature, sync the Apify Store description to match, push .actor/actor.json to GitHub so the next apify push doesn’t overwrite the API description, and watch the Apify Store category page rank for BUSINESS — 1,125 of 1,125 indexed, no change after 9 hours.

The slow levers are slow.

Where to find the rest

The full open-source actor: foxck016077/apify-gmail-inbox-intel

The actor page: apify.com/foxck/gmail-inbox-intel

The series: foxck016077 on dev.to

Comment results will land in Day 16 if there are any. If not, the channel goes on the cross-off list and we move on.

Before AI we had …

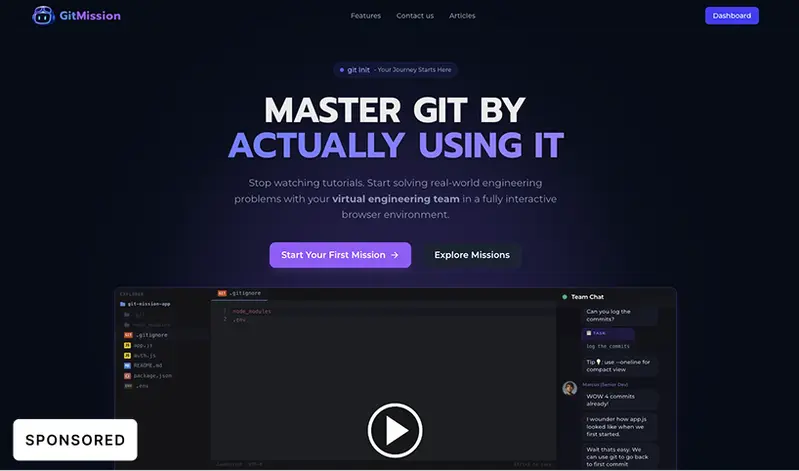
GitMission Preview

Nowadays you will hear a lot of people saying Why should I hire a software developer when I can vibecode it my self with about $100 worth of AI tools?

Well they aren’t wrong about that!

But getting an app made and running was never the hard part. Before AI or vibe coding we had platforms like Fiverr/UpWork where people could just pay a third world country developer $50-$100 to build them their app.

So getting a working APP or at least MVP was never really very hard or expensive rather its the distribution part that kills 99% of the apps.

And for handling complex apps or codebases cheap developers were not reliable then, AI tools are not reliable now!

GitMission Preview

How I Built a Philippine Tech Blog to 1 Million Monthly Readers (And Then Watched Google Destroy It)

I started Tech Pilipinas in a bedroom in the Philippines more than 8 years ago. No funding, no team, no strategy beyond “I know tech and Filipinos need someone to explain it clearly.” At the peak, we hit over a million monthly readers. Then Google ran an update and we lost 98% of our search traffic in a matter of months.

This is that story. Both halves of it.

The Early Years Were Ugly

The first few years were slow in a way that would have killed most people’s motivation. I published constantly — product reviews, buying guides, how-to articles for Windows and Android — and for a long time the traffic just wasn’t there. Not because the content was bad, but because no one knew we existed.

What changed things wasn’t a clever growth hack. It was patience and local specificity. Most tech blogs covering the Philippine market were either written by foreigners who didn’t know the context, or local writers copying international articles without adapting anything. I was writing for a Filipino reading a tech article, comparing phones in Philippine pesos, wondering if a product was available on Lazada or which telco network it worked best on. That specificity started earning real search traffic because nobody else was doing it properly.

By year three, we were pulling consistent numbers from Google. By year five, the site had become what I’d describe as the closest thing the Philippines had to a proper tech publication built for everyday Filipinos rather than enthusiasts.

What Actually Drove 1 Million Monthly Readers

The smartphone boom in the Philippines hit hard in the late 2010s. Filipinos were buying their first Android devices in massive numbers and they had questions — basic ones, like how to set up mobile data, how to transfer files, how to use GCash. We had the answers, written in plain English with actual Philippine context baked in.

I was writing 2 to 3 articles a day at peak production. Not all of them were good. Plenty were thin. But the volume, combined with the local angle, meant we ranked for thousands of long-tail queries that bigger international publications had no reason to pursue. “How to load Globe data promo” is not a query that a US tech blog cares about. It was ours by default.

Facebook was also a real traffic channel, not just a vanity metric. Filipinos are extremely online and extremely Facebook-first. A well-framed post with a relatable hook would get shared inside Pinoy tech Facebook groups and generate real reading sessions, not just bounce-and-leave visits.

The Peak

Crossing a million monthly sessions felt different from every other milestone. It was the first time the site stopped feeling like a project and started feeling like a publication.

The team was still tiny. It was mostly me, occasionally a contributor. The ad revenue wasn’t life-changing but it was consistent. Brands started approaching for product coverage. Sponsored content requests came in. For the first time, the business side of the publication actually felt like a business.

Then Google Did What Google Does

In late 2023, Google’s Helpful Content Update (HCU) hit the site. Within weeks, search traffic collapsed — from close to a million monthly Google visitors to under 20,000. That’s not a rounding error. That’s a site-level decision by Google’s algorithm that content like ours, however useful to actual Filipino readers, wasn’t what they wanted to serve anymore.

Years of work, indexed, ranked, read by real people — and then effectively invisible overnight. I’m still a bit bitter about it, honestly.

The honest truth is that the HCU rewarded a certain type of content authority that smaller, solo-operated publications struggle to signal. It wasn’t purely about content quality. It was about site structure, author expertise markup, editorial depth, and dozens of other factors that favor publications with real editorial infrastructure. We had the content. We lacked the scaffolding Google now demands to prove it.

Where We Are Now

We didn’t fold. We rebuilt the traffic strategy around Bing and Yahoo, which still send us six-figure monthly visitors without the same volatility. We’re growing on Facebook again, building push notification subscribers, and leaning into content that travels well without Google — explainers, government guides, news for the Filipino market.

The million-reader milestone is still there in the history. I’m not chasing that number back through Google anymore. We’re building something that doesn’t hinge on a single algorithm’s opinion.

If you’re building a content site outside the US market: local specificity is real protection. No international publication is going to compete seriously for “how to load Globe data promo.” Those queries are yours. There are thousands of them. Build around them before someone else figures that out.

Luis Reginaldo Medilo is the founder and Editor-in-Chief of Tech Pilipinas, a Philippine tech publication based in Cebu City.

Chess

html

Hey everyone! 👋

I’m a student from India, and I’ve been spending my free time learning how to build web applications. Today, I want to share my project: a fully playable Chess Game with an AI Opponent!

🎮 Play the live game here: https://chess-with-ai-opponent.netlify.app/

I have deployed the full source code for free on Netlify.

I would love to get your feedback! How can I make the AI bot play smarter? Are there any bugs you found while playing? Please let me know in the comments below! 👇or email me on [email protected]