Safaricom’s sandbox STK Query API returns FAILED for successful payments. Here’s what’s happening.

Running reconciliation against the Daraja sandbox last week, I got this:

{"checked":3,"matched":0,"skipped":0,"mismatches":[
  {"checkoutRequestId":"ws_CO_26032026133641276708729173",
   "storedStatus":"PENDING","mpesaStatus":"FAILED"},
  {"checkoutRequestId":"ws_CO_26032026111016899708729173",
   "storedStatus":"SUCCESS","mpesaStatus":"FAILED"},
  {"checkoutRequestId":"ws_CO_26032026113146397708729173",
   "storedStatus":"SUCCESS","mpesaStatus":"FAILED"}
]}

The last two entries are the problem. Both have confirmed M-Pesa receipts in the database — UCQ5UAQ403 and UCQ5UAPYRY — with confirmed deductions on the test account. The STK callback delivered ResultCode: 0 for both. Money moved. Safaricom’s own callback said so.

The STK Query API disagrees. It says both payments failed.

I searched Stack Overflow, the Safaricom GitHub repos, every community integration I could find. No prior documentation of this. Not a single issue or comment. It appears to be unreported.

What’s actually happening

Safaricom’s sandbox doesn’t fully simulate the USSD network layer. This is documented behavior — it’s why Pesa Playground exists. The sandbox can’t reliably generate failure states. What’s less documented is the inverse: the sandbox STK Query endpoint apparently cannot reliably confirm success states either. It defaults to FAILED when it can’t definitively resolve a transaction, regardless of what the callback already told you.

The sandbox callback and the sandbox STK Query are not reading from the same source of truth.

How [email protected] handled it

The library refused to act on the contradiction. matched:0 — it checked the payments, found that the STK Query response conflicted with an authoritative stored SUCCESS, and did not overwrite. The PENDING record from the orphaned payment stayed PENDING rather than being incorrectly resolved to FAILED.

That is the correct behavior. A reconciliation system that overwrites SUCCESS with a contradictory query response would be worse than one that does nothing.

What this means for your reconciliation implementation

Two things need to be true in how you handle STK Query responses:

Never overwrite a terminal SUCCESS or confirmed FAILED record based on a query response alone. The callback is the authoritative source. The query is a fallback for records that never received a callback — PENDING only.

Don’t trust sandbox reconciliation results. The sandbox STK Query is not a reliable test surface for this code path. Test your reconciliation logic against a production environment, or accept that sandbox results for this specific path are noise.

The production question

I haven’t run this against a live production environment. Safaricom’s documentation implies the production STK Query returns accurate results — the sandbox is the broken environment, not production. If you’ve tested reconciliation in production and can confirm the query API behaves correctly there, I’d like to know. Leave a comment or find me on the Daraja Discord.

The finding stands regardless: if you’re building reconciliation, your implementation needs to handle contradictory query responses. The sandbox will generate them. Production might too, in edge cases nobody has documented yet.

Tested on 2026-03-26, Daraja sandbox, [email protected]. Full test log in the flutter-daraja-raw repo.

Running State Pattern — LeetCode #1480: Running Sum of 1D Array

Prerequisite: Loop Invariants — the first post in this series covers what an invariant is and how to state one. If the word “invariant” is new to you, start there.

The Problem (15 seconds)

Given an array nums, return an array where each element is the running sum up to that index.

Input:  [1, 2, 3, 4]
Output: [1, 3, 6, 10]

// result[0] = 1
// result[1] = 1 + 2 = 3
// result[2] = 1 + 2 + 3 = 6
// result[3] = 1 + 2 + 3 + 4 = 10

LeetCode #1480 — Running Sum of 1D Array

The Obvious Mistake

Most engineers look at this problem and see a loop inside a loop.

“For each index, add up everything before it.” That’s the instinct. It’s technically correct. It’s also exactly the kind of thinking that produces O(n²) code when O(n) was sitting right there.

// Brute force — recompute the sum from scratch for each index
function runningSum(nums: number[]): number[] {
  const result: number[] = [];
  for (let i = 0; i < nums.length; i++) {
    let sum = 0;
    for (let j = 0; j <= i; j++) {
      sum += nums[j]!;
    }
    result.push(sum);
  }
  return result;
}

O(n²). For each element, summing everything from the start again. But by the time you’re computing result[3], you already know result[2].

You already did that work. Why are you doing it again?

The Moment It Clicks

You’re not computing sums from scratch. You’re carrying one forward.

result[i] = result[i-1] + nums[i]

Each running sum is just the previous running sum plus the current number. You don’t look backward — you carry the answer forward. That shift in mental model — from “compute everything again” to “carry the last answer forward” — is the entire insight. Every problem after this is just a variation on it.

This is the running state pattern: instead of recomputing from scratch, maintain a variable that accumulates as you go.

The Invariant

At step i, sum equals the total of nums[0] through nums[i-1].

After adding nums[i], sum becomes the total through nums[i] — which is exactly result[i].

Let’s trace it:

nums = [1, 2, 3, 4]

Before loop: sum = 0              → total of nothing ✓
i=0: sum = 0 + 1 = 1             → total of [1] ✓        → result = [1]
i=1: sum = 1 + 2 = 3             → total of [1,2] ✓      → result = [1,3]
i=2: sum = 3 + 3 = 6             → total of [1,2,3] ✓    → result = [1,3,6]
i=3: sum = 6 + 4 = 10            → total of [1,2,3,4] ✓  → result = [1,3,6,10]

The invariant held at every step. The result is guaranteed correct.

Solution

TypeScript:

function runningSum(nums: number[]): number[] {
  const result: number[] = [];
  let sum = 0;

  for (const num of nums) {
    sum += num;
    result.push(sum);
  }

  return result;
}

Python:

def running_sum(nums: list[int]) -> list[int]:
    result: list[int] = []
    total = 0

    for num in nums:
        total += num
        result.append(total)

    return result

Complexity: O(n) time, O(n) space (for the result array).

In-place variant (modifies the input):

function runningSum(nums: number[]): number[] {
  for (let i = 1; i < nums.length; i++) {
    nums[i]! += nums[i - 1]!;
  }
  return nums;
}

The Foundation of Everything Hard

Running Sum is the simplest prefix sum — a running total stored at every index. That stored total is the key that unlocks a whole class of harder problems:

  • Subarray Sum Equals K (#560) — does any slice of the array add up to exactly k?
  • Range Sum Query (#303) — what’s the total between index i and index j?
  • Maximum Subarray / Kadane’s (#53) — which contiguous slice has the biggest sum?
  • Product of Array Except Self (#238) — same idea, with multiplication instead of addition

You don’t need to know how to solve these yet. Just notice: every one of them is asking a question that gets dramatically easier once you have the running totals precomputed. The only thing that changes problem to problem is the operation — sum, max, product. The carry-forward structure is identical.

People skip this problem because it’s labeled “Easy.” That’s the mistake. The “Easy” label measures implementation difficulty, not conceptual weight. You’ll hit Subarray Sum Equals K and wonder why prefix sums feel unfamiliar — it’s because you rushed past the problem that introduced them.

It’s Not Just This Problem

Here’s the real pattern underneath all of it.

When you see yourself writing a nested loop where the inner loop starts at index 0 every single time — that’s the signal. You’re recomputing something you already know. The fix is always the same: carry it forward in a variable.

Kadane’s carries the best sum forward. Sliding Window carries the window total forward. Dynamic Programming carries the answer to the previous subproblem forward. Different problems, different names — same move underneath.

The shape changes. The principle doesn’t.

Don’t recalculate. Accumulate. Running sum is the first time you’ll see this idea. It won’t be the last.

How to Recognize This Pattern

You need the accumulator pattern when:

  • The answer at position i depends on all previous positions (not just neighbors)
  • You catch yourself writing a nested loop where the inner loop starts at 0 every time
  • The problem says “running”, “cumulative”, “prefix”, or “so far”

The signal: “I’m recomputing something I already know.” The fix is always the same — carry it forward in a variable.

There’s a version of you that solves this problem in five minutes, checks it off, and moves on without thinking about it again. That version hits a wall at Subarray Sum Equals K and can’t figure out why the prefix sum lookup feels alien.

The other version pauses here. States the invariant. Traces through it manually. Asks: “Where else does this carry-forward idea show up?” That version arrives at Kadane’s with the pattern already loaded. The algorithm makes sense on first reading because the shape is familiar.

This is an easy problem. That doesn’t mean it’s a small one.

What pattern did you miss the first time you solved it — and only understood later when you hit a harder version of the same idea?

Next in the series: Contains Duplicate (#217) — where you’ll learn the “have I seen this before?” pattern with hash sets. Then Valid Anagram (#242) and finally Two Sum (#1) — invariant + lookup + accumulator, all together.

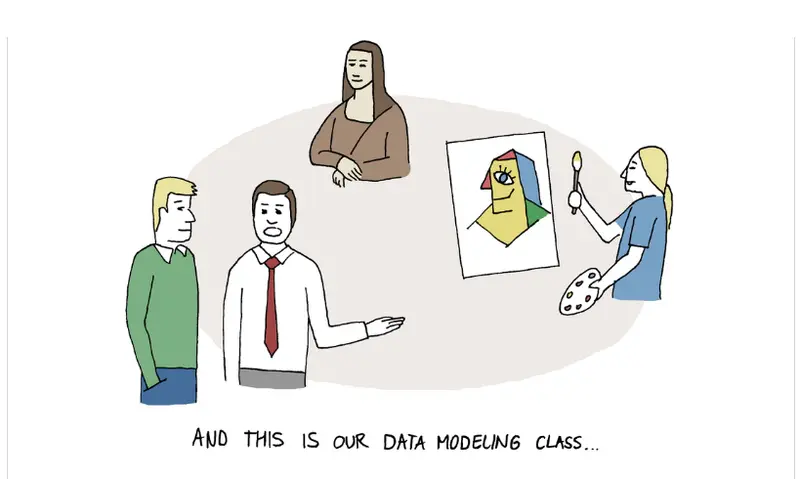
Data Modelling in Power BI: The Foundation Every Analyst Needs.

I started learning Power BI backwards. I jumped straight into building visuals, dragging fields onto a canvas, and then kept wondering why my numbers are wrong. Well, the reason is that I had completely skipped data modelling.

Data modelling-is the invisible architecture behind every Power BI report.
Here is what you need to understand:

What is a Data Model?
A data model is the structure that defines how your tables relate to each other. In Power BI,there is a tool called the Model View, where you connect tables using relationships.

Its often depicted as lines that tell Power BI “this column in this table matches that column in that table.”
The most important concept in data modelling is the difference between two types of tables:

Fact table-They contain measurements i.e. numbers that change over time e.g. sales amounts.
Dimension table-They provide context i.e. the who, what, when and where e.g. Customer names, product categories, customer locations etc.

Star Schema-It is a data modeling technique that organizes data into a central fact table connected to multiple dimension tables, optimizing query performance and simplifying analysis.

*Power BI works best with this structure. Your reports will be faster, your filters will work correctly, and your calculations will give you the right answer. *

Real life Example
Bank loan dashboard
Imagine you work at XYZ bank as a Business Analyst.You are required to provide a report showing loan performance. You have three tables.

1.Loans table.
2.Customers table.
3.Branches Table.

You connect them like this.
Customer ID in the loans table connects to customer ID in the customer’s table.
Branch ID in the loans table connects to branch ID in the branches table.

When a manager clicks on Kakamega branch, Power BI automatically filters the loan table to show only Kakamega branch loans.

So before you drag another visual onto that canvas, check your data model.

LET’S TALK JOINS

Joins-Before your data lands in Power BI, sometimes you need to combine tables first. This is where joins come in. A join is simply a way of saying ”take this table and that table and bring them together based on a matching column”

Think of it like this. You have a class register with student names and IDs. You have a marks sheet with student IDs and scores. A join connects the two so you can see each student’s name alongside their score in one clean table.

There are four main types of joins.

Inner join — give me only the rows that match in both tables. If a student is in the register but not the marks sheet, they are left out completely.

Left join— give me everything from the left table, and match what you can from the right table. If there is no match, leave the right side empty. This is the most common join in data work.

Right join — the opposite of a left join. Keep everything from the right table and match what you can from the left.

Full outer join — give me everything from both tables regardless of whether there is a match. Unmatched rows get blanks on the side that has no data.

SEE BELOW DIAGRAM

What is the most challenging part of data modelling for you?

Road to Golden Jacket: My Journey and Tips for the New AWS SOA-C03 Exam 🚀

When I sat down to take my AWS Certified SysOps Administrator – Associate exam on March 23, I had prepared for a broad range of operational topics. But when the test began, one thing became immediately clear: Amazon CloudWatch was everywhere.

It felt like every other scenario revolved around monitoring, analyzing logs, or troubleshooting performance bottlenecks. Now that AWS has officially transitioned to the new AWS Certified CloudOps Engineer – Associate (SOA-C03) exam, I realize that my heavy CloudWatch experience was actually the best preparation I could have asked for.

Here is a personal look at my exam experience, why CloudWatch is your best friend, and my top tips for anyone tackling the new CloudOps certification.

📈 The CloudWatch Marathon

During my exam on March 23, the monitoring and logging domain was a massive part of the test. I had to know exactly how to trigger alarms, collect logs, and automate responses.

If you are studying for the new SOA-C03 exam, this is even more critical. The domain has been expanded to “Monitoring, Logging, Analysis, Remediation, and Performance Optimization” and now carries the heaviest weight on the exam at 22%,.

To pass, you must understand how to:

  • Configure and manage the CloudWatch agent to collect metrics and logs not just from EC2 instances, but also from Amazon ECS and Amazon EKS clusters,.
  • Set up composite alarms and configure them to invoke AWS services directly or through Amazon EventBridge.
  • Automate remediation tasks using AWS Systems Manager Automation runbooks.

🔄 Bridging the Gap: SysOps to CloudOps

While my exam tested me heavily on traditional monitoring, the new “CloudOps” title reflects a modern shift in cloud operations. If I were taking the SOA-C03 today, here is what I would add to my study list to bridge the gap:

  • The Container Ecosystem: Containers are now officially in-scope. You need to understand Amazon Elastic Container Registry (ECR), Elastic Container Service (ECS), and Elastic Kubernetes Service (EKS),.
  • Infrastructure as Code (IaC): The new exam emphasizes creating and managing stacks using AWS CloudFormation and the AWS Cloud Development Kit (AWS CDK),.
  • Multi-Account Management: Operating in a single account is a thing of the past. You must know how to enforce compliance and manage security across multiple accounts using AWS Organizations, Service Control Policies (SCPs), and AWS Control Tower,.

💡 My Top Tips for Exam Day

Based on my experience in the hot seat, here are my top tips for crushing the exam:

  1. Build a Real Monitoring Lab: Don’t just read the docs. Spin up an EC2 instance, install the CloudWatch agent, and create a custom dashboard,. Set up an alarm to trigger an SNS notification or an EventBridge rule, so you see the automated flow in action.
  2. Master Automation: Understand how to use AWS Systems Manager to automate operational processes and remediate issues,.
  3. Eliminate the Noise: AWS questions are famously wordy and the distractors are designed to look plausible. Find the core requirement like “most cost-effective” or “highly available” and eliminate the answers that don’t fit.
  4. Embrace the AWS Well-Architected Framework: The exam tests your ability to support workloads according to these best practices,. Always think about how to optimize performance and reliability.

Taking this exam validated my practical skills and proved that I could maintain and secure workloads in the cloud. If you are preparing for the SOA-C03, dive deep into CloudWatch and embrace automation!

Have you taken the exam yet? Let me know your experience in the comments below! 👇

How I Built a Live Streaming Platform with PHP, WordPress and WebRTC (Real Case)

JSON to Kotlin extension

Building a real-time streaming platform is usually associated with complex infrastructures and expensive services.

However, in this case, I developed a fully functional live streaming system using PHP, WordPress, and WebRTC — all inside a custom plugin.

This is a real-world implementation, not a theoretical example.

Project Goal

The main idea was to create a platform where:

Users can watch live streams
Private sessions can be started between users
Real-time chat is available
A pay-per-minute system is implemented

All without relying on external streaming services.

⚙️ Tech Stack
Backend: PHP (WordPress plugin)
Database: MySQL ($wpdb)
Streaming: WebRTC (PeerJS)
Frontend: JavaScript + AJAX
Real-Time Streaming with WebRTC

The core of the system is based on WebRTC using PeerJS.

The broadcaster (model) shares their camera:

navigator.mediaDevices.getUserMedia({ video: true, audio: true });

The viewer connects using a dummy stream to avoid permission prompts:

function createDummyStream() {
const canvas = document.createElement(‘canvas’);
return canvas.captureStream();
}

This approach significantly improves UX.

Private Sessions Logic

Private sessions are handled via URL parameters:

/transmision-privada?babe=username

Flow:

User selects a model
A direct peer connection is created
The session starts in real time
Disconnection is detected automatically
💸 Pay-Per-Minute System

One of the most important parts is monetization.

Users are charged per minute
Balance is updated in real time
Broadcasters receive a percentage

Example logic:

function charge_user_per_minute($user_id) {
$balance = get_user_meta($user_id, ‘balance’, true);
return $balance – 3000;
}

This allows building scalable revenue models.

Real-Time Chat (AJAX)

Instead of using WebSockets, I implemented chat using AJAX polling:

Messages sent via admin-ajax.php
Fetched every few seconds
Rendered dynamically

Simple, but effective.

Stream State Management

A custom table tracks active streams:

active_private
active_public
finished

This allows listing live streams and controlling sessions.

Role-Based Access

Two main roles:

Broadcasters (models)
Subscribers (users)

Managed directly through WordPress roles.

Real-World Implementation

This architecture is already being used in production in a live webcam streaming platform with direct payment system, where all these concepts are applied together.

It combines real-time video, chat, and monetization in a single environment.

Final Thoughts

Building a streaming platform with PHP and WordPress is absolutely possible if you combine the right tools.

The real challenge is not just streaming video — it’s integrating:

  • Real-time communication
  • Payment logic
  • User roles
  • System state

This project proves that you can build complex, scalable systems without leaving the WordPress ecosystem.

Top 10 CSS Tips and Tricks Every Developer Should Know in 2026 🎨

1. 🎯 Stop Fighting CSS — Start Using It

Let me be honest with you. We’ve all been there — staring at a div that refuses to center, copy-pasting Stack Overflow answers at midnight, and muttering things that shall not be repeated. CSS has a reputation for being “simple but frustrating,” like a GPS that gives you directions after you’ve missed the turn.

But here’s the thing — CSS in 2026 is genuinely exciting. Like, legitimately powerful. The language has quietly leveled up while many of us were busy arguing about frameworks. It now handles logic, animations, responsive design, and even conditional styling — things we used to hand off to JavaScript or Sass.

So whether you’re building your first portfolio or shipping production UIs, these 10 CSS tips and tricks will change how you write styles. Some are fundamentals done better. Some are brand-new 2025–2026 features that are already landing in browsers. All of them are worth your time. ☕

2. 💡 What Even Is “Good CSS”?

Good CSS isn’t just about making things look pretty. It’s about writing styles that are maintainable, performant, and predictable.

Think of CSS like your closet. You could just throw everything in there — and it’ll technically work — but the moment you need to find that one shirt for an interview, you’re digging through chaos at 8am. Good CSS is an organized closet: clear structure, logical sections, nothing randomly stuffed behind the winter jackets.

In practical terms, good CSS means:

  • Your styles don’t randomly break when you add one new class
  • Your layout works across screen sizes without seventeen media queries
  • Your team (or future-you) can read the code six months later without having a crisis
  • You’re not importing a full JavaScript library just to animate a button

That’s the goal. And these tips will get you there. 🎯

3. 🔥 Why CSS Skills Still Matter (A Lot)

“But I use Tailwind / CSS-in-JS / [insert framework here] — do I really need to know raw CSS?”

Yes. Absolutely yes.

Here’s why: every CSS utility class you use is just CSS underneath. Every component library has a stylesheet. Every animation you see in a slick SaaS product is ultimately pixels painted by the browser using CSS rules. When things break — and they will — the developer who understands CSS is the one who fixes it in 10 minutes while everyone else opens a GitHub issue.

Also, CSS has become dramatically more capable. The theme of 2026 is that CSS is becoming state-aware, context-aware, and layout-smart — which means we can ship cleaner UI with fewer JavaScript workarounds. That’s not a small thing. That’s CSS becoming a real design engineering tool.

Understanding CSS deeply makes you a better frontend developer. Full stop.

4. 🚀 10 CSS Tips and Tricks That Actually Work

Tip 1: Use CSS Custom Properties Like a Pro

CSS variables (custom properties) aren’t just for storing colors. They’re your design system in a file. You can scope them, inherit them, and even change them with JavaScript at runtime.

:root {
  --brand-color: #fd6e4e;
  --radius: 12px;
  --spacing-md: 1.5rem;
}

.card {
  background: var(--brand-color);
  border-radius: var(--radius);
  padding: var(--spacing-md);
}

The best part? Change --brand-color in one place, and every element using it updates instantly. It’s like editing a Google Doc instead of emailing attachments — one source of truth. No Sass required.

Tip 2: Master CSS Nesting (Now Native!)

Remember when you needed Sass just to write nested selectors? Those days are over. CSS nesting is now supported across modern browsers — no preprocessor needed. You can write styles the way you think about components, keeping related rules together.

.card {
  padding: 1rem;
  border: 1px solid var(--border);

  & h3 {
    margin: 0 0 .5rem;
  }

  &:hover {
    border-color: oklch(0.8 0.1 20);
  }
}

This makes your CSS dramatically easier to scan and maintain. One block, one component, zero confusion. 🙌

Tip 3: Use :has() — The Parent Selector We Always Wanted

For years, developers asked: “Can CSS select a parent based on its child?” The answer was always “no, use JavaScript.” Now the answer is “yes, use :has().”

/* Style a card differently if it contains an image */
.card:has(img) {
  padding: 0;
  overflow: hidden;
}

/* Style a form if it has an invalid input */
form:has(input:invalid) {
  border-left: 3px solid red;
}

You can use :has() to make components respond to their own content, not just their parent container — and it’s well-supported in modern browsers today. This one tip alone can replace a surprising amount of JavaScript.

Tip 4: Scroll-Driven Animations Without JS

Want elements to animate as the user scrolls? You used to need Intersection Observer, GSAP, or at least 30 lines of JavaScript. Not anymore.

.section {
  view-timeline: --reveal block;
}

figure {
  animation: fade-in 1s ease both;
  animation-timeline: --reveal;
  animation-range: entry 0% cover 60%;
}

@keyframes fade-in {
  from { opacity: 0; transform: translateY(20px); }
  to   { opacity: 1; transform: translateY(0); }
}

Scroll-driven animations let you tie subtle, performant motion to the user’s reading flow — and for older browsers, your static styles still look completely fine as a fallback. Animations that feel intentional without the JavaScript weight. 🎬

Tip 5: The clamp() Function for Fluid Typography

Stop writing three media queries just to change a font size on mobile, tablet, and desktop. clamp() handles it in one line.

h1 {
  font-size: clamp(1.5rem, 4vw, 3rem);
}

This means: “Be at least 1.5rem, scale with 4% of the viewport width, but never exceed 3rem.” The browser does the math. You go get coffee. ☕

It works for spacing and widths too:

.container {
  padding-inline: clamp(1rem, 5%, 3rem);
}

Tip 6: CSS if() — Conditional Logic in Your Stylesheets

This one is genuinely mind-bending. CSS now has a built-in if() function for conditionally adjusting properties, allowing you to pick a value based on media queries, feature queries, or style queries — all inside your CSS.

.card {
  transition-duration: if(
    media(prefers-reduced-motion: reduce): 0ms;
    else: 180ms;
  );
}

No more juggling class toggles — CSS can now make its own decisions based on context. It’s like giving your stylesheet a brain. Browser support is still emerging, so use @supports guards for now — but this is where CSS is heading.

Tip 7: Native CSS Mixins with @mixin and @apply

Sass users, this one’s for you. Native CSS mixins are arriving — you can define reusable blocks of declarations with @mixin --name {} and apply them with @apply --name. These work like Sass mixins but are built into the language, supporting parameters and conditional logic.

@mixin --center {
  display: flex;
  align-items: center;
  justify-content: center;
}

.card {
  @apply --center;
}

No build step. No preprocessor. Just CSS. The walls between “plain CSS” and “Sass projects” are getting thinner every month.

Tip 8: Use oklch() for Smarter Colors

oklch() is the new color format that actually makes perceptual sense. Unlike hex or HSL, lightness in oklch is perceptually uniform — which means your light blue and light red will actually look equally light to the human eye.

:root {
  --primary: oklch(65% 0.2 25);   /* coral */
  --muted:   oklch(65% 0.05 25);  /* same lightness, less chroma */
}

It’s especially powerful for generating color palettes programmatically or building accessible dark/light modes. Once you understand it, going back to hex values feels like cooking without tasting. 🧑‍🍳

Tip 9: View Transitions for Smooth Page Navigation

SPA-style page transitions used to require a full framework or complex JavaScript. Now they’re a few lines of CSS.

@view-transition {
  navigation: auto;
}

::view-transition-old(root) {
  animation: fade-out 0.3s;
}

::view-transition-new(root) {
  animation: fade-in 0.3s;
}

View transitions now work across full page navigations in multi-page apps, not just SPAs — use @view-transition { navigation: auto } to animate between pages served by the same origin.

Your site suddenly feels like an app. Users notice. Bounce rates drop. Win. 🏆

Tip 10: Always Use Logical Properties for Internationalization

This one trips up a lot of developers — especially when they start supporting RTL languages (Arabic, Hebrew, Urdu). Instead of margin-left and padding-right, use logical properties:

/* Old way */
.card {
  margin-left: 1rem;
  padding-right: 2rem;
}

/* Better way */
.card {
  margin-inline-start: 1rem;
  padding-inline-end: 2rem;
}

Logical properties respond to writing direction automatically. It’s as easy as unlocking your phone once you know the password — but your layout now works for every language on the planet without a single extra line of code. 🌍

5. ⚖️ Modern CSS vs. The Old Way — A Real Comparison

What You Want Old Way Modern CSS Way
Fluid font sizes 3+ media queries clamp() in one line
Animate on scroll JavaScript + Intersection Observer view-timeline + animation-timeline
Nested selectors Sass / Less Native CSS Nesting
Conditional styles JS class toggling if() function
Reusable patterns Sass @mixin Native @mixin + @apply
Parent selector JavaScript workaround :has() pseudo-class
Smart color palettes Manual hex values oklch() + contrast-color()
Page transitions Full framework @view-transition

The verdict? Modern CSS has largely caught up to what we used preprocessors and JS libraries for. You still need tools for complex projects — but the baseline is dramatically higher now.

🤔 Quick question for you: Which of these features did you not know existed? Drop your answer in the comments or DM me on social — I’m genuinely curious how many developers are still sleeping on oklch().

6. ✅ Best Tips / Do’s and Don’ts

Do’s ✅

  • Do use CSS Custom Properties for anything you repeat more than twice
  • Do write mobile-first styles and use min-width media queries
  • Do use clamp() for responsive sizing instead of media query breakpoints
  • Do test your CSS in multiple browsers, especially Safari (it’s always Safari 😅)
  • Do use :focus-visible instead of removing outline styles — accessibility matters
  • Do use @supports when testing new CSS features so older browsers degrade gracefully
  • Do keep your specificity low — use classes over IDs for styling

Don’ts ❌

  • Don’t use !important as a first resort — it’s a patch, not a solution
  • Don’t set height: 100vh on mobile without accounting for browser UI chrome — use dvh instead
  • Don’t animate properties that trigger layout (like width or top) — animate transform and opacity for performance
  • Don’t add vendor prefixes manually anymore — use a build tool or just check Baseline support
  • Don’t use inline styles for anything you’ll need to change later
  • Don’t forget prefers-reduced-motion — some users get motion sick from animations

7. 🚫 Common Mistakes Developers Make with CSS

1. Fighting the cascade instead of working with it
CSS is cascading by design. Trying to override everything with high-specificity selectors creates technical debt fast. Learn how specificity works and lean into inheritance — it saves code.

2. Using px everywhere
Pixels are fine for borders and small decorative details. But for font sizes, spacing, and layout, rem and em give you scalability. A user who sets their browser font size to 20px will thank you.

3. Ignoring the gap property
Still using margin-right on flex children? gap in flexbox and grid is cleaner, doesn’t add unwanted margin to the last child, and reads better. Use it.

4. Not using CSS layers (@layer)
Specificity battles are one of CSS’s most frustrating parts. @layer lets you explicitly control which styles take priority without hacking specificity scores. It’s like having a referee in your stylesheet.

5. Writing huge stylesheet files
One massive styles.css is a support nightmare. Split by component, use imports, or scope with @scope. Treat your styles like your JavaScript — modular and organized.

6. Forgetting will-change for heavy animations
If you’re animating something complex, add will-change: transform to hint the browser to prepare a separate compositing layer. Just don’t slap it on everything — it has a memory cost.

7. Not using DevTools properly
Chrome and Firefox DevTools are incredibly powerful for CSS debugging. The computed styles panel, the flexbox/grid overlays, the animation inspector — these tools exist to help you. Use them before you Google.

8. 🎉 Wrapping Up — Your CSS Era Starts Now

CSS in 2026 is genuinely one of the most exciting times to be a frontend developer. The language has evolved from “how do I center a div” memes to a serious design engineering tool with logic, animation timelines, parent selectors, and native mixins.

The developers who invest in understanding modern CSS — not just memorizing utilities, but actually getting the language — are the ones who build the interfaces that people remember. They’re the ones who ship faster, debug quicker, and write cleaner code.

And hey, the good news? You don’t have to learn it all at once. Start with one tip from this list. Play with clamp() today. Try :has() on your next component. Swap a hex color for oklch() and see what happens.

Want more content like this? I cover frontend development, CSS deep-dives, React tips, and developer tools regularly on my blog. Head over to 👉 hamidrazadev.com for more hands-on articles that cut through the noise.

And if this post helped you — share it! Seriously. One developer sharing this with a teammate creates a ripple. You might save someone a three-hour debugging session. That’s a good deed. ✨

See you on the other side of the stylesheet. 🚀

The Ink, The Iron, and the Algorithm: Why I Build for Truth

This is a submission for the 2026 WeCoded Challenge: Echoes of Experience

In the world of rare and historical artifacts, the difference between a masterpiece and a clever forgery often hides in the smallest details. It could be a specific serif on a typeface, or a tooling mark on piece of stone. This type of knowledge historically is known only by a select few. Locked away in the knowledge banks of high-end auction houses and private archives.

As I worked on a recent Archival Intelligence project for the Notion MCP Challenge, I realized that my journey in tech has been leading me toward a vital mission: Democratizing the Truth.

From Commodore Pets to Forensic AI

My journey started with early Commodore PETs and VIC-20s. Yeah, I’m that old. Back then, “diversity” in tech was barely a conversation. Further, the “archives” of our digital world were in their infancy.

History, however, is fragile. It is frequently written by those with the most resources. The records of marginalized communities, those whose stories aren’t backed by high-end auction houses, are often the first to be lost to the sands of time or forged for the sake of a more ‘profitable’ narrative. I build to ensure those stories have a forensic advocate.

Building the “Digital Magnifying Glass”

When I built the MCP Forensic Analyzer and looked at rare books, I wasn’t just thinking about $150,000 first editions. I was thinking about governance.

Much has changed and advanced in the world of tech since the Commodore PET days. We now find ourselves in a world in which AI can be a powerful ally. It can also hallucinate and manipulate digital data in seconds. We need systems that act as a “Ground Truth” for AI.

By using the Model Context Protocol to link Notion databases into a forensic audit trail, I’m trying to solve a problem that is older than computers… How do we prove what is real?

Tech as an Equalizer

The #WeCoded mission resonates with me because inclusion isn’t just about who is in the room.

It’s about whose history we choose to protect.

How can we use tech to accomplish this?

  • By automating the “Chain of Custody”: We can take the power of authentication out of the hands of the auction houses and private archivists and make the knowledge accessible via an open protocol.
  • AI integration: By making these tools available through simple chat interfaces, any small library, local museum, or interested individual can verify records and artifacts with the same rigor as top-tier institutions.

The Echoes of Our Experience

The code we write today becomes the archive of tomorrow.

My “Echo of Experience” is this:

Don’t just build tools to make things faster; build tools to make the world more verifiable.

Whether it’s a rare book, historical record, or antique stone artifact, the truth deserves a forensic advocate. I’m proud to be working on that advocacy. One line of code at a time.

Copilot vs Cursor: Which AI Coding Tool Should Frontend Developers Use in 2026?

Originally published on NextFuture

You probably have access to both. GitHub Copilot comes bundled with many dev subscriptions and student plans. Cursor has been the darling of indie devs and startup teams for the past year. But when you’re deep in a Next.js codebase at 11pm trying to ship, which one actually helps?

This isn’t a benchmark post. It’s a practical guide for frontend developers who need to decide where to spend their attention — and their money.

The Core Difference: IDE vs. Extension

This is the most important thing to understand: Copilot is an extension, Cursor is an IDE.

GitHub Copilot plugs into VS Code, JetBrains, Neovim, and others. Your existing setup, keybindings, and extensions stay intact. Cursor is a VS Code fork — it ships with AI baked into the core, not bolted on. You import your VS Code settings in 30 seconds, but you’re now in Cursor’s environment.

This matters because Cursor can do things architecturally that Copilot simply cannot — like reading your entire project tree, running terminal commands, and making coordinated multi-file edits through its Composer agent.

Autocomplete: Copilot Still Has an Edge

For pure line-by-line autocomplete, Copilot remains excellent. It’s fast, unobtrusive, and its suggestions feel natural for most JavaScript and TypeScript patterns.

// Copilot excels here — write the function signature and it completes the body
async function fetchUserWithPosts(userId: string) {
  // Copilot will suggest a complete Prisma query with include, error handling, etc.
  const user = await prisma.user.findUnique({
    where: { id: userId },
    include: {
      posts: {
        orderBy: { createdAt: 'desc' },
        take: 10,
      },
    },
  });

  if (!user) throw new Error(`User ${userId} not found`);
  return user;
}

Cursor’s autocomplete is comparable, but the real wins come from Composer — not the inline suggestions.

Where Cursor Dominates: Composer and Project-Level Context

Cursor’s Composer (especially in agent mode with the new Composer 2 model) can understand and modify your project holistically. This is where the comparison stops being close.

# What you can do in Cursor Composer that Copilot can't match:

# 1. Multi-file refactor with full context
"Update all API routes in /app/api/ to use the new auth middleware
from @lib/auth.ts — wrap each handler and add proper error responses"

# 2. Debug with file + doc context
"@app/api/stripe/webhook/route.ts is returning 400 on live webhooks
but passes local tests. Cross-reference @Stripe webhook docs and find the issue."

# 3. Generate from design decisions
"Create a complete user settings page at /app/settings/page.tsx using
the existing Card and Input components from @components/ui/"

Copilot Chat can handle some of this, but without deep file tree access or agent-mode execution, it often gives you generic answers rather than code tailored to your actual codebase.

Pricing Reality Check

  • GitHub Copilot Individual: $10/month — solid value, especially if you’re already on GitHub

  • GitHub Copilot Business: $19/user/month — adds policy controls, audit logs

  • Cursor Pro: $20/month — unlimited fast requests, Composer with agent mode, priority access to frontier models

If you’re choosing one: Cursor Pro at $20/month gives you more leverage per dollar for serious React/Next.js development. If budget allows, many developers run both — Copilot in their existing editors for quick tasks, Cursor for focused feature work.

When to Pick Each

Choose GitHub Copilot if:

  • You live in JetBrains or Neovim and don’t want to switch editors

  • You want AI assistance without changing your workflow

  • Your team is on GitHub Enterprise and Copilot is already included

  • You mostly need autocomplete, not architectural help

Choose Cursor if:

  • You primarily work in VS Code and are open to a fork

  • You do complex React/Next.js development with lots of cross-file changes

  • You want to use .cursorrules to embed project conventions into AI context

  • You need agent-mode for refactors, not just completions

Actionable Takeaways

  • Copilot for breadth, Cursor for depth — autocomplete vs. architectural understanding

  • Cursor’s .cursorrules file is a superpower — no Copilot equivalent exists at this level

  • Agent mode changes the game — multi-file changes with context awareness is Cursor’s biggest differentiator

  • Try Cursor free for 2 weeks — import your VS Code settings and judge for yourself

  • Don’t benchmark, use — ship something real with each tool before deciding

The honest answer: in 2026, for React and Next.js developers doing serious product work, Cursor is the stronger daily driver. But Copilot’s ubiquity and editor flexibility keep it relevant. Start with Cursor’s free trial, keep Copilot for your non-VS Code workflows, and reassess after a month of real usage.

This article was originally published on NextFuture. Follow us for more frontend & AI engineering content.

How I Solved Multi-Guard Permission Issues in Laravel with Redis

When working with Laravel applications that use multiple guards (web, api, etc.), I ran into a subtle but critical issue:

Permissions were leaking between guards.

At first, everything seemed fine… until it wasn’t.

The Problem

Imagine this scenario:

A user has a permission under the api guard
You check that permission under the web guard
$user->hasPermissionTo(‘posts.edit’);

And it returns true, even though it shouldn’t.

This happens when your permission system doesn’t properly isolate guards — something that can silently introduce security issues in production.

Why This Happens

Most implementations treat permission names as globally unique:

posts.edit

But in reality, permissions should be scoped by guard, meaning:

web: posts.edit
api: posts.edit

Without that separation, collisions are inevitable.

The Solution

In v2.0.0 of my package (laravel-permissions-redis), I redesigned the permission system to be fully guard-aware.

1. Guard-Scoped Permission Checks

All permission and role checks now accept a guard:

$user->hasPermissionTo(‘posts.edit’, ‘api’);
$user->hasRole(‘admin’, ‘web’);

Or fluently:

$user->forGuard(‘api’)->hasPermissionTo(‘posts.edit’);

2. Redis Storage Redesign

Permissions are now stored using this format:

guard|permission

Example:

api|posts.edit
web|posts.edit

This completely eliminates collisions between guards.

3. Smarter Caching

I also improved cache control to make the system more scalable:

rewarmAll() → rebuild cache without flushing
warmPermissionAffectedUsers() → only warm impacted users
getUserIdsAffectedByPermission() → precise impact analysis

4. Performance Improvements

No more full table scans when warming users
Redis config is cached internally
Middleware now resolves the correct guard automatically

Breaking Changes

If you’re upgrading:

Methods like hasPermission() now accept a $guard
Redis key format changed → you must flush and rewarm cache

Key Takeaway

Authorization bugs are dangerous because they don’t crash your app — they silently give access.

Fixing guard isolation is not just a “nice to have”, it’s essential for any system with:

  • APIs + Web apps
  • Multi-auth setups
  • Scalable architectures

Final Thoughts

This update was focused on one thing:

Making authorization correct, predictable, and scalable.

If you’re dealing with complex permission systems in Laravel, this approach might save you from some very tricky bugs.

I’d love to hear your thoughts or how you’re handling permissions in your projects.

Cursor Tips for React: How to Actually Use AI to Write Better Components

Originally published on NextFuture

You’ve installed Cursor, pointed it at your React project, and… you’re basically using it like VS Code with autocomplete. Sound familiar? Most developers barely scratch the surface of what Cursor can actually do — especially for React and Next.js development.

In 2026, with Cursor’s Composer 2 now backed by Kimi K2.5 and trained on large-scale realistic coding sessions, the gap between developers who know these tricks and those who don’t is growing fast. Here are the Cursor tips that will actually change how you build React apps.

1. Use Composer for Full Component Generation

Stop using Tab autocomplete for complex components. Open Composer (⌘K / Ctrl+K) and describe what you want at a high level. Instead of writing a validated form from scratch, prompt Composer like this:

// Prompt: "Create a login form with email/password, Zod validation,
// React Hook Form, Tailwind CSS, and a loading state during submission."

import { useForm } from 'react-hook-form';
import { zodResolver } from '@hookform/resolvers/zod';
import { z } from 'zod';

const loginSchema = z.object({
  email: z.string().email('Invalid email address'),
  password: z.string().min(8, 'Password must be at least 8 characters'),
});

type LoginFormData = z.infer;

export function LoginForm({
  onSubmit,
}: {
  onSubmit: (data: LoginFormData) => Promise;
}) {
  const {
    register,
    handleSubmit,
    formState: { errors, isSubmitting },
  } = useForm({ resolver: zodResolver(loginSchema) });

  return (


        {errors.email && 
{errors.email.message}
}


        {errors.password && 
{errors.password.message}
}


        {isSubmitting ? 'Signing in...' : 'Sign In'}


  );
}

That’s a production-ready form from a single prompt. The key: be explicit about your stack (Zod, React Hook Form, Tailwind) rather than being generic. Vague prompts produce vague code.

2. Set Up .cursorrules — The Highest-ROI Action You’re Skipping

Create a .cursorrules file at your project root and every Cursor suggestion will be automatically aligned with your conventions. No more re-explaining your stack in every prompt.

# .cursorrules
You are an expert Next.js 15 developer working in this codebase.

## Tech Stack
- Next.js 15 App Router (no Pages Router)
- TypeScript strict mode
- Tailwind CSS v4
- Prisma with PostgreSQL
- Zod for validation

## Code Rules
- Default to Server Components; use 'use client' only when necessary
- Prefer named exports over default exports
- Never use the 'any' type
- Always include loading and error states for async operations
- Put server actions in /app/actions/ and types in /types/

## Naming
- Components: PascalCase (UserCard.tsx)
- Hooks: camelCase prefixed with 'use' (useAuth.ts)

Set this up on day one of every project. It’s the closest thing to a permanent memory for Cursor.

3. Master @-References for Context-Aware Suggestions

Cursor’s @ system lets you inject files, docs, and URLs directly into prompts. For Next.js debugging, this is essential:

  • @app/dashboard/page.tsx — include a specific file in context

  • @Next.js — pull in Next.js official docs inline

  • @web https://tanstack.com/query/latest — reference any live URL

Example: “Look at @app/dashboard/page.tsx — this Server Component is serving stale data after mutations. Check @next.js caching and revalidation docs and fix the revalidatePath call.” Cursor analyzes your actual code against live documentation and gives targeted fixes instead of generic answers.

4. Agent Mode for Multi-File Refactors

Toggle “Agent” in Composer and Cursor can make coordinated changes across multiple files simultaneously. This is where Composer 2’s improvements shine — it understands how a change in one file ripples through a codebase.

Try: “Refactor all components in /components/ui/ to use design tokens from @styles/tokens.ts. Replace hardcoded Tailwind colors with token references and update all imports.” Cursor will open each file, show you a diff, and apply the changes — hours of manual work done in minutes.

Actionable Takeaways

  • Create .cursorrules immediately — highest single ROI action for any project

  • Use Composer, not just Tab — think in features and components, not lines

  • Master @-references — file context plus live docs equals accurate suggestions

  • Try agent mode for refactors — stop doing tedious multi-file edits manually

  • Specify your stack in every prompt — “with Tailwind” beats “with CSS”

Cursor has become the default choice for serious React and Next.js developers in 2026 — but only if you use it intentionally. Start your free trial at cursor.com and set up your .cursorrules file before you write a single line of code.

This article was originally published on NextFuture. Follow us for more frontend & AI engineering content.