Ways to Learn Vim in 2026: A Complete Beginner’s Guide

If you had asked someone five years ago whether learning Vim was necessary, they might have called it a niche flex for greybeards. But in 2026, the landscape of software development has shifted dramatically. The terminal is back, and it brought AI with it.

Tools like Claude Code, Cursor’s terminal, Copilot CLI, and Warp are pushing developers out of heavy GUIs and back into the command line. But there’s a catch: to use terminal-first AI tools efficiently, you need to know how to navigate and edit text without reaching for your mouse.

Vim keybindings are now everywhere – from VS Code and JetBrains to Obsidian and browser extensions. Knowing Vim is no longer just about looking cool; it’s becoming a practical necessity for the AI-augmented workflow. Here is a complete beginner’s guide to why and how to learn Vim today.

Why Even Learn Vim? (The Honest Case)

The learning curve is notorious. So why put yourself through it?

  • Speed & Efficiency: Vim allows you to edit at the speed of thought. Every time you move your hand from the keyboard to the mouse to highlight a word, you lose context. Vim keeps you in the flow.

  • The Grammar of Composability: Vim isn’t just a list of shortcuts to memorize. It’s a language. It uses a “verb + noun” grammar (operator + motion). Once you know that d is delete, c is change, w is word, and i" is inside quotes, you instantly know how to diw (delete inside word) or ci" (change inside quotes). A small set of building blocks creates hundreds of commands.

  • Ubiquity: vi and vim are pre-installed on virtually every server, Linux distribution, and Docker container on the planet. When you SSH into a broken server, your favorite electron-based editor won’t be there to save you.

  • A One-Time Investment: JavaScript frameworks change every three years. Vim has been around for decades. The muscle memory you build today will pay dividends until the day you retire.

  • The Career Signal: Let’s be honest – navigating code effortlessly in the terminal signals depth, craft, and a deep understanding of your tools to peers and interviewers.

7 Ways to Learn Vim: Ranked and Reviewed

There is no single “correct” way to learn Vim. The best approach usually involves combining a few methods. Here is an honest breakdown of your options.

1. The Built-in Classic: vimtutor

Open your terminal and type vimtutor. It’s a built-in, interactive text file that teaches you the absolute basics.

  • Pros: Free, pre-installed everywhere, gets you moving in 30 minutes.

  • Cons: It’s dry. There’s no visual feedback, no scoring, and it leaves you with the classic “I finished vimtutor, now what?” problem.

  • Best for: Day 1. Getting your hands on hjkl and learning how to save and quit (:wq).

2. “Cold Turkey” (Editor Extensions)

Installing a Vim extension in VS Code or IntelliJ and forcing yourself to use it for your daily work.

  • Pros: Builds muscle memory incredibly fast because you have real work to do.

  • Cons: Extremely frustrating without a foundation. Your productivity will tank for the first week, and most people give up after an hour.

  • Best for: Developers who already know the basic motions and want to force the transition.

3. Mobile Companion Apps (e.g., VimKata)

Mobile apps allow you to practice Vim motions when you are away from your keyboard – during a commute or a coffee break. Apps like VimKata provide animated demos of what commands do before you practice them on real code snippets.

  • Pros: Visual feedback, gamified scoring based on efficiency (not just typing the “right” answer), bite-sized learning. It teaches the composable grammar as a system.

  • Cons: It’s a companion tool. You still need to transfer that knowledge to a physical keyboard eventually.

  • Best for: Beginners who want structured, visual learning to bridge the gap between vimtutor and daily coding.

4. YouTube Tutorials & Video Courses

Watching creators like ThePrimeagen or DistroTube navigate code like wizards.

  • Pros: Highly motivating. Shows you the true potential and ceiling of Vim mastery.

  • Cons: Passive learning. Watching someone type dt) (delete till parenthesis) doesn’t build your muscle memory.

  • Best for: Inspiration and discovering advanced workflows.

5. Interactive Web Games (Vim Adventures)

Browser-based games where you move a character using Vim keys.

  • Pros: A fun, non-threatening entry point, especially for non-developers.

  • Cons: They usually only cover basic motions, lack real code context, and development on them has mostly stagnated.

  • Best for: The absolute first taste of Vim mechanics.

6. Books (Practical Vim)

Deep dives into the philosophy and advanced mechanics of the editor.

  • Pros: Comprehensive and incredibly eye-opening for intermediate users.

  • Cons: Too dense for Day 1 beginners who just need to figure out how to enter Insert mode without panicking.

  • Best for: Leveling up after you have survived your first month.

7. Cheat Sheets

A PDF or desktop wallpaper with 100+ commands.

  • Pros: Great quick reference.

  • Cons: Terrible as a primary learning method. Memorizing a list without context won’t stick.

  • Best for: Supplementing your primary learning method.

Comparing the Methods

Method Real Code Context Visual Feedback Structured Path Best For
vimtutor No (Text blocks) No Yes (Basic) Absolute Day 1
Cold Turkey Yes (Your code) Yes No Ripping the band-aid off
Companion Apps Yes (Snippets) Yes (Animations) Yes Daily micro-habits
Video Courses Yes Yes Variable Inspiration & Theory

The Beginner’s Practical Roadmap

Don’t try to learn everything at once. Follow this timeline:

  1. Day 1: Open your terminal and run vimtutor. Get comfortable with hjkl, i (insert), Esc, and :wq.

  2. Week 1: Focus on micro-habits. Use a companion app like VimKata for 10-15 minutes a day during downtime to visually understand how operators and motions combine.

  3. Week 2: Enable the Vim extension in your primary editor (VS Code, JetBrains). Keep a cheat sheet on your second monitor. Accept that you will be slower for a few days.

  4. Weeks 3-4: Stop moving character by character. Focus entirely on the grammar: combining d, c, and y with motions like w (word), $ (end of line), and % (matching bracket).

  5. Month 2+: Start customizing. Build your .vimrc or init.lua incrementally. When you catch yourself reaching for the mouse, pause and google “how to do X in Vim”.

The AI-Era Angle: Why Now?

If you’re using tools like Claude Code, you are reading, navigating, and editing code directly within a terminal context. AI agents are incredibly fast at generating edits, but as the human in the loop, you still need to review, jump between files, and apply tweaks efficiently.

The modern power-user setup that AI tools assume you have is a terminal multiplexer (like tmux) paired with a terminal-based editor (Neovim). GUI-heavy workflows are slowly giving way to Terminal + AI workflows. Learning Vim in 2026 isn’t about rejecting modern technology; it’s about mastering the interface that AI is naturally converging on.

Just Start

Don’t overthink finding the “perfect” way to learn. 10 minutes of practice a day will always beat a 4-hour weekend cram session that you never repeat.

Your next step is simple: open your terminal and type vimtutor, or download VimKata to start practicing visually on your phone. Just take the first step. Your future self will thank you.

I spent 8 weeks building a Nash Equilibrium calculator from scratch in Python

Hey everyone,

I am someone who has been wanting to apply computer science into economics and mathematics and hence I decided to build a Nash Equilibrium calculator of sorts using Python and other libraries in Python like numpy and scipy.optimize.

The solver calculates all pure and mixed nash equilibria using the support enumeration algorithm. It also uses linear programming, which I did through the HiGHS solver, for the iterated elimination of strictly dominated strategies. I also built a small sub feature where the tool calculates game values for zero sum games using the Von Neumann Minimax theorem by identifying the Pareto optimal outcomes and hence calculating the social welfare loss. To make it visually easy to read, I used the rich library to build a terminal UI that color-codes the matrices.

This project took me almost 8 weeks to complete and I had to force myself to not use AI at all and hence the code might be a bit wonky.

Nonetheless, would be great if y’all could check it out and as always, open to any and all comments for improvement regarding the code or the math.

Here is the repo on GitHub, please go check it out: Github Link

Cómo crear un sistema de pago por minuto en PHP (caso real aplicado a streaming) con wordpress

Uno de los modelos de monetización más utilizados en plataformas de streaming es el pago por minuto.

En este artículo te voy a mostrar cómo implementar este sistema usando PHP dentro de WordPress, basado en un caso real donde se desarrolló una plataforma de transmisión en vivo.

¿Qué es un sistema de pago por minuto?

Es un modelo donde:

El usuario paga mientras consume el contenido
El saldo se descuenta automáticamente cada cierto tiempo
El creador recibe una parte del dinero

Este sistema es común en plataformas de:

Streaming en vivo
Consultorías online
Contenido premium
⚙️ Lógica básica del sistema

La implementación se basa en 3 elementos clave:

Saldo del usuario
Costo por minuto
Intervalo de descuento automático

Almacenamiento del saldo

En WordPress, el saldo se puede guardar usando user_meta:

add_user_meta($user_id, ‘saldo_disponible’, 0, true);

Esto permite manejar un sistema simple sin necesidad de tablas complejas.

Descuento automático por minuto

Cada minuto se ejecuta una función que descuenta saldo:

function descontar_saldo($user_id) {
$saldo = floatval(get_user_meta($user_id, ‘saldo_disponible’, true));

if ($saldo <= 0) return 0;

$nuevo = $saldo - 3000;
update_user_meta($user_id, 'saldo_disponible', $nuevo);

return $nuevo;

}

Ejecución en tiempo real (AJAX)

Para ejecutar esto sin recargar la página:

setInterval(() => {
fetch(‘/wp-admin/admin-ajax.php’, {
method: ‘POST’,
body: new URLSearchParams({
action: ‘descuento_minuto’
})
});
}, 60000);

Esto permite descontar saldo automáticamente mientras el usuario está conectado.

Distribución de ganancias

En el caso real:

Usuario paga: 3000 COP por minuto
Creador recibe: 1500 COP (50%)
function sumar_ganancia_creador($user_id) {
$saldo = get_user_meta($user_id, ‘saldo_disponible’, true);
$nuevo = $saldo + 1500;
update_user_meta($user_id, ‘saldo_disponible’, $nuevo);
}

Validación de saldo antes de iniciar

Antes de permitir el acceso:

function tiene_saldo($user_id) {
$saldo = get_user_meta($user_id, ‘saldo_disponible’, true);
return $saldo >= 3000;
}

Esto evita accesos sin pago.

Aplicación real

Este tipo de sistema ya se utiliza en plataformas donde los usuarios acceden a contenido en tiempo real con pagos directos, combinando streaming, interacción y monetización.

Consideraciones importantes

Validar saldo constantemente
Evitar que el usuario siga conectado sin crédito
Sincronizar frontend y backend
Controlar errores en AJAX

Implementar un sistema de pago por minuto en PHP es más sencillo de lo que parece si se estructura correctamente.

Con herramientas nativas de WordPress y un poco de JavaScript, es posible crear modelos de monetización en tiempo real sin depender de servicios externos.

Chapter 4. How to Use — Sub Agents

4.1 What Is a Sub Agent?

A Sub Agent is a specialized AI assistant dedicated to handling specific tasks within a Claude Code session.

If the main Claude Code is the “general manager,” Sub Agents are “team members,” each with their own area of expertise.
Each Sub Agent operates with its own independent context window, dedicated system prompt, and restricted tool access.

┌──────────────────────────────────────────────┐
│  Main Claude Code Session (General Manager)  │
│                                              │
│  "Review this code"                          │
│      ↓ delegate                              │
│  ┌──────────────────────────────────┐        │
│  │  Sub Agent: code-reviewer        │        │
│  │  • Independent context window    │        │
│  │  • Read-only tools allowed       │        │
│  │  • Code review system prompt     │        │
│  └──────────────┬───────────────────┘        │
│                 ↓ return result              │
│  "Review complete: 3 improvements found"     │
└──────────────────────────────────────────────┘

4.2 Purpose and Role

Why Use Sub Agents?

Purpose Description
Context preservation Exploration and analysis results do not pollute the main conversation. Sub Agents return only a summary, keeping the main context clean
Specialization Role-specific system prompts for tasks like code review, test writing, and security analysis improve accuracy
Tool restriction Apply the principle of least privilege — e.g., grant only Read to review agents, and Write/Edit to implementation agents
Reusability A Sub Agent created once can be used across all projects (user scope)

Built-in Sub Agents

Claude Code includes built-in Sub Agents that are used automatically.

Name Tools Role
Explore Read-only Search and navigate the codebase. No file modifications
Plan Read-only Analyze the codebase before implementation in Plan Mode
General-purpose All tools Complex multi-step tasks (exploration + modification)
Bash Terminal Execute commands in a separate context

These built-in agents are delegated to automatically by Claude.
The user does not need to invoke them directly — they are selected automatically based on the nature of the task.

4.3 Setup and Verification

Method 1: /agents Command (Recommended)

> /agents

From the interactive menu, you can:

  1. Select Create new agent
  2. Choose Personal (all projects) or Project (current project only)
  3. Select Generate with Claude → enter a description of the role
  4. Choose tool access scope (Read-only, all tools, etc.)
  5. Select a model (Sonnet, Opus, Haiku)
  6. Choose a background color → save

Example: Creating a Code Review Agent

> /agents
→ Create new agent
→ Personal
→ Generate with Claude
→ "An agent that analyzes code and suggests improvements from the perspective of readability, performance, and best practices"
→ Select Read-only tools
→ Sonnet
→ Save

Method 2: Writing a Markdown File Directly

# Personal use (all projects)
mkdir -p ~/.claude/agents
nano ~/.claude/agents/code-reviewer.md

# Project use (current project only)
mkdir -p .claude/agents
nano .claude/agents/code-reviewer.md

How to Verify

# List agents from CLI (outside a session)
claude agents

# List agents from within a session
> /agents

How to Invoke

# Automatic delegation — Claude judges automatically based on the description
> Analyze the code quality of this project

# Explicit invocation — specify the agent by name
> Use the code-reviewer agent to review the src/api/ folder

4.4 Sub Agent File Structure

A Sub Agent is composed of a YAML front matter + Markdown body.

File Example: .claude/agents/code-reviewer.md

---
name: code-reviewer
description: Analyzes code quality and suggests improvements from the perspectives of readability, performance, and security. Used when code review or quality analysis is requested.
tools: Read, Grep, Glob
model: sonnet
---

# Code Reviewer Agent

## Role
You are a senior software engineer dedicated to performing code reviews.

## Review Criteria
- Readability: variable names, function structure, comments
- Performance: unnecessary iteration, potential memory leaks
- Security: SQL injection, XSS, hardcoded secrets
- Best practices: adherence to project conventions

## Output Format
For each issue:
1. File path and line number
2. Current code
3. Description of the problem
4. Suggested improved code

YAML Front Matter Fields

Field Required Description
name ✅ Agent identifier (alphanumeric, hyphens allowed)
description ✅ Explains when to use this agent. Claude reads this description to decide whether to delegate automatically
tools ❌ List of allowed tools. If omitted, all tools from the main session are inherited
model ❌ Model to use (sonnet, opus, haiku). Default: the main session model

Tool Restriction Examples

# Read-only (for review and analysis)
tools: Read, Grep, Glob

# Code modification allowed (for implementation)
tools: Read, Write, Edit, Bash, Grep, Glob

# Inherit all tools (omit the field entirely)
# Do not include the tools field at all

Scope by Storage Location

~/.claude/agents/             ← Personal: available across all projects
.claude/agents/               ← Project: available only in this project
                                 (commit to Git to share with the team)

If a Sub Agent with the same name exists in both locations, the project-level agent takes precedence.

Full File Structure Example

my-project/
├── .claude/
│   ├── agents/                    ← Project Sub Agents
│   │   ├── code-reviewer.md
│   │   ├── test-writer.md
│   │   └── security-auditor.md
│   ├── settings.json              ← Project settings (hooks, permissions)
│   └── commands/                  ← Slash commands
├── CLAUDE.md                      ← Project memory
└── .mcp.json                      ← MCP server config (shared with team)

~/.claude/
├── agents/                        ← Personal Sub Agents (all projects)
│   └── general-assistant.md
├── CLAUDE.md                      ← Global memory (personal)
└── settings.json                  ← Personal global settings

4.5 Sub Agent vs MCP — Key Differences

Category Sub Agent MCP Server
Identity A specialized Claude instance A connection to an external tool or service
How it works Claude performs tasks in an independent context An external process provides tool functionality
Context Its own context window (separate from the main session) Shares and consumes the main context window
Config format Markdown file (YAML + prompt) JSON config (command, args, env)
Storage location .claude/agents/ .claude.json or .mcp.json
How it is invoked Claude delegates automatically or by name Claude calls it as a tool
What it can do AI reasoning tasks: code analysis, review, implementation, test writing, etc. External system integration: DB queries, GitHub PRs, browser automation, etc.
Cost Consumes separate tokens (independent context) Consumes context proportional to tool descriptions
Relationship Can use MCP tools Operates independently of Sub Agents

When to Use Which?

"Automatically create a GitHub PR"              → MCP (github server)
"Review this code"                              → Sub Agent (code-reviewer)
"Query user data from the DB"                   → MCP (postgresql server)
"Write test code"                               → Sub Agent (test-writer)
"Find a function by symbol"                     → MCP (serena server)
"Analyze security vulnerabilities"              → Sub Agent (security-auditor)

Key distinction: MCP is a tool for connecting to external systems; Sub Agents are AI instances that perform work in specialized roles.
The two are not substitutes — they are meant to be combined.
Example: a security-auditor Sub Agent uses the Serena MCP’s find_symbol tool to trace vulnerable functions.

4.6 Quick Reference

# ── Sub Agent Management ─────────────────────────────
> /agents                              # Create, view, edit, delete (in session)
claude agents                          # List agents (CLI)

# ── File Locations ───────────────────────────────────
~/.claude/agents/                      # Personal (all projects)
.claude/agents/                        # Project (team-shareable)

# ── Invocation ───────────────────────────────────────
> Analyze using the code-reviewer agent     # Explicit invocation
> Review this code                          # Automatic delegation (description matching)

# ── File Format ──────────────────────────────────────
# .claude/agents/my-agent.md
---
name: my-agent
description: Describe when to use this agent
tools: Read, Grep, Glob            # Omit to inherit all tools
model: sonnet                      # sonnet / opus / haiku
---
System prompt content (Markdown)

Reference: https://code.claude.com/docs/en/sub-agents

How We Built an ELO Rating System for 1v1 Esports Matches

1v1 ELO for Esports

RaiseGG is a competitive gaming platform where players stake USDC on 1v1 matches in CS2, Dota 2, and Deadlock. We needed a fair ranking system.

The Algorithm

Standard ELO with esports modifications:

const K = 32 // Base K-factor
const expectedScore = 1 / (1 + Math.pow(10, (opponentElo - playerElo) / 400))
const newElo = playerElo + K * (actualScore - expectedScore)

Our Modifications

Stake-Weighted K-Factor

Higher stakes = more ELO at risk. A $20 match matters more than a $1 match.

Game-Specific Adjustments

CS2 1v1s are more volatile than Dota 2 1v1s, so K-factors differ by game.

Placement Matches

New players get a higher K-factor for their first 10 matches to quickly reach their true skill level.

City Rankings

Players belong to cities. City ELO is the average of top 10 players from that city. Creates regional rivalries.

Results

After thousands of matches, the system produces stable rankings where:

  • Top players consistently beat lower-ranked opponents
  • Upsets happen but don’t wildly swing rankings
  • New players reach their true rank within ~15 matches

Check the leaderboards: raisegg.gg

Have you implemented ELO or similar rating systems? What edge cases did you hit?

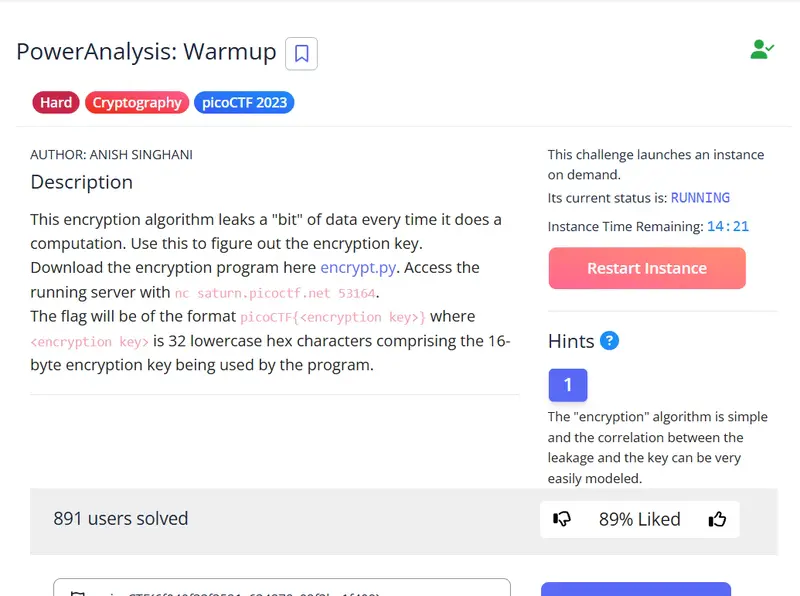
CTF Writeup: PowerAnalysis: Warmup

  1. Challenge OverviewThe challenge provides a remote service that performs encryption. The description hints that the algorithm leaks a “bit” of data during computation. Unlike traditional crypto challenges where you attack the math, here we attack the implementation by observing side-channel leakage.2. The Vulnerability: Side-Channel LeakageThe core of the problem is a Power Analysis vulnerability. In a real-world scenario, a CPU uses slightly more power to process a 1 than a 0, or takes more time if a specific branch of code is executed.In this challenge, we assume the leakage allows us to determine if our guess for a specific bit of the key is correct.3. Exploitation StrategyThe attack is performed bit-by-bit. Instead of brute-forcing $2^{128}$ possibilities (which is impossible), we only need to test each bit position.Connect to the challenge via a Python socket.Iterate through each bit of the key (from 0 to 127).Submit a guess for the current bit.Analyze the leakage: If the response indicates a “hit” (usually through a timing delay or a specific returned value representing power “leaked”), we lock that bit as 1. Otherwise, it’s a 0.Repeat until the full 128-bit key is reconstructed.4. The Solution ScriptHere is the logic used to automate the recovery of the key:Pythonimport socket
    from Crypto.Util.number import long_to_bytes
import socket
import logging
import time
import argparse
from concurrent.futures import ThreadPoolExecutor
from typing import Optional

# Setup professional logging
logging.basicConfig(
    level=logging.INFO,
    format='%(asctime)s [%(levelname)s] %(message)s',
    handlers=[logging.StreamHandler()]
)
logger = logging.getLogger(__name__)

class PowerAnalysisClient:
    """A professional interface for interacting with the challenge server."""

    def __init__(self, host: str, port: int, timeout: int = 5):
        self.address = (host, port)
        self.timeout = timeout

    def _communicate(self, payload: str) -> str:
        """Handles the low-level socket lifecycle."""
        try:
            with socket.create_connection(self.address, timeout=self.timeout) as sock:
                sock.sendall(payload.encode() + b'n')
                response = sock.recv(4096).decode().strip()
                return response
        except socket.error as e:
            logger.error(f"Socket error: {e}")
            return ""

    def measure_leak(self, guess: str, samples: int = 1) -> float:
        """
        Measures the side-channel leak. 
        In professional tools, we sample multiple times to filter out network noise.
        """
        timings = []
        for _ in range(samples):
            start = time.perf_counter()
            self._communicate(guess)
            timings.append(time.perf_counter() - start)

        # Using the median or max is often more stable than the mean in network timing
        return max(timings)

class KeyRecoverer:
    """Orchestrates the bit-by-bit recovery of the secret key."""

    def __init__(self, client: PowerAnalysisClient, key_length: int = 128):
        self.client = client
        self.key_length = key_length
        self.recovered_bits = ""

    def recover(self):
        logger.info(f"Starting recovery for {self.key_length}-bit key...")

        for bit_index in range(self.key_length):
            # Test both possibilities for the current bit
            t0 = self.client.measure_leak(self.recovered_bits + "0")
            t1 = self.client.measure_leak(self.recovered_bits + "1")

            if t1 > t0:
                self.recovered_bits += "1"
            else:
                self.recovered_bits += "0"

            if bit_index % 8 == 0:
                logger.info(f"Progress: {bit_index}/{self.key_length} bits recovered.")

        self.finalize()

    def finalize(self):
        key_hex = hex(int(self.recovered_bits, 2))[2:].zfill(self.key_length // 4)
        logger.info(f"SUCCESS: Recovered Key (Hex): {key_hex}")

if __name__ == "__main__":
    # Command-line interface for portability
    parser = argparse.ArgumentParser(description="Professional Power Analysis Tool")
    parser.add_argument("--host", default="saturn.picoctf.net", help="Server hostname")
    parser.add_argument("--port", type=int, required=True, help="Server port")
    args = parser.parse_args()

    client = PowerAnalysisClient(args.host, args.port)
    recoverer = KeyRecoverer(client)
    recoverer.recover()

[Actual socket interaction code goes here]

  1. ConclusionPowerAnalysis: Warmup demonstrates that even mathematically “perfect” encryption like AES can be broken if the physical hardware leaks information. By measuring metadata (power/time) rather than the data itself, we reduced an exponential problem to a linear one.

How I Debug Logs Across Services (and Why I Built a CLI Tool)

CLI demo gif

A while back at work, I was debugging an issue across a few services.
I had the request_id, but the logs were scattered across different files.

Not every environment I work in has full tracing or centralized logging set up, especially local or staging setups, so I often rely on raw logs.

The usual workflow looked something like this:

  • open multiple terminals
  • run grep on each service
  • copy the same ID again and again
  • try to mentally piece together what happened

It worked… but it was slow and honestly pretty frustrating.
I kept thinking — there has to be a simpler way to do this.

Logs are usually:

  • spread across multiple services or files
  • in different formats (plain text, JSON, sometimes pretty logs)
  • hard to follow in order

Even when you do find the right logs, understanding the full request flow takes time. During live debugging, it gets worse — you’re trying to figure things out quickly while jumping between files and commands.

What I Wanted

A simpler workflow that lets me:

  • search by a key (like request_id, trace_id, etc)
  • scan multiple log files at once
  • see everything in a clean, chronological flow

Something lighter than full observability tools, but more structured than chaining grep commands.

Introducing reqlog

So I built a small CLI tool called reqlog.

Basic usage:

reqlog --dir ./logs --key request_id abc123

It searches across log files and prints a timeline like this:

2026-03-20T14:10:00Z [api-gateway]   | request_id=abc123 start request
2026-03-20T14:10:01Z [order-service] | request_id=abc123 fetching order
2026-03-20T14:10:02Z [inventory]     | request_id=abc123 checking stock

Instead of jumping between files, you can just follow the request from start to finish.

Here’s what it looks like in action:
CLI demo gif

Why Not Just Use grep?

grep is great — I still use it all the time.
But when you’re debugging across multiple services, it starts to fall apart:

  • recursive search can touch all files, but you still have to mentally stitch together logs from different services
  • no automatic sense of timeline across services
  • structured logs (like JSON) aren’t convenient
  • lots of copy/paste to track the same request

reqlog sits in between:

more structured than grep, but much simpler than full observability tooling.

Features (v1)

Nothing fancy — just what I needed:

  • works with plain text and JSON logs (single-line)
  • key-based search (--key request_id abc123)
  • scans logs across a directory by default (recursive)
  • optionally filter specific services (--service)
  • time filtering (--since)
  • live tailing (--follow)

Performance

I tested it on multi-million line logs (~9M+ lines across services).

Not as fast as grep (which is highly optimized and only does string matching), but still quick enough for real debugging workflows.
Most searches finish in a couple of seconds.

The extra work (JSON parsing, sorting into a timeline, etc.) adds some overhead — but that’s also what makes the output useful.

Tradeoffs

For v1, I kept things simple:

  • only supports single-line logs
  • no handling for multi-line / pretty logs
  • processes logs sequentially

There’s plenty of room to improve in future versions.

What’s Next

Some things I’m considering:

  • Docker / Kubernetes log support
  • performance improvements (parallel scanning)
  • support for more structured log formats

The main goal is to make debugging across services easier, even without tools like Jaeger or centralized logging systems.

Feedback

If you debug logs across multiple services, I’d love to hear:

  • would something like this be useful for you?
  • what would you want it to do (multi-line logs, k8s/docker support, etc.)?

If this looks interesting, check it out here: reqlog on GitHub

From Learning Capture to Self-Evolving Rules: Adding Verification Sweeps to terraphim-agent

From Learning Capture to Self-Evolving Rules: Adding Verification Sweeps to terraphim-agent

A self-evolving AI coding agent sounds like science fiction. It is not. It is a shell script, a markdown file with grep patterns, and a weekly review discipline.

We have been running terraphim-agent in production for months. It captures every failed bash command from Claude Code and OpenCode, stores them in a persistent learning database, and lets agents query past mistakes before repeating them. The capture loop works. The query system works. The correction mechanism works.

What was missing was verification. We could capture mistakes and add corrections, but we had no way to prove the corrections were being followed. No machine-checkable enforcement. No audit trail. No quantitative measure of whether the system was actually improving.

Then Meta Alchemist published a viral guide on transforming Claude Code into a self-evolving system, and two ideas jumped out: verification patterns on every rule and session scorecards. We already had the foundation. The article showed us what to build on top.

This post covers what we added, what we deliberately did not copy, and why the combination of a Rust CLI with a thin shell verification layer is more robust than an all-in-JSONL approach.

If you have not read the foundation post on configuring terraphim-agent for Claude Code and OpenCode, start there. This post assumes you have the capture system running.

What we already had

Before reading the Meta Alchemist article, our learning infrastructure had three layers:

Layer 1: Learning capture (PostToolUse hook)

Every failed bash command in Claude Code triggers our post_tool_use.sh hook. The hook extracts the command, exit code, and error output, then pipes them to terraphim-agent learn hook --format claude. The learning is stored as a structured file in ~/.local/share/terraphim/learnings/ (global) or .terraphim/learnings/ (project-scoped).

# What the hook does on every failed command:
terraphim-agent learn capture "$COMMAND" --error "$ERROR_OUTPUT" --exit-code "$EXIT_CODE"

The design is fail-open: if terraphim-agent is missing or crashes, the hook passes through silently. An observability tool must never break the tool it observes.

Layer 2: Safety guard (PreToolUse hook)

Before any bash command executes, our pre_tool_use.sh hook runs two checks:

  1. terraphim-agent guard --json blocks destructive commands (rm -rf, git push –force, etc.)
  2. terraphim-agent replace --role "Terraphim Engineer" performs knowledge graph text replacement (npm -> bun, pip -> uv, etc.)

The guard blocks. The replacement corrects. Neither depends on the LLM remembering instructions.

Layer 3: Query and correct

Humans and agents query the learning database:

# List recent learnings
terraphim-agent learn list

# Search by pattern (with synonym expansion via thesaurus)
terraphim-agent learn query "docker"

# Add a correction to a captured learning
terraphim-agent learn correct 3 --correction "Use 'docker compose' (v2 plugin)"

The thesaurus has 20 semantic categories and 160+ synonym mappings. Search for “error” and you find “failure”, “bug”, “issue”. Search for “setup” and you find “configuration”, “install”, “init”. This is not keyword matching. It is structured retrieval.

What was missing

The capture-query-correct loop is a journal. It records mistakes and lets you look them up. What it does not do:

  • Enforce rules mechanically. A rule saying “never use pip” exists only in CLAUDE.md text that the LLM might or might not follow.
  • Verify compliance at session start. No sweep checks whether graduated rules are actually being obeyed.
  • Track improvement quantitatively. No session scorecards. No trend data. No way to prove the system is getting better.
  • Provide an audit trail for rule changes. Rules appear and disappear without record.

These gaps are exactly what the Meta Alchemist article addressed.

What Meta Alchemist proposed

The full guide describes a four-layer system:

  1. Cognitive core (CLAUDE.md): A decision framework Claude runs before writing code, plus completion criteria that must pass before any task is done.
  2. Specialised agents: An architect (plans, read-only) and a reviewer (validates, read-only) that spawn as subagents.
  3. Path-scoped rules: Security rules that only load when editing auth code. API design rules that only activate in handler directories. Keeps context lean.
  4. Evolution engine: A memory system that captures corrections in JSONL files, runs verification sweeps at session start, generates session scorecards, and promotes patterns through a confidence ladder.

The genuinely good ideas:

  • Verify lines on every rule. Each learned rule gets a machine-checkable grep pattern. verify: Grep("...options", path="src/api/") -> 0 matches. The sweep runs the grep and reports PASS/FAIL. This is brilliant. It turns instructions into guardrails.
  • Session scorecards. Quantitative tracking of corrections received, rules checked, rules passed, violations found. Trend detection over time. If corrections are flat or increasing, the rules are not working.
  • Promotion ladder. Corrected once = logged. Corrected twice = auto-promoted to permanent rule. In learned-rules for 10+ sessions = candidate for graduation to CLAUDE.md.
  • Capacity management. Max 50 lines in learned-rules.md forces graduation or pruning. Prevents unbounded growth.

The key quote: “A rule without a verification check is a wish. A rule with a verification check is a guardrail. Only guardrails survive.”

We agree with the principle. We disagree with the implementation.

Where our approaches diverge

The Meta Alchemist article builds everything from scratch using JSONL files parsed by the LLM:

  • corrections.jsonl — user corrections as JSON objects
  • observations.jsonl — verified discoveries
  • violations.jsonl — rule violations caught by sweep
  • sessions.jsonl — session scorecards

This is a reasonable approach if you have no existing infrastructure. We do. terraphim-agent already provides structured file storage with frontmatter, synonym-expanded querying, project/global scoping, and correction chaining. Adding parallel JSONL files would create a split-brain problem: two sources of truth for the same data.

The article also proposes auto-promotion: when the same correction appears twice, it automatically becomes a permanent rule. This is risky. A correction might be context-dependent (correct for one project, wrong for another). It might be a preference rather than a constraint. Auto-promotion without a quality gate means the system accumulates rules without human judgement about which ones deserve to be permanent.

Our approach: capture in terraphim-agent, verify with shell scripts, promote with CTO approval.

The verification layer we added

Three new components, all configuration. No Rust code changes.

learned-rules.md: graduated rules with verify patterns

The file lives at .claude/memory/learned-rules.md. Each rule has three parts: the constraint text, a machine-checkable verify pattern, and a source annotation.

# Learned Rules

Rules graduated from terraphim-agent corrections and CLAUDE.md conventions.
Each rule has a `verify:` pattern checked by the /boot verification sweep.

---

- Never use pip, pip3, or pipx; always use uv instead.
  verify: Grep("pip install|pip3 install|pipx install", path="automation/") -> 0 matches
  [source: CLAUDE.md convention, terraphim-agent learning #4, 2026-03-30]

- Never use npm, yarn, or pnpm; always use bun instead.
  verify: Grep("npm install|yarn add|pnpm add", path="automation/") -> 0 matches
  [source: CLAUDE.md convention, terraphim KG hook replacement, 2026-03-30]

- Never use double dashes in document titles or markdown headings.
  verify: Grep("^#.*--", path="knowledge/") -> 0 matches
  [source: corrected 2x, terraphim-agent learning #5, 2026-03-30]

- Never hardcode API keys as default values in bash scripts.
  verify: Grep("API_KEY=.[a-zA-Z0-9]", path="automation/") -> 0 matches
  [source: MEMORY.md security lesson, 2026-03-30]

The format is deliberately simple. No JSON. No YAML frontmatter. Just markdown that a human can read and a shell script can parse. The verify line follows a consistent pattern:

verify: Grep("regex_pattern", path="scope/") -> N matches

Where -> 0 matches means the pattern should NOT appear (absence check) and -> 1+ matches means the pattern MUST appear (presence check).

Rules without a verify line are flagged as technical debt during evolution review.

verify-sweep.sh: the verification engine

The core script parses learned-rules.md, extracts each verify line, runs the check, and reports PASS/FAIL. It uses rg (ripgrep) when available for native output limiting (no SIGPIPE issues from pipe chains).

#!/bin/bash
# Verification Sweep: parse learned-rules.md, run verify: checks, report PASS/FAIL
# Always exits 0 (advisory tool, never blocks).

set -uo pipefail

RULES_FILE="${1:-.claude/memory/learned-rules.md}"
PROJECT_ROOT="$(git rev-parse --show-toplevel 2>/dev/null || pwd)"
RG="$(which rg 2>/dev/null || echo '')"

TOTAL=0; PASSED=0; FAILED=0; MANUAL=0
current_rule=""

while IFS= read -r line; do
    # Capture rule text (lines starting with "- ")
    if echo "$line" | rg -q '^s*- .+' 2>/dev/null; then
        current_rule=$(echo "$line" | sed 's/^s*- //')
    fi

    # Process verify: lines
    if echo "$line" | rg -q '^s*verify:' 2>/dev/null; then
        TOTAL=$((TOTAL + 1))

        # Skip manual checks
        if echo "$line" | rg -qi 'manual' 2>/dev/null; then
            MANUAL=$((MANUAL + 1))
            echo "SKIP: $current_rule (manual check)"
            continue
        fi

        # Extract pattern, path, and expected count
        pattern=$(echo "$line" | sed -n 's/.*Grep("([^"]*)".*/1/p')
        path_scope=$(echo "$line" | sed -n 's/.*path="([^"]*)".*/1/p')
        expected=$(echo "$line" | sed -n 's/.*-> ([0-9]*).*/1/p')

        [ -z "$pattern" ] && { MANUAL=$((MANUAL + 1)); echo "SKIP: $current_rule (unparseable)"; continue; }

        search_path="${path_scope:-.}"
        [ ! -d "$search_path" ] && [ -d "$PROJECT_ROOT/$search_path" ] && search_path="$PROJECT_ROOT/$search_path"

        # Count matches
        if [ -n "$RG" ]; then
            match_count=$("$RG" -c "$pattern" "$search_path" 2>/dev/null 
                | awk -F: '{s+=$NF} END {print s+0}') || true
        else
            match_count=$(grep -rEc "$pattern" "$search_path" 2>/dev/null 
                | awk -F: '{s+=$NF} END {print s+0}') || true
        fi

        # Compare against expectation
        if [ "$expected" = "0" ]; then
            if [ "$match_count" -eq 0 ]; then
                PASSED=$((PASSED + 1)); echo "PASS: $current_rule"
            else
                FAILED=$((FAILED + 1))
                echo "FAIL: $current_rule (found $match_count matches, expected 0)"
                "$RG" -n --max-count 1 "$pattern" "$search_path" 2>/dev/null 
                    | head -3 | sed 's/^/  >> /' || true
            fi
        else
            if [ "$match_count" -gt 0 ]; then
                PASSED=$((PASSED + 1)); echo "PASS: $current_rule"
            else
                FAILED=$((FAILED + 1))
                echo "FAIL: $current_rule (found 0 matches, expected 1+)"
            fi
        fi
    fi
done < "$RULES_FILE"

echo ""; echo "--- Verification Summary ---"
echo "Rules checked: $TOTAL | Passed: $PASSED | Failed: $FAILED | Skipped: $MANUAL"

Real output from our production environment:

PASS: Never use pip, pip3, or pipx; always use uv instead.
PASS: Never use npm, yarn, or pnpm; always use bun instead.
FAIL: Never use double dashes in document titles or markdown headings. (found 252 matches, expected 0)
  >> knowledge/mem-layer-graph-memory.md:1:# Mem-Layer -- Graph-Based AI Memory System
  >> knowledge/claude-1m-context-ga.md:7:# Claude 1M Context Window -- General Availability
  >> knowledge/ukri-funding-opportunities-2026.md:7:# UKRI Funding Opportunities -- 2026 Active/Recent
FAIL: Use British English spelling in all generated content. (found 316 matches, expected 0)
  >> knowledge/topics/context-engineering.md:41:- locality-of-behavior-dev-community.md
  >> knowledge/topics/conway-vs-strongdm-identity.md:49:- Govern AI agent behavior at runtime
SKIP: Always run date before date-sensitive operations. (manual check)
PASS: Never hardcode API keys as default values in bash scripts.
PASS: Never use git commit --amend in pre-push hooks.

--- Verification Summary ---
Rules checked: 7 | Passed: 4 | Failed: 2 | Skipped: 1

The two failures are from imported external articles that use American English spelling and double dashes. These are expected: imported content is not generated content. This kind of nuance is exactly why we do not auto-fix violations. The sweep surfaces them; the human decides what to do.

/boot skill: session-start verification

The /boot skill wraps the verification sweep into a session-start ritual:

  1. Run date to establish the actual current date (never trust stale context)
  2. Read learned-rules.md to load all graduated rules
  3. Execute verify-sweep.sh to check compliance
  4. Run terraphim-agent learn list to surface recent learnings
  5. Report a one-line summary
Boot complete: 7 rules checked, 4 passed, 2 failed. 10 recent learnings loaded.

The Meta Alchemist article proposes a SessionStart hook to trigger this automatically. Claude Code does not have a SessionStart hook type. Their article assumes one exists. Ours does not. We invoke /boot manually at the start of each session. A manual invocation that runs reliably is better than an automatic hook that does not exist.

The evolution engine

Verification tells you what is wrong. Evolution fixes it over time.

/evolve skill: weekly review with approval gate

The /evolve skill is the mechanism by which the system improves. It runs weekly (or on demand) and does the following:

  1. Gathers corrections from terraphim-agent learn list (recent captures and corrections)
  2. Reads current rules from learned-rules.md
  3. Reads the evolution log from evolution-log.md (to avoid re-proposing rejected rules)
  4. Groups failures by pattern and identifies repeat corrections
  5. Proposes changes using a structured format:
PROPOSE: PROMOTE
Rule: Never use timeout command on macOS (does not exist)
Source: terraphim-agent learning #8, #12
Evidence: Corrected twice across different sessions
Verify: Grep("timeout ", path="automation/") -> 0 matches
Destination: learned-rules.md
Risk: Low. The command genuinely does not exist on macOS.
  1. Waits for CTO approval. No changes are applied until each proposal is individually approved, rejected, or modified.
  2. Logs everything to evolution-log.md: approved changes, rejected proposals, and the reasoning.

This is where we differ most from the Meta Alchemist approach. Their system auto-promotes on the second correction. Ours proposes and waits. The CTO reviews and approves.

Why? Because a correction is context. “Don’t use pip” is correct for our projects. It is not correct for a project that deliberately uses pip. Auto-promotion assumes all corrections are universally true. They are not.

Our principle: A rule without CTO approval is an assumption.

Promotion ladder

Signal Destination
Failed command captured terraphim-agent learn database
Human adds correction Same learning, enriched
Same correction appears twice Flagged for /evolve review
Approved during /evolve learned-rules.md with verify: pattern
Passing for 5+ sessions Candidate for graduation to CLAUDE.md
Rejected during /evolve evolution-log.md (never re-proposed)

The ladder is one-way unless the CTO explicitly overrides. Rejected rules do not come back. Graduated rules do not regress. The evolution log is the audit trail that makes this provable.

Session scorecards

The session-scorecard.sh script generates a quantitative summary:

=== Session Scorecard: 2026-03-30 ===

--- Recent Learnings ---
Total learnings in database: 10
With corrections: 2

--- Verification Sweep ---
Rules checked: 7 | Passed: 4 | Failed: 2 | Skipped: 1

--- Relevant Past Learnings ---
No learnings matching 'cto-executive-system'.

=== End Scorecard ===

Over time, the trend data answers a fundamental question: is the system getting better? If corrections decrease and pass rates increase, the evolution loop is working. If they are flat, the rules are too vague or too disconnected from actual work.

What we deliberately did not build

Engineering is as much about what you leave out as what you put in. Here is what the Meta Alchemist article proposes that we skipped, and why.

JSONL files for corrections and observations

The article creates corrections.jsonl, observations.jsonl, violations.jsonl, and sessions.jsonl. Each is an append-only log of JSON objects that Claude parses at session start.

We already have terraphim-agent learn which provides structured file storage, thesaurus-expanded querying, project/global scoping, and correction chaining. Adding JSONL files would create two sources of truth for the same data. The agent CLI is the single source.

Auto-promotion on second correction

The article promotes automatically when the same correction appears twice. We flag for review. The difference matters:

  • Auto-promotion: fast, no human bottleneck, but accumulates rules without judgement
  • Reviewed promotion: slower, requires CTO time, but every rule is intentional

We chose reviewed promotion because our project spans multiple contexts (CTO executive system, Terraphim AI, client projects). A correction that is right in one context might be wrong in another. The human knows the difference.

SessionStart and Stop hooks

The article configures SessionStart and Stop hooks in Claude Code’s settings.json. These hook types do not exist in Claude Code’s documented hook system. The available types are PreToolUse, PostToolUse, and (in some versions) SubagentStart. The article either assumes a future feature or describes a different version.

We replaced the SessionStart hook with a /boot skill. We replaced the Stop hook with a manual session-scorecard.sh invocation. Both work reliably because they use mechanisms that actually exist.

Path-scoped rules

The article loads different rule files based on which file Claude is editing: security rules for auth code, API design rules for handlers, performance rules everywhere. This is a genuine Claude Code feature (.claude/rules/ with paths: frontmatter).

We skipped it because our project is not a single codebase. The CTO executive system contains knowledge articles, automation scripts, domain models, plans, and publishing workflows. Path-scoped rules make sense for a web application with clear directory boundaries. They are premature for a heterogeneous knowledge system.

Hard capacity cap

The article enforces a maximum of 50 lines in learned-rules.md. If you hit the cap, you must graduate or prune before adding more.

This is a useful forcing function for projects that might accumulate hundreds of rules. We started with 7. When we approach a natural limit, /evolve will recommend pruning. We do not need an artificial constraint to force a behaviour that good engineering practice already demands.

Architecture comparison

Dimension Meta Alchemist terraphim-agent + verify layer
Storage JSONL files parsed by LLM Rust CLI with structured file storage
Capture trigger Custom evolution SKILL.md (auto-triggered) PostToolUse bash hook (fail-open)
Query mechanism LLM reads and interprets JSONL CLI with thesaurus-expanded search
Verification Grep patterns in learned-rules.md Same (we adopted this idea)
Promotion Auto on 2nd correction Manual via /evolve with CTO approval
Audit trail evolution-log.md Same (we adopted this idea)
Session scoring sessions.jsonl (auto-written) session-scorecard.sh (manual)
Cross-tool support Claude Code only Claude Code + OpenCode + any CLI
Safety guard settings.json deny list terraphim-agent guard (pattern matching)
Text replacement Not included terraphim-agent replace (KG-based)

The fundamental difference: Meta Alchemist builds a complete system inside Claude Code’s configuration. We build a thin verification layer on top of an existing CLI. The CLI handles storage, querying, and correction chaining. The verification layer handles enforcement and evolution. Each does what it is good at.

Where this fits in the broader landscape

The idea of self-improving AI coding agents is not new. Several approaches exist:

  • Devin’s knowledge suggestions: captures corrections as project-specific “knowledge” entries that load into future sessions
  • OpenClaw’s metacognitive loops: three-phase review cycle that captures Phase 2 findings as learnings for future Phase 1s
  • Ouroboros pattern: self-modifying agents with constitutional guardrails, event sourcing, and multi-model review chains
  • Compound agency learning architecture: six nested learning loops from failure-to-guardrail up to loop-evolution

Our approach sits between Devin (simple capture) and Ouroboros (full self-modification). We capture automatically, verify mechanically, but promote deliberately. The human stays in the loop for rule changes. The machine handles enforcement.

Getting started

If you already have terraphim-agent configured with the PostToolUse hook (see the foundation post), adding the verification layer takes five steps:

1. Create the directory structure

mkdir -p automation/learning .claude/skills/boot .claude/skills/evolve .claude/memory

2. Seed learned-rules.md

Start with 3 to 5 rules from your existing CLAUDE.md or project conventions. Each rule needs a verify pattern. If you cannot write a grep check for a rule, the rule is too vague.

3. Write verify-sweep.sh

Copy the script from above. Make it executable. Test it:

chmod +x automation/learning/verify-sweep.sh
bash automation/learning/verify-sweep.sh

You should see PASS/FAIL for each rule. If a rule fails, either fix the violation or refine the verify pattern.

4. Create the /boot and /evolve skills

These are SKILL.md files in .claude/skills/boot/ and .claude/skills/evolve/. The boot skill runs the sweep and surfaces learnings. The evolve skill reviews corrections and proposes rule changes. Full skill definitions are in our repository.

5. Add to CLAUDE.md

### Learning Evolution System
- Run /boot at session start to verify learned rules and surface past learnings
- Run /evolve weekly to review corrections and propose rule promotions
- Graduated rules with verify: patterns: .claude/memory/learned-rules.md
- Evolution audit trail: .claude/memory/evolution-log.md

Conclusion

The Meta Alchemist article gave us the idea we were missing: machine-checkable verification patterns on every rule. That single concept transforms a learning journal into an immune system. We credit the article for the insight.

What we brought to the table: a Rust CLI that already handles capture, storage, querying, and correction chaining. The verification layer is 100 lines of bash on top of a structured backend, not 500 lines of JSONL parsing instructions for an LLM.

The combination works. Corrections are captured automatically by the PostToolUse hook. Rules are verified mechanically by the sweep script. Promotions are approved deliberately by a human. The system gets better every week, and we can prove it with session scorecards.

Two principles emerged from building this:

From Meta Alchemist: A rule without a verification check is a wish.

From us: A rule without CTO approval is an assumption.

Only verified, approved guardrails survive.

The terraphim-agent learning system is open source at github.com/terraphim/terraphim-ai. The verification layer described in this post is configuration, not code: shell scripts and markdown files on top of the existing CLI.

This is the third post in a series: Part 1: Configuring terraphim-agent for Claude Code and OpenCode | Part 2: Verification Checklist | Part 3: Self-Evolving Rules (this post)

Java Features

Java is a high-level, object-oriented programming language. This language is very easy to learn and widely used. It is known for its platform independence, reliability, and security. It follows one principle, that is “Write Once, Run Anywhere” principle. It supports various features like portability, robustness, simplicity, multithreading, and high performance, which makes it a popular choice for beginners as well as for developers.

1. Simple Syntax (Java)

Java is designed to be easy to read, write, and understand, especially for beginners.

🔹 Why Java syntax is simple?

  • ✔️ Similar to C/C++ → easy for beginners with basic programming knowledge
  • ✔️ No complicated features like:
    • Pointers ❌
    • Operator overloading ❌
  • ✔️ Clear and structured code style
  • ✔️ Uses English-like keywords (class, public, static, void)
public class Hello {
    public static void main(String[] args) {
        System.out.println("Hello World");
    }
}

🔍 Explanation (Easy):

  • public class Hello → class name
  • main() → starting point of program
  • System.out.println() → print output

2. Object-Oriented (Java)

Java is a pure Object-Oriented Programming (OOP) language (almost everything is based on objects).

🔹 What is Object-Oriented?

👉 Object-Oriented means writing programs using objects and classes instead of just functions.

  • Class → Blueprint (design)
  • Object → Real-world entity created from class

📌 Example:

  • Class = Car 🚗 (design)
  • Object = Your car (real instance)

Java is a pure object-oriented language. It supports core OOP concepts like,

  • Class
  • Objects
  • Inheritance
  • Encapsulation
  • Abstraction
  • Polymorphism

3. Platform Independent (Java)

Java is famous for “Write Once, Run Anywhere (WORA)” ✅

🔹 What does Platform Independent mean?

👉 A Java program written on one system (Windows/Linux/Mac) can run on any other system without changing the code.

🔄 How it works?

Java uses a special process:

1. Write code → .java file
2. Compile → converts to bytecode (.class)
3. Run on JVM → executes on any OS

🔁 Flow:

Java Code → Compiler → Bytecode → JVM → Output

4. Interpreted (Java)

Java is both compiled + interpreted language ✅

🔹 What does “Interpreted” mean?

👉 An interpreted language executes code line by line instead of running fully compiled machine code.

🔄 How Java is Interpreted?

Java works in 2 steps:

1. Compilation

  • java → converted into bytecode (.class) using compiler

2. Interpretation (JVM)

  • JVM reads bytecode line by line
  • Converts it into machine code and runs it

🔁 Flow:

Java Code → Compiler → Bytecode → JVM (Interpreter) → Output

5. Scalable (Java)

👉 Scalable means a program can handle growth (more users, more data, more features) without breaking.

🔹 Simple Real-Life Example

📱 Think about a food delivery app:

  • Initially → 10 users
  • Later → 10,000 users
    👉 If the app is scalable, it will still work smoothly even when users increase.

6. Portable (Java)

👉 Portable means Java programs can run on different systems without changing code or behavior.

🔹 What is Portability?

👉 A program written on one machine can be moved (ported) to another system and still work the same.

🔄 Why Java is Portable?

  • ✔️ Uses standard data types (same size everywhere)
  • ✔️ No system-dependent features (like pointers)
  • ✔️ Bytecode runs on any JVM

7. Secured and Robust (Java)

Java is designed to be both secure 🔐 and robust 💪, making it reliable for real-world applications.

🔐 Security in Java

👉 Java protects systems from harmful code.

🔹 How Java is Secure?

  • ✔️ No pointers → prevents direct memory access
  • ✔️ JVM Security → runs code inside a safe environment (sandbox)
  • ✔️ Bytecode verification → checks code before execution
  • ✔️ Exception handling → prevents system crashes

💪 Robust in Java

👉 Robust means strong and reliable, even when errors occur.

🔹 Why Java is Robust?

– ✔️ Strong memory management
– ✔️ Automatic Garbage Collection
– ✔️ Exception handling system
– ✔️ Type checking (compile + runtime)

8. Memory Management (Java)

👉 Java handles memory automatically, so developers don’t need to manage it manually like in C/C++.

🔹 What is Memory Management?

👉 It is the process of:

  • Allocating memory 🧠
  • Using memory
  • Releasing unused memory

🔄 How Java Manages Memory?

Java uses Heap Memory + Stack Memory + Garbage Collector

9. High Performance (Java)

👉 Java is considered high performance because it runs fast compared to many other high-level languages.

🔹 Why Java is High Performance?

🚀 1. JIT Compiler (Just-In-Time)

👉 Converts bytecode into machine code at runtime

  • Frequently used code → optimized
  • Runs faster after few executions

⚡ 2. Bytecode Optimization

👉 Java compiles code into bytecode, which is:

  • Efficient
  • Optimized for execution

🧵 3. Multithreading Support

👉 Java can run multiple tasks at the same time
👉 Improves overall performance

♻️ 4. Efficient Memory Management

👉 Garbage Collector removes unused objects
👉 Prevents memory issues and improves speed

10. Multithreading (Java)

👉 Multithreading means running multiple tasks at the same time within a single program.

🔹 What is a Thread?

👉 A thread is a small unit of a process
👉 Java allows multiple threads to run concurrently

🔄 Real-Life Example

📱 Mobile phone:

  • Listening to music 🎧
  • Downloading file ⬇️
  • Using WhatsApp 💬

👉 All happening at the same time → Multithreading

11. Rich Standard Library (Java)

👉 Java has a huge collection of built-in classes and packages
👉 So you don’t need to write everything from scratch ✅

🔹 What is Standard Library?

👉 It is a collection of ready-made code provided by Java
👉 You can directly use it in your programs

📦 Example packages:

  • java.lang → basic features
  • java.util → collections (ArrayList, HashMap)
  • java.io → file handling
  • java.net → networking

12. Functional Programming Features (Java) – Simple Explanation

👉 From Java 8, Java supports Functional Programming (FP) concepts
👉 This helps you write short, clean, and modern code ✅

🔹 What is Functional Programming?

👉 Instead of writing long code, you write small functions and pass them around

👉 Focus on:

  • What to do ✔️
  • Not how to do ❌

13. Integration with Other Technologies (Java)

👉 Java can easily connect and work with other technologies like databases, web apps, APIs, and different programming languages.

🔹 What is Integration?

👉 Integration means:
➡️ Java can communicate with other systems
➡️ Share data and work together

14. Support for Mobile and Web Applications (Java)

👉 Java is widely used to build both mobile apps 📱 and web applications 🌐

📱 1. Mobile Applications (Android)

👉 Java is one of the main languages for Android app development

  • Used in Android Studio
  • Builds apps like:
    • WhatsApp 💬
    • Instagram 📸
    • Banking apps 🏦

🌐 2. Web Applications

👉 Java is used to build backend (server-side) of websites

  • Technologies:
    • Servlet
    • JSP
    • Spring Boot

👉 Used in:

  • Login systems 🔐
  • E-commerce sites 🛒
  • Online booking systems 🎟️

15. Documentation and Community Support (Java)

👉 Java has good learning materials and many people to help you ✅

📚 Documentation

👉 Java gives official guides with:

  • Easy explanations
  • Examples
  • Ready reference (API)

👉 You can learn how to use classes like ArrayList, Scanner easily

👨‍💻 Community Support

👉 Many developers use Java, so help is everywhere:

  • Stack Overflow
  • YouTube
  • GitHub
  • Blogs

👉 If you get an error → just search → solution available 😄