
Clean Unit Testing in .NET: Practical xUnit and Moq Tips

When writing unit tests in .NET, the basics are easy to learn. Frameworks like xUnit and Moq make it straightforward to create tests, mock dependencies and verify behavior. The real challenges appear later, when you start testing real production code.

Sooner or later, you run into practical questions that documentation rarely answers clearly:

  • What is the cleanest way to configure IOptions<T> in unit tests?
  • How can you test internal classes without making them public?
  • How do you verify ILogger calls using Moq without verbose boilerplate?
  • How can you test ILogger calls without Moq at all?
  • How do you log output in xUnit tests?
  • How can you keep [Theory] tests type-safe?
  • How can you assert objects created internally using Moq .Callback?

These are not complex architectural problems, just practical issues that appear repeatedly in real projects.

This article shows practical unit testing tips and tricks for .NET developers, helping you write cleaner, more maintainable tests with xUnit and Moq.

How to use IOptions in Unit Tests (Without Mocking)

Avoids unnecessary mocking and keeps your tests simple, type-safe, and easy to configure.

Many developers try to use new Mock<IOptions<T>>(), but that’s unnecessary overhead. The Microsoft.Extensions.Options library provides a built-in helper specifically for this. You can simply use the Create extension method from the Microsoft.Extensions.Options.Options class to easily generate the required options object instead.

private readonly IOptions<DistributedLockOptions> _options;

// ...

_options = Microsoft.Extensions.Options.Options.Create(new DistributedLockOptions
{
    // configure properties
});

Make Internals Visible to Test Projects via .csproj

Enables testing internal logic without exposing implementation details publicly, keeping your code encapsulated.

You shouldn’t make a class public just to test it. You can keep your logic internal and still grant your test project access by adding a simple attribute to your source project’s .csproj file.

    <ItemGroup>
        <AssemblyAttribute Include="System.Runtime.CompilerServices.InternalsVisibleToAttribute">
            <_Parameter1>Your.Test.Project.Name</_Parameter1>
        </AssemblyAttribute>
    </ItemGroup>

Example

File.Core.csproj:

    <ItemGroup>
        <AssemblyAttribute Include="System.Runtime.CompilerServices.InternalsVisibleToAttribute">
            <_Parameter1>File.Core.UnitTests</_Parameter1>
        </AssemblyAttribute>
    </ItemGroup>

Note: Alternatively, you can place [assembly: InternalsVisibleTo("Your.Test.Project")] in an AssemblyInfo.cs file (or any source file). This approach is common in older .NET Framework projects. In SDK-style projects, configuring the attribute in the .csproj file avoids introducing an additional file and keeps assembly configuration centralized.

In this example, File.Core.UnitTests is the destination test project name. See a project example here.

Mock ILogger with Moq: Simplify Log Verification

Simplifies verifying logs in tests, reducing boilerplate and making assertions readable and maintainable.

Mocking ILogger<T> is notoriously difficult because the commonly used methods like LogInformation() or LogError() are extension methods, Moq cannot intercept those directly. You must verify calls against the underlying interface method Log<TState>(), which has a complex generic signature.

Here is a useful example of an extension class that simplifies verifying logger method calls:

using Microsoft.Extensions.Logging;
using Moq;

namespace Extensions
{
    public static class MoqLoggerExtensions
    {
        public static void VerifyLog<T>(this Mock<ILogger<T>> loggerMock, LogLevel logLevel, EventId eventId, string message, Times times)
        {
            loggerMock.Verify(
               x => x.Log(
                   It.Is<LogLevel>(y => y.Equals(logLevel)),
                   It.Is<EventId>(y => y.Equals(eventId)),
                   It.Is<It.IsAnyType>((o, _) => string.Equals(message, o.ToString(), StringComparison.InvariantCultureIgnoreCase)),
                   It.IsAny<Exception>(),
                   It.IsAny<Func<It.IsAnyType, Exception?, string>>()),
               times);
        }

        public static void VerifyLog<T>(this Mock<ILogger<T>> loggerMock, LogLevel logLevel, EventId eventId, Times times)
        {
            loggerMock.Verify(
               x => x.Log(
                   It.Is<LogLevel>(y => y.Equals(logLevel)),
                   It.Is<EventId>(y => y.Equals(eventId)),
                   It.IsAny<It.IsAnyType>(),
                   It.IsAny<Exception>(),
                   It.IsAny<Func<It.IsAnyType, Exception?, string>>()),
               times);
        }
    }
}

Example usage in a project.

Note: Prefer FakeLogger<T> for new projects targeting .NET 8+. Use the Moq approach when you’re already using Moq throughout your test suite or need to target older .NET versions.

Test ILogger Without Moq Using FakeLogger

Removes the need for a mocking framework entirely when asserting log output, using a first-party in-memory logger built for testing.

Since .NET 8, the Microsoft.Extensions.Logging.Testing NuGet package ships a built-in FakeLogger<T> class designed specifically for unit tests. It collects all log records in memory, so you can assert on them directly without setting up any mocks or extension methods.

using Microsoft.Extensions.Logging.Testing;

var logger = new FakeLogger<OrderService>();
var service = new OrderService(logger);

service.ProcessOrder(orderId: 0);

Assert.Equal(1, logger.Collector.Count);
Assert.Equal(LogLevel.Warning, logger.Collector.LatestRecord.Level);
Assert.Contains("invalid order", logger.Collector.LatestRecord.Message, StringComparison.OrdinalIgnoreCase);

FakeLogger<T> exposes a Collector property (FakeLogCollector) that holds all captured records. Each FakeLogRecord gives you direct access to Level, Message, Exception, EventId, and more.

Example usage in a project.

How to Log in xUnit Tests using ITestOutputHelper

Ensures test logs are visible regardless of the test runner, improving debugging and test diagnostics.

In xUnit, Console.WriteLine won’t show up in your Test Explorer or on some CI logs. You must use ITestOutputHelper to capture diagnostic data.

public class CalculatorTests
{
    private readonly ITestOutputHelper _output;

    public CalculatorTests(ITestOutputHelper output)
    {
        _output = output;
    }

    [Fact]
    public void Add_ShouldLogExecution()
    {
        _output.WriteLine("Starting addition test...");
        // Test logic goes here
    }
}

Example usage in a project.

Type-Safe [MemberData] using TheoryData

Preserves type safety in parameterized tests, preventing runtime errors and improving code readability.

Using IEnumerable<object[]> for parameterized tests is error-prone. xUnit provides TheoryData<...>, which provides compile-time safety for your test parameters.

public static TheoryData<int, string, bool> ValidScenarios => new()
{
    { 1, "Active", true },
    { 2, "Pending", false },
    { 3, "Closed", false }
};

[Theory]
[MemberData(nameof(ValidScenarios))]
public void ShouldProcessStatus(int id, string status, bool isValid)
{
    // Type-safe parameters, no object[] casting required!
}

Example usage in a project.

Use .Callback to Assert Internal Objects

Allows you to inspect and assert on objects that are constructed inside the method under test and passed directly to a dependency.

Sometimes a method creates a complex object internally and passes it to a dependency. To verify that “hidden” object, use Moq’s .Callback to capture it.

var mockRepo = new Mock<IUserRepository>();
User capturedUser = null;

mockRepo.Setup(x => x.Save(It.IsAny<User>()))
        .Callback<User>(user => capturedUser = user);

var service = new UserService(mockRepo.Object);
service.Register("[email protected]", "password");

// Now assert the internal state of the captured object
Assert.NotNull(capturedUser);
Assert.Equal("[email protected]", capturedUser.Email);

Note: .Callback is useful for observing internal interactions, but relying on it heavily may signal a design smell. Prefer designs where important results are observable through return values or public behavior rather than mock interception.
Pişirme Stresini Ortadan Kaldıran Yeni Nesil 5 Fırın Teknolojisi!

Mutfakta fırın başında nöbet tutup “Acaba pişti mi?” diye fırın camından gözünü kısarak bakma devri kapanıyor. Yapay zekâ ve gelişmiş görüntü işleme teknolojileri artık akıllı fırınların içine entegre edilmiş durumda. Bu yeni nesil donanımlar, sadece ısı veren birer kutu olmaktan çıkıp yemeğin durumunu analiz eden akıllı asistanlara dönüştü. Bu konuda öncü markalardan biri de Siemens ve iQ700 serisi ürünler ile mutfakta pek çok kolaylık sağlıyor.

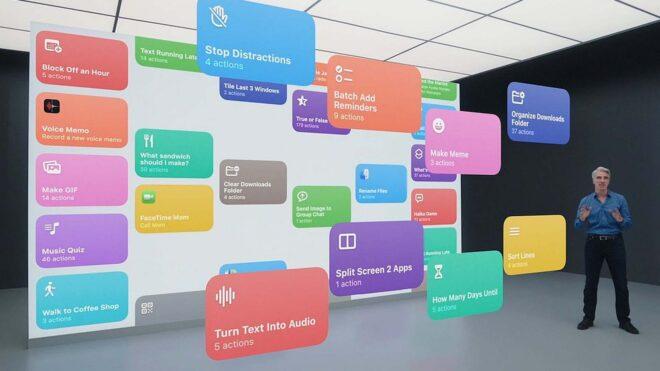
Apple’ın Kestirmeler uygulaması, iOS 27’de yapay zeka kullanarak özel sistemler/otomasyonlar oluşturabilir

iOS 27

iOS 27'deki Kestirmeler Uygulaması, yapay zeka kullanarak özel işlemler oluşturabilirMacRumors tarafından ortaya atılan son iddiaya göre Apple’ın resmi “Kestirmeler” uygulaması, iOS 27 ile birlikte yapay zeka kullanarak özel sistemler oluşturmaya başlayabilir. Apple Intelligence modellerinden güç alacağı söylenen bu yeni altyapı, yazılı ya da sesli olarak verilecek doğal komutlara bakarak kullanıcılar için özel otomasyonlar ve fazlasını oluşturabilir.

Apple’ın Kestirmeler uygulaması, iOS 27’de yapay zeka kullanarak özel sistemler/otomasyonlar oluşturabilir yazısı ilk olarak Teknoloji haberleri – LOG üzerinde yayınlandı.

Codex Fast Mode vs Claude Fast Mode: What’s Actually Different?

TL;DR

Both Codex and Claude support a fast mode, but the way they achieve speed is completely different. Codex has two tracks: either it serves the same GPT-5.4 model about 1.5× faster, or it runs a separate small model called Spark on Cerebras wafer-scale hardware at more than 1,000 tokens per second. Claude keeps the same Opus 4.6 model and speeds it up through infrastructure-level prioritization, with output speed improving by up to 2.5×. The tradeoffs around price, speed, and intelligence retention are subtle, and which option is better depends on your workflow.

What got me curious

Since I use both Codex and Claude Code, I already knew both sides offered a fast mode. But the pricing felt different, the speed felt different, and the user experience felt different. Sean Goedecke’s post, “Two different tricks for fast LLM inference,” made it clear that the two companies were solving the problem in fundamentally different ways, so I started digging deeper.

Codex fast mode: really two different tracks

On the Codex side, there are actually two things that can reasonably be called fast.

The first is GPT-5.4 fast mode. It serves the same GPT-5.4 model about 1.5× faster while consuming 2× the credits. Since the model itself does not change, there is no intelligence drop. In the CLI, it is just a simple /fast on toggle.

Nathan Lambert noted that even when using GPT-5.4 fast mode with xhigh reasoning effort, he had never hit the Codex limit, while Claude could still hit limits sometimes. Whether that comes from better token efficiency or looser limits on OpenAI’s side, it does feel noticeably roomier in practice.

The second is GPT-5.3-Codex-Spark, which is a separate model entirely. This is the truly ultra-fast path, running on Cerebras WSE-3 (Wafer-Scale Engine 3) hardware. It can generate more than 1,000 tokens per second. Right now, it is available as a research preview for ChatGPT Pro subscribers.

Cerebras WSE-3: a different world from GPUs

Cerebras WSE-3 is fundamentally different from a conventional GPU. NVIDIA’s flagship B200 is around 208 billion transistors, while the Cerebras chip packs 4 trillion transistors across roughly 900,000 cores on a single silicon wafer. The core advantage is memory bandwidth: up to 27 petabytes per second on chip. Since memory bandwidth is one of the real bottlenecks in LLM inference, Cerebras is attacking that bottleneck directly at the hardware level.

That said, WSE-3 only has 44GB of on-chip memory, so it is difficult to place a very large model like GPT-5.3-Codex on it wholesale. That is why Spark is a smaller model. In real use, some people say it still carries that familiar “small model smell,” especially when tool calls get messy.

OpenAI and Cerebras have also announced a multi-year partnership worth up to $10B, including plans for a 750MW data center. The longer-term direction seems clear: Spark is likely just the beginning of putting bigger frontier models onto Cerebras hardware.

OpenAI also shared infrastructure-level optimizations around Spark. By introducing persistent WebSocket connections and optimizing the Responses API internals, they say they reduced client-server roundtrip overhead by 80%, token overhead by 30%, and TTFT by 50%. So the speedup is not only about the model itself. It is also about tightening the whole pipeline.

Claude fast mode: same model, different infrastructure

Claude’s approach is much simpler. The Opus 4.6 model stays exactly the same. If you set speed: "fast" in the API, Anthropic prioritizes the request at the infrastructure layer. According to the official docs, output token speed can improve by up to 2.5×. The focus is on output throughput rather than TTFT.

Anthropic has not publicly disclosed the full implementation details, but the likely explanation is something like lower-batch-size inference with more dedicated GPU allocation. Smaller batches are less efficient for GPU utilization, but they improve response speed for individual requests. That inefficiency is then covered by the 6× premium pricing.

In Claude Code, fast mode is toggled with /fast, and it requires version 2.1.36 or later. When enabled, it automatically switches to Opus 4.6 and shows a ↯ icon next to the prompt.

One important detail is that fast mode usage is not included in the normal subscription usage bucket. It is billed as extra usage. Pricing kicks in from the very first token, so cost management matters.

Fast mode and effort level are also completely different axes. If you lower effort, the model simply spends less time reasoning and quality may drop. Fast mode, by contrast, serves the same reasoning process faster at the infrastructure level. You can combine them: fast mode plus lower effort for simpler tasks, fast mode plus higher effort for more complex ones.

The core difference

The most important distinctions look like this:

  • Codex GPT-5.4 fast mode: about 1.5× speed, 2× credits, same model
  • Codex Spark: 15×+ speed, separate ultra-fast smaller model
  • Claude fast mode: up to 2.5× speed, 6× price, same Opus 4.6 model

Sean Goedecke captures the difference well. Anthropic is still serving the actual Opus 4.6 model, while OpenAI’s Spark path uses a separate lower-capability model. In terms of raw speed, Spark is dramatically faster. In terms of quality retention, Claude has the stronger position.

There is also a broader point here: the value of an AI agent is often determined less by raw speed and more by how rarely it makes mistakes. If something is 6× faster but increases mistakes by 20%, that can easily be a net loss, because fixing those mistakes may take much longer than waiting for the model.

So if you compare same-model fast modes only, Claude offers a bigger speed bump than Codex, but it is also much more expensive. If you include Spark, OpenAI has the more extreme speed story, but you have to remember it is not the same model.

What about speculative decoding?

Early in my research, I came across claims that Codex fast mode used speculative decoding. That does not seem accurate. Speculative decoding itself is a real and widely used inference optimization technique, but I could not find official confirmation that Codex fast mode specifically uses it.

The idea behind speculative decoding is elegant. A small draft model predicts upcoming tokens first, and then the larger main model verifies them in a single pass. Google published work on this in 2022 and later discussed using it in products like AI Overviews, where it can deliver 2–3× speedups while preserving the same output distribution.

For Codex Spark, though, the main speed story seems much more tied to the hardware characteristics of Cerebras itself. The model benefits from staying close to on-chip SRAM and avoiding the usual memory bandwidth bottlenecks. It is possible that speculative decoding is also used somewhere internally, but there is no official confirmation.

Closing thoughts

Peter Steinberger is one of the most fascinating examples of where this kind of workflow can go. He reportedly runs four OpenAI subscriptions and one Anthropic subscription, spends around $1,000 per month, runs 3–8 Codex CLI sessions in a 3×3 terminal grid, and can hit 600 commits in a day. That is a completely different scale. By his own estimate, API usage would cost about 10× more, so running multiple subscriptions is actually the more rational option. More recently, he has even joined OpenAI.

What is especially interesting is that Peter used to be a serious Claude Code power user but gradually shifted toward Codex. His reason was surprisingly relatable: Claude Code kept saying things like “absolutely right” and “100% production ready” even when tests were failing, and he found that unbearable. Codex, by contrast, felt more like an introverted engineer quietly doing the work. He also said Codex tends to read far more code before starting, which lets it infer intent well even from short prompts. Eventually he canceled additional Anthropic subscriptions and made Codex his main driver, even though he still uses Claude in a smaller role.

Whether I am on Claude Max or Codex Pro, I usually cannot even consume the full weekly quota. But people like that are running five subscriptions at once. If you listen to AI podcasts, there are quite a few people using even more. A while ago I had to force myself to adapt to a kind of parallel-project brain just to burn through huge amounts of tokens, and it was honestly exhausting. Now I do not really get the headache anymore. Instead, I get stuck wondering what else I could even do with all this capacity. That is how one project leads to another, and another task appears from there.

In the end, running several projects at once becomes a kind of refresh loop. If I look away from one blocked project for a while and work on another, ideas tend to come back. Peter described it as doing one thing while another is “cooking,” then switching again while that one cooks too. My scale is obviously smaller, but I recognize the pattern.

Refs

The Simplest Image to Base64 Converter — 100% Client-Side, Ad-Free & Built for Developers

As a 90s-born developer who’s spent years building frontends and debugging APIs, I know how frustrating it is to find a reliable image-to-Base64 tool. We’ve all been there: you need to embed a small icon to reduce HTTP requests, send an image via an API that only accepts Base64, or add a background image to CSS — and the tools available are either full of ads, require sign-ups, or upload your images to remote servers (a big no-no for sensitive work).
That’s why I built this Image to Base64 converter — it’s designed for real developers, with none of the fluff. No ads, no sign-ups, no data uploads — just fast, secure, and simple functionality that fits right into your workflow.

Key Features (Built for Devs)

  • Flexible Uploads: Upload images via file selection or paste directly with Ctrl+V (perfect for screenshots).

  • 3 Export Formats: Get output as a raw Base64 string, an HTML img tag, or a CSS background — ready to copy-paste into your project.

  • Data URI Toggle: Turn the Data URI prefix on or off, depending on your use case (frontend, API, etc.).

  • Format Support: Works with all common image formats — PNG, JPG, GIF, WebP, and more.

  • 100% Client-Side: All processing happens locally in your browser. Your images never leave your device — safe for sensitive screenshots, internal designs, or confidential assets.

  • One-Click Copy: No manual selection or formatting — just click to copy the result and paste it into your code.

  • Ad-Free & No Login: Open the tool and start using it immediately — no distractions, no hoops to jump through.

Real-World Use Cases

This tool isn’t just a gimmick — it’s built for the workflows you use every day:

  • Frontend Performance: Embed small icons and background images as Base64 to reduce HTTP requests and speed up page loads.

  • API Debugging: Generate Base64 image data to send via APIs that require it — no more manual encoding errors.

  • Email Templates: Inline images as Base64 to avoid broken links and ensure your emails look consistent across clients.

  • Testing & Mocking: Quickly create Base64 mock data for unit tests or demo projects.

  • Cross-Platform Development: Convert local images to Base64 for use in small programs, hybrid apps, or other environments with strict resource rules.

How to Use It (It’s Ridiculously Simple)

  1. Go to the tool:https://daima.life/en/tools/img2base64/

  2. Upload an image (click “Select File”) or paste a screenshot with Ctrl+V.

  3. Toggle the Data URI prefix on or off, depending on your needs.

  4. Choose your export format: Base64, HTML, or CSS.

  5. Click “Copy” and paste the result into your project — that’s it!

Why This Tool Beats the Rest

Most online tools feel like they’re built for non-developers — they’re slow, clunky, and missing the little details that matter to us. This tool is different because it’s built by a developer, for developers: it’s fast, it’s secure, and it focuses on the features you actually need (no useless extras).

I use it every day for my own projects, and I hope it saves you as much time as it saves me. Give it a try, and let me know what you think in the comments — if you have feature requests or find a bug, I’m always happy to improve it!

Tool link (for easy access): https://daima.life/en/tools/img2base64/

P.S. If you find this useful, check out the rest of the daima.life toolbox — it’s full of other free, client-side developer tools (like Base64 decoding, ASCII conversion, and MD5 hashing) that I built to make our lives easier.

3 Layers Between Your AI Agent and Your Funds

Giving an AI agent a wallet is like handing over your car keys to a teenager—you know they’ll get places faster, but you also know they need guardrails. The question isn’t whether AI agents should handle crypto transactions (they already are), but how to let them operate without risking your entire treasury on a hallucination or prompt injection.

Most developers building AI agents face the same uncomfortable choice: either severely limit what the agent can do (defeating the purpose), or give it full wallet access and hope nothing goes wrong. There’s got to be a middle ground.

Why AI Agent Security Matters More Than You Think

The stakes are real. Unlike traditional APIs where a bug might corrupt data or spam users, crypto transactions are irreversible. A confused agent that misinterprets “send 0.1 ETH” as “send 10 ETH” doesn’t just create an awkward support ticket—it creates an actual financial loss.

Even worse, AI agents are particularly vulnerable to prompt injection attacks where malicious inputs trick the agent into performing unintended actions. When those actions involve moving funds, the damage can be immediate and permanent.

The naive approach—generating a private key and letting the agent sign whatever it wants—works until it doesn’t. And when it doesn’t work, you’re explaining to your users (or your boss) why the trading bot just market-sold the entire position at 3 AM.

Three Layers of Defense

WAIaaS implements a 3-layer security model: authentication → policy enforcement → human oversight. Each layer serves as a backstop for the ones before it, ensuring that even if your agent goes rogue, your funds stay safe.

Layer 1: Session-Based Authentication

Instead of giving your agent raw private keys, WAIaaS uses short-lived session tokens. Your agent authenticates once to get a JWT token that expires, can be revoked instantly, and only grants access to specific wallets.

# Create a session for your AI agent (masterAuth)
curl -X POST http://127.0.0.1:3100/v1/sessions 
  -H "Content-Type: application/json" 
  -H "X-Master-Password: my-secret-password" 
  -d '{"walletId": "<wallet-uuid>"}'

The session token includes built-in limits: time-to-live, maximum renewals, and absolute lifetime. When something goes wrong, you kill the session instead of trying to wrestle control back from a misbehaving agent.

# Agent uses session token for all operations
curl http://127.0.0.1:3100/v1/wallet/balance 
  -H "Authorization: Bearer wai_sess_eyJhbGciOiJIUzI1NiJ9..."

This alone prevents the “oops, I leaked my private key in a GitHub repo” scenario, but it’s just the first line of defense.

Layer 2: Policy Engine with Default-Deny

Here’s where WAIaaS gets serious about security. The policy engine uses 21 different policy types with 4 security tiers: INSTANT, NOTIFY, DELAY, and APPROVAL. More importantly, it follows default-deny: your agent literally cannot touch tokens or contracts you haven’t explicitly whitelisted.

# Create a token whitelist (masterAuth)
curl -X POST http://127.0.0.1:3100/v1/policies 
  -H "Content-Type: application/json" 
  -H "X-Master-Password: my-secret-password" 
  -d '{
    "walletId": "<wallet-uuid>",
    "type": "ALLOWED_TOKENS",
    "rules": {
      "tokens": [
        {"address": "EPjFWdd5AufqSSqeM2qN1xzybapC8G4wEGGkZwyTDt1v", "symbol": "USDC", "chain": "solana"}
      ]
    }
  }'

Without this policy, your agent can’t transfer USDC at all—even if it has the session token. Default-deny means you explicitly define what’s allowed rather than hoping to catch what should be blocked.

The spending limit policy adds amount-based tiers:

curl -X POST http://127.0.0.1:3100/v1/policies 
  -H "Content-Type: application/json" 
  -H "X-Master-Password: my-secret-password" 
  -d '{
    "walletId": "<wallet-uuid>",
    "type": "SPENDING_LIMIT",
    "rules": {
      "instant_max_usd": 10,
      "notify_max_usd": 100,
      "delay_max_usd": 1000,
      "delay_seconds": 300,
      "daily_limit_usd": 500
    }
  }'

Now your agent can send up to $10 instantly, $100 with notifications, $1000 after a 5-minute delay (giving you time to cancel), and anything larger requires explicit human approval. The daily limit acts as a circuit breaker.

Layer 3: Human Approval Channels

When your agent hits the APPROVAL tier—or when you need to intervene manually—WAIaaS provides multiple human-in-the-loop channels. WalletConnect integration means you can approve transactions directly from your existing wallet app. Telegram and push notification channels mean you get alerted in real-time when your agent is about to do something expensive.

# Agent submits large transaction → goes to pending queue
curl -X POST http://127.0.0.1:3100/v1/transactions/send 
  -H "Content-Type: application/json" 
  -H "Authorization: Bearer wai_sess_<token>" 
  -d '{
    "type": "TRANSFER",
    "to": "recipient-address",
    "amount": "5.0"
  }'

# You approve via WalletConnect or API call
curl -X POST http://127.0.0.1:3100/v1/transactions/<tx-id>/approve 
  -H "X-Owner-Signature: <ed25519-signature>" 
  -H "X-Owner-Message: <signed-message>"

This isn’t just about large amounts. You can force specific transaction types or recipients into the approval queue. Maybe your trading agent can swap freely but needs approval before interacting with new DeFi protocols.

Default-Deny in Practice

The key insight is that most wallet security failures come from agents doing things they were never supposed to do. Default-deny flips the model: instead of trying to block bad actions, you define the narrow set of allowed actions.

Here’s what default-deny looks like for a trading agent:

# 1. Only allow specific tokens
ALLOWED_TOKENS: [USDC, SOL, ETH]

# 2. Only allow known DEX contracts  
CONTRACT_WHITELIST: [Jupiter, Uniswap_Router, 1inch]

# 3. Spending limits with human oversight
SPENDING_LIMIT: instant=$50, delay=$500, approval=$1000+

# 4. Rate limiting
RATE_LIMIT: 20 transactions/hour

Your agent can now trade efficiently within these boundaries, but it cannot:

  • Touch random tokens (even if they appear in your wallet)
  • Interact with unknown contracts (even if they claim to be DEXs)
  • Make large trades without delay/approval
  • Spam transactions faster than your rate limit

When your agent tries to do something outside these rules, it gets a clear error message instead of silently failing or, worse, succeeding when it shouldn’t have.

{
  "error": {
    "code": "POLICY_DENIED",
    "message": "Transaction denied by ALLOWED_TOKENS policy",
    "domain": "POLICY",
    "retryable": false
  }
}

Practical Implementation

Setting up secure AI agent wallets with WAIaaS takes about 10 minutes:

1. Deploy the daemon:

git clone https://github.com/minhoyoo-iotrust/WAIaaS.git
cd WAIaaS
docker compose up -d

2. Create wallets and policies:

npm install -g @waiaas/cli
waiaas init
waiaas start
waiaas quickset --mode mainnet  # Creates wallets + sessions

3. Configure your AI agent with the SDK:

import { WAIaaSClient } from '@waiaas/sdk';

const client = new WAIaaSClient({
  baseUrl: 'http://127.0.0.1:3100',
  sessionToken: process.env.WAIAAS_SESSION_TOKEN,
});

// Agent can now operate within policy boundaries
const balance = await client.getBalance();
const tx = await client.sendToken({
  to: 'recipient-address',
  amount: '0.1',
});

4. Set up MCP integration for Claude or other AI frameworks:

waiaas mcp setup --all

5. Test the guardrails by having your agent attempt something outside policy bounds—it should fail gracefully with clear error messages.

The daemon exposes 39 REST API endpoints for everything from balance queries to DeFi position management, all protected by the same 3-layer security model. Your agent gets the capabilities it needs without the access it shouldn’t have.

Beyond Basic Security

WAIaaS includes more sophisticated security features for production deployments. The 7-stage transaction pipeline includes gas price conditions (transactions only execute when gas is below your threshold), dry-run simulation (test transactions before committing), and cross-chain bridging with built-in slippage protection.

For teams managing multiple agents, the policy engine supports per-agent customization. Your conservative DCA bot gets different spending limits than your active arbitrage bot, but both operate under the same security framework.

The system also integrates with ERC-4337 Account Abstraction for gasless transactions and ERC-8004 for onchain agent reputation—letting you grant higher limits to agents with proven track records while keeping new agents on tight leashes.

The Real Test: When Things Go Wrong

Security systems are ultimately judged by how they handle failures, not successes. WAIaaS assumes your agent will eventually do something stupid and builds accordingly. Session tokens expire and can be killed instantly. Policies are enforced at the transaction level, not just the application level. Human approval channels provide multiple fallback options.

Most importantly, the default-deny approach means that even a completely compromised agent can only operate within the boundaries you’ve defined. It can’t suddenly start interacting with new contracts, transferring random tokens, or exceeding spending limits just because it received malicious instructions.

This isn’t theoretical—these are the actual guardrails protecting live agents managing real funds on mainnet today. The question isn’t whether your AI agent will eventually encounter edge cases or adversarial inputs. The question is whether you’ll have the right safeguards in place when it does.

Ready to give your AI agent a wallet without giving it the keys to the kingdom? Start with the WAIaaS GitHub repository for the full implementation, or check out the documentation and examples at waiaas.ai. Your future self—and your users—will thank you for building security in from the start.

I automated my CSV cleanup with Python (saved 2 hours every week)

I automated my CSV cleanup with Python (saved 2 hours every week)

Every Monday morning. Two hours cleaning CSV exports.

Same boring work, different data. Fixed headers, removed duplicates, standardized formats. Every week.

The Problem

I export product data from different sources. Amazon scrapers, supplier sheets, manual research. Each CSV formatted completely differently.

Headers inconsistent. “Product Name” vs “product_name” vs “ProductName”. Pick one please.

Duplicates everywhere. Same product ID, different rows. Why.

Prices as strings. “$19.99” not 19.99. Excel hates this.

Empty rows scattered throughout. Date formats all over the place. MM/DD/YYYY, YYYY-MM-DD, timestamps, whatever the system felt like exporting that day.

What I Tried First

Manual cleanup in Excel. Filter, sort, find duplicates, fix one by one.

Worked for 10 rows. Died at 500.

Tried Google Sheets formulas. Got messy fast. Broke when column order changed. Gave up.

The Solution

Built a Python script that does the cleanup automatically:

import pandas as pd
import re
from datetime import datetime

def clean_csv(input_file, output_file):
    # Read CSV
    df = pd.read_csv(input_file)

    # Normalize column names (lowercase, underscores)
    df.columns = [col.lower().replace(' ', '_') for col in df.columns]

    # Remove empty rows
    df = df.dropna(how='all')

    # Remove duplicates (by product_id if exists)
    if 'product_id' in df.columns:
        df = df.drop_duplicates(subset=['product_id'], keep='first')

    # Clean price column (remove $ and convert to float)
    if 'price' in df.columns:
        df['price'] = df['price'].astype(str).str.replace('$', '').str.replace(',', '')
        df['price'] = pd.to_numeric(df['price'], errors='coerce')

    # Standardize dates
    date_columns = [col for col in df.columns if 'date' in col.lower()]
    for col in date_columns:
        df[col] = pd.to_datetime(df[col], errors='coerce')
        df[col] = df[col].dt.strftime('%Y-%m-%d')

    # Save cleaned CSV
    df.to_csv(output_file, index=False)
    print(f"Cleaned {len(df)} rows → {output_file}")

# Usage
clean_csv('raw_products.csv', 'clean_products.csv')

Now I drop CSVs into a folder, run the script, get clean data in 10 seconds.

Script handles column name variations automatically. Finds and removes duplicates based on product ID. Converts prices to numbers. No more Excel errors screaming at me about text formatting.

Standardizes dates to YYYY-MM-DD. Removes empty garbage rows.

Still gotta manually check edge cases. Weird characters in product names. Null prices that should be 0. But like 90% automated now.

The Annoying Part

Script works great for supplier CSVs. Doesn’t handle scraped data as well tho.

When I scrape Amazon or eBay with ParseForge, the data comes cleaner already but sometimes has fields the script doesn’t expect. Column names are different.

Ended up adding a config file to map column names:

# column_mappings.json
{
  "asin": "product_id",
  "item_name": "product_name",
  "current_price": "price"
}

Not perfect. Still breaks on weird supplier exports sometimes. But way better than doing it all manually like an idiot

ReCUBE Benchmark Reveals GPT-5 Scores Only 37.6% on Repository-Level Code Generation

Researchers introduce ReCUBE, a benchmark isolating LLMs’ ability to use repository-wide context for code generation. GPT-5 achieves just a 37.57% strict pass rate, showing the task remains highly challenging.

ReCUBE Benchmark Reveals GPT-5 Scores Only 37.6% on Repository-Level Code Generation

A new benchmark called ReCUBE, introduced in a March 2026 arXiv paper, isolates and measures a critical weakness in today’s large language models (LLMs) for code: their ability to leverage repository-level context. The results are sobering. Even the most advanced models, including GPT-5, struggle significantly, achieving a strict pass rate of just 37.57% in the most direct test. The work also proposes a toolkit, Caller-Centric Exploration (CCE), which boosts agent performance by up to 7.56%, pointing toward a more structured approach to navigating complex codebases.

This research arrives amid a surge of activity on arXiv related to LLMs and Retrieval-Augmented Generation (RAG), with over 50 articles featuring the preprint server this week alone. It directly addresses a gap left by existing benchmarks like SWE-Bench or HumanEval, which test coding capability but do not specifically measure how well a model synthesizes information scattered across an entire project’s files, dependencies, and docs.

What the Researchers Built: A Context-Isolation Test

ReCUBE (Repository-Level Context Utilization Benchmark for code gEneration) is designed with a simple, brutal premise: can an LLM reconstruct a single, completely masked source file given everything else in a real-world software repository? The “everything else” includes all other source files, dependency specifications (like requirements.txt or package.json), and any documentation.

This task strips away the safety nets of single-file generation or issue-specific prompts. To succeed, a model must understand the project’s architecture, trace cross-file dependencies, infer data types and function signatures from usage, and adhere to the project’s coding conventions—all from the provided context. The benchmark uses 150 carefully selected Python repositories from GitHub, chosen for their moderate size and clear dependency structures.

Evaluation is done with “usage-aware” test cases. These aren’t just unit tests for the isolated file; they simulate both internal module logic and external integration, testing how the reconstructed code interacts with the rest of the codebase. This mirrors real-world software maintenance and feature addition tasks.

Key Results: State-of-the-Art Models Struggle

The paper evaluates eight models across four settings: two zero-shot scenarios (with and without repository context) and two agentic scenarios (with a simple ls/cat explorer and one augmented with the new CCE toolkit). The “strict pass rate” is the primary metric, requiring generated code to pass all usage-aware tests.

The headline result is the performance in the Full-Context Setting, where the model receives the entire repository’s text as a single, massive prompt. This tests raw comprehension and integration ability without any exploratory help.

Model Strict Pass Rate (Full-Context)
GPT-5 37.57%
Claude 3.7 Sonnet 31.42%
DeepSeek-Coder-V2.5 28.91%
CodeLlama-70B 18.74%
GPT-4o 16.33%

Even the best model fails nearly two-thirds of the time. Performance drops sharply without the full context; in a zero-shot setting with no repository context, GPT-5’s pass rate plummets to 6.12%, highlighting the essential value of the provided information.

The second major finding is the efficacy of the proposed Caller-Centric Exploration (CCE) toolkit. When integrated into an agentic framework (where the LLM can iteratively explore the repository by listing and reading files), CCE provides a decisive advantage.

Agent Type Avg. Strict Pass Rate (Across 8 Models)
Simple Explorer (ls/cat) 22.18%
Explorer + CCE Toolkit 28.41%

This represents an average improvement of 6.23 percentage points, with gains of up to 7.56% for individual models. CCE-equipped agents consistently outperformed all other baselines, including the full-context setting for most models.

How It Works: Dependency Graphs Over Random Walks

The core innovation of the CCE toolkit is moving agentic exploration from a naive, often random file traversal to a guided, graph-informed search. It consists of tools that build and analyze a static dependency graph of the repository.

  1. Graph Construction: The toolkit first parses the repository to build a call graph, identifying which files import or call functions from other files.
  2. Caller Identification: Given the target masked file, CCE tools can identify its “caller” files—the files that most likely depend on or use the code to be generated. This is based on the intuition that understanding how a module is used is often more critical for reconstruction than understanding its internal dependencies.
  3. Guided Exploration: Instead of letting the agent wander, the framework prioritizes fetching and presenting the content of these high-value caller files early in the exploration loop. This gives the LLM the most relevant integration context first.

This approach is a form of structured retrieval, aligning with the broader industry trend toward sophisticated RAG systems, as noted in our recent coverage of production RAG stacks. It replaces hope-based exploration with a deterministic strategy grounded in software engineering principles.

Why It Matters: A Reality Check for AI Coding Assistants

ReCUBE provides a crucial, missing diagnostic tool. While models excel at generating syntactically correct code snippets or solving contained puzzles, their ability to perform holistic reasoning across a large, interconnected codebase is still fundamentally limited. The 37.6% ceiling for GPT-5 is a quantitative anchor for expectations.

Practically, the success of the CCE toolkit validates a key direction for AI coding agents: they need deep, programmatic integration with software analysis tools (compilers, linters, static analyzers) to be truly effective. The future of these agents may look less like a pure LLM and more like an LLM orchestrating a suite of specialized software understanding tools—a trend already emerging in enterprise RAG systems.

The benchmark and toolkit have been released as open source, providing a new, rigorous target for model developers aiming to improve real-world coding assistance.

gentic.news Analysis

This paper lands in a crowded but relevant field. The recent surge in arXiv publications on LLMs and RAG (24 and 33 articles this week, respectively) underscores the intense focus on overcoming the context limitations of foundational models. ReCUBE directly complements the findings from GitHub’s March 28th study on effective AI coding agents, which analyzed thousands of custom instructions. Where that study looked at the “how” of agent design, ReCUBE provides the “how well” metric for a core, unsolved capability.

The results also contextualize the excitement around agentic frameworks. The significant lift from the CCE toolkit (6.23% on average) proves that naive file exploration is a major bottleneck. This aligns with the broader industry move, noted in our March 24th trend report, where enterprises show a strong preference for structured RAG over fine-tuning for production systems. CCE is essentially a domain-specific RAG for code, using a dependency graph as its retrieval index instead of a vector database.

Furthermore, the poor performance in the full-context setting suggests that simply scaling context windows—a primary arms race among model providers—is insufficient. Throwing 1 million tokens of unstructured repository text at a model does not guarantee comprehension. The structure and guided retrieval provided by CCE were more effective than raw context for most models, a critical lesson for developers building on these APIs. This echoes cautionary tales from RAG system failures at production scale, a topic covered here just days ago.

Frequently Asked Questions

What is the ReCUBE benchmark?

ReCUBE is a benchmark designed to evaluate how well large language models can use information from an entire software repository to generate a single missing source file. It tests a model’s ability to understand project architecture, cross-file dependencies, and coding conventions by having it reconstruct a masked file using all other files and docs as the only context.

Why does GPT-5 only score 37.6% on this task?

The 37.57% strict pass rate for GPT-5 highlights that repository-level code generation is a fundamentally difficult task requiring deep, integrative reasoning. It involves tracing dependencies, inferring types from usage, and maintaining consistency across multiple modules—a form of reasoning that goes beyond next-token prediction and appears to be a current limitation of even state-of-the-art models.

What is the Caller-Centric Exploration (CCE) toolkit?

The CCE toolkit is a set of software analysis tools that can be integrated into AI coding agents. It builds a static dependency graph of a code repository and uses it to guide the agent’s exploration, prioritizing the files that are most likely to “call” or use the code being generated. This structured approach led to performance improvements of up to 7.56% over agents using simple file exploration.

How is this different from benchmarks like SWE-Bench or HumanEval?

While SWE-Bench evaluates an AI’s ability to resolve real GitHub issues (a broader task), and HumanEval tests standalone function generation, ReCUBE specifically isolates the skill of repository-context utilization. It removes other variables to measure precisely how well a model can leverage scattered, project-wide information, which is a key sub-skill for practical coding assistance.

Originally published on gentic.news